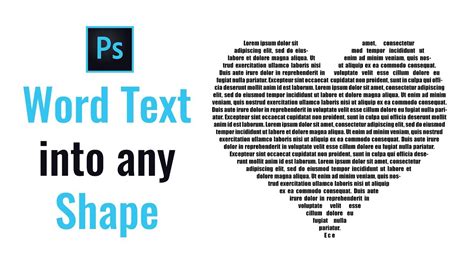
Photoshop offers a powerful and versatile suite of tools for manipulating text, and one of the most visually engaging techniques is placing text inside custom shapes. This method allows for creative artwork where letters themselves become containers for meaningful content, or where text flows dynamically within intricate designs. Whether you're aiming for artistic expression or precise graphic design, understanding how to effectively fill shapes with text in Photoshop is an invaluable skill. This tutorial will guide you through various approaches, from converting type into a shape to drawing custom forms and integrating text seamlessly.
Crafting Your Textual Canvas: Laying the Foundation
Before diving into the specifics of filling shapes, it's crucial to establish your document and prepare your initial text. The dimensions and resolution of your document should be tailored to its intended use, whether for print or digital display. For print, a resolution of 300 pixels/inch is generally recommended to ensure crispness.
Step 1: Introducing Your Primary Text Element
The first step involves adding the text that will either form the shape itself or serve as the content to be placed within another shape.
Adding and Refining Your Initial Text
Begin by selecting the Horizontal Type Tool (T). Choose a font that aligns with your creative vision. For instance, if you're aiming for a bold, impactful shape, a font with thicker strokes, like Joylane from the Blackletter font family, would be an excellent choice. Type your desired text. Adjust its size to fit your immediate needs. Photoshop's Character and Paragraph panels, accessible via the small folder icon in the top toolbar, offer granular control over settings such as kerning (spacing between specific letter pairs) and leading (spacing between lines of text). You might find it beneficial to horizontally scale your text, as demonstrated by scaling to 150% in some examples, to achieve a desired visual weight.
If your chosen font offers additional decorative characters, known as glyphs or swashes, explore guides on accessing them to enhance your design's uniqueness.
Centering Your Text for Precision
Once your text is in place, switch to the Move Tool (V). To ensure precise placement, utilize the "Align Vertical Centers" and "Align Horizontal Centers" options in the top toolbar to center your text within the document. This foundational step is crucial, especially when your text will later be converted into a path.
Transforming Type into Form: Creating Work Paths
A powerful method for creating text-filled shapes involves converting your initial text into a "work path." This path then acts as a boundary or a container for your subsequent text.
Step 2: Generating a Work Path from Text
With your text layer selected, choose the Horizontal Type Tool (T) again. Right-click directly on top of your text and select "Create Work Path." Photoshop will generate a vector path that precisely outlines the shape of your characters.
To better visualize this path, you can temporarily hide the original text layer by clicking the small eye icon next to its thumbnail in the Layers panel. Navigate to the Paths panel (Window > Paths). Here, you'll find a new layer named "Work Path," which visually represents the shape you've just created.
Step 3: Managing Negative Space within Shapes
For letters that contain internal hollow spaces, such as 'D,' 'B,' 'O,' or 'P,' a special consideration is needed to ensure that text placed inside these shapes correctly acknowledges these openings as negative space.
The Compound Path Challenge and Its Solution
Without a specific adjustment, text placed within a path that has internal holes will flow around the entire outer boundary, ignoring the inner negative spaces. This occurs because Photoshop typically uses compound paths to define such areas.
To resolve this, select the Rectangle Tool (U). In the top options bar, ensure "Path" is selected under "Tool Mode." Then, in the "Path Operations" menu, choose "Subtract Front Shape." Now, draw a small rectangular shape that partially overlaps the hollow space of a letter and extends to its outer edge. This action effectively "cuts" the hollow space out of the path, creating a continuous outline and allowing text to flow correctly within and around the letter's form. This trick is essential for achieving a natural text flow within letters that have internal voids.
Integrating Content: Filling Shapes with Text
With your shape established, either through converted text or by drawing a custom form, you can now proceed to fill it with your desired content.
Step 4: Populating Your Shape with Text
Select the Horizontal Type Tool (T) once more. Choose the font you intend to use for the text that will fill your shape. Adjust its size and other settings as needed. Carefully hover your cursor over the path of your shape. The cursor icon will change, typically showing an I-beam with a dotted circle around it, indicating that you are about to type inside the path. Click to activate the text insertion point.
Photoshop may automatically insert placeholder text. You can then further refine the text's appearance using the Character and Paragraph panels. Type your chosen quote or content. You can then tweak the text to perfectly fit within the shape, adjusting font size, leading, and justification.
Expanding to Other Shapes
This technique isn't limited to text-based shapes. You can apply it to any shape created with Photoshop's shape tools (Rectangle, Ellipse, Polygon, Custom Shape Tool) or even custom shapes drawn with the Pen Tool (P). The key is to ensure that "Path" is selected in the "Tool Mode" of the respective tool, allowing the shape to be treated as a vector path for text input.
Step 5: Refining Paths for Seamless Flow
If you employed the "Subtract Front Shape" trick in Step 3 to manage negative space, you'll need to tidy up the path afterward.
Closing Gaps and Removing Unwanted Elements
First, in the Paths panel, select the "Work Path" layer. Then, switch to the Path Selection Tool (A). Click on the rectangular path you created to subtract the hollow space and press the "Delete" key to remove it.
Next, to ensure the text flows seamlessly, you might need to close any small gaps created at the edges of where the rectangle was removed. Select the text layer in the Paths panel. Use the Direct Selection Tool (A) to precisely move the anchor points of the path, effectively joining the edges and creating a continuous boundary for your text.
Step 6: Iterative Filling for Multiple Shapes
If your design involves multiple shapes to be filled with text, simply repeat Steps 3 through 5 for each individual shape. This iterative process allows for consistent application of the text-filling technique across all elements of your artwork.
Step 7: Final Touches: Adjusting Text Attributes
Once all your shapes are filled with text, you can further refine the overall aesthetic.
Fine-Tuning Size, Color, and More
Select the text within each shape using the Type Tool (T). You can then adjust its size, color, leading, and other attributes to achieve your desired visual impact. For example, varying text sizes within a shape can create depth and emphasis. Experimenting with different text colors, perhaps sampled directly from an accompanying image using the Eyedropper tool, can also tie your design elements together cohesively.
Alternative Approaches: Direct Shape Creation
Beyond converting type to paths, Photoshop offers more direct methods for incorporating text within shapes, particularly useful when you're not starting with text as the shape itself.
Utilizing Shape Tools for Text Containers
Photoshop's built-in shape tools (Rectangle, Ellipse, Polygon, Custom Shape) provide a straightforward way to create defined areas for text.
Drawing and Filling Custom Shapes
When using these tools, select "Shape" from the "Tool Mode" options in the top toolbar. This ensures that the shape is created on its own vector layer, offering flexibility for adjustments. You can choose to fill the shape with a color or leave it as an outline.
Once the shape is drawn, select the Horizontal Type Tool (T). Hover over the interior of your shape until the cursor indicates you can type within it. Click and begin typing. The text will automatically conform to the boundaries of the shape, reflowing as you type or adjust the text box size.
How to Wrap Text Around Any Shape in Photoshop | Wrap Text Around shape | Quick and Easy
The Precision of the Pen Tool
For highly customized and complex shapes, the Pen Tool (P) is indispensable. It allows for the creation of intricate vector outlines that can then serve as text containers.
Crafting Unique Boundaries with the Pen Tool
Select the Pen Tool (P) and set the "Tool Mode" to "Shape." Draw your desired custom shape by clicking to create anchor points. Ensure the shape is closed by clicking back on the initial anchor point. Similar to using the built-in shape tools, the text will flow within the boundaries defined by the path you create.
When using the Pen Tool, remember that you can refine the shape's points and curves using the Direct Selection Tool (A) even after the initial drawing. This level of control is invaluable for achieving precise visual results.
Advanced Text Manipulation Within Shapes
Photoshop provides further options for enhancing text within shapes, allowing for dynamic and visually rich compositions.
Modifying Text After Placement
Yes, you can indeed change the shape of your text after it has been typed into a container. This involves converting the text layer into a shape layer. Once this conversion is complete, the "Direct Selection" tool becomes your primary instrument for manipulating the anchor points of the newly formed shape, effectively altering the contour of your text.
Adding Multiple Lines and Adjusting Flow
Photoshop readily accommodates multiple lines of text within a shape. Simply press 'Enter' to create a new line, and the text will continue to flow within the defined boundaries. The "Justify All" option in the Paragraph palette is particularly useful for ensuring that text evenly fills the shape from edge to edge, creating a dense and impactful appearance.
Repositioning and Alignment
The "Move Tool" (V) allows for easy repositioning of the entire block of text within the shape. For finer control over text alignment within the shape, the Paragraph panel offers options like left, center, right, and justified alignment, which can significantly impact the overall composition.
Applying Gradients and Layer Styles
To add further visual flair, gradients can be applied to text within shapes. This is achieved by creating a gradient using the Gradient tool and then applying it to the text layer through the "Blending Options" within the "Layer Style" dialog box. This can introduce depth and visual interest, transforming simple text into a more dynamic element.
Troubleshooting Common Issues
While Photoshop's text-within-shape functionality is robust, users may encounter specific challenges.
Text Not Flowing Correctly
A common issue is text not behaving as expected, particularly with complex shapes or those with internal voids. If text isn't flowing within the intended boundaries, revisit Step 3 ("Adjust the Work Path to Include Negative Space if Needed") or ensure that your shape is correctly defined as a path and that the text tool is activated within that path. For shapes created with the Pen Tool, ensure the path is closed.
Distorting Text
To avoid distorting the text's appearance while resizing, always hold down the Shift key when dragging handles in the Free Transform box (Ctrl+T or Cmd+T). This constrains the proportions, preventing unwanted stretching or squashing.
Editing Text Inside a Shape
Editing text within a shape is straightforward. Simply select the Type Tool (T) and click inside the shape where the text resides. This reactivates the text layer, allowing you to modify font, size, color, and content as needed.
By mastering these techniques, you can unlock a new level of creativity in Photoshop, transforming plain text into dynamic and integrated design elements within custom shapes. Whether you're creating artistic typography or designing complex layouts, the ability to precisely control text flow within defined boundaries is a powerful asset.