Photopea, a powerful browser-based photo editor, offers a robust suite of tools for making precise selections. Learning these selection tools is a must if you are a photo editor. They may need a lot of practice, but once you are good at them, it will be worth it. Selection tools are great in terms of scalability and functionality. This guide delves into the intricacies of creating, refining, and crucially, deselecting in Photopea, ensuring you can isolate and manipulate specific areas of your images with confidence.
Understanding the Fundamentals of Selection
At its core, a selection in Photopea defines a specific area of your image that you want to edit, move, copy, or otherwise manipulate independently of the rest of the image. Without accurate selections, complex editing tasks become frustratingly difficult, if not impossible. Photopea provides a variety of tools, each suited for different selection scenarios, from simple shapes to intricate details.
The Magic Wand Tool: Selecting by Color
The Magic Wand tool is designed to select pixels with similar colors. When you click on a pixel, the Magic Wand selects that pixel and any adjacent pixels that fall within a specified tolerance range of the clicked pixel's color. This makes it particularly useful for selecting solid blocks of color or areas with relatively uniform hues.

The key setting for the Magic Wand is "Tolerance." A lower tolerance means the tool will only select colors very similar to the one you clicked. A higher tolerance will include a broader range of colors. For instance, if you click on a bright blue sky, a low tolerance might select only the exact shade of blue, while a high tolerance might select lighter blues, darker blues, and even some hints of cyan or purple if they are close enough in value.
The Magic Wand tool also offers a "Contiguous" mode option. When Contiguous is enabled, the tool selects only those pixels with similar colors that are connected to the initially clicked pixel. If Contiguous is disabled, the tool will select all pixels in the image that fall within the tolerance range, regardless of whether they are connected or not. This distinction is crucial for efficient selection.
A peculiar behavior has been noted with the Magic Wand tool concerning its Tolerance setting. If you click on the Tolerance box, type in a new number, and then hit Enter or click outside the canvas, any subsequent movement of the cursor across the image without clicking can trigger an effect akin to hitting Ctrl-Z for every single pixel moved. This essentially acts like genuine history backsteps, but simultaneously, the Tolerance number reduces itself until it reaches 0. This bug appears to be specific to the Magic Wand tool, as switching to other tools deactivates this unusual behavior.
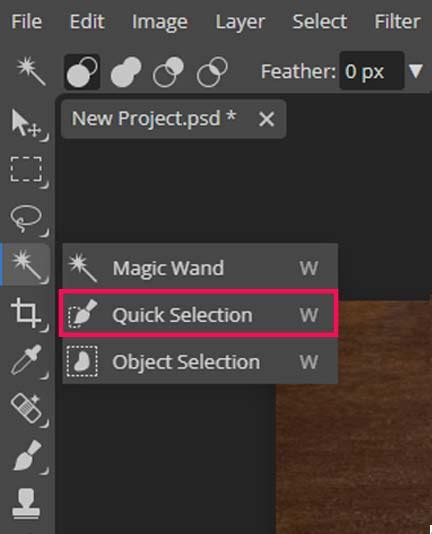
Quick Selection Tool: Brushing Your Way to a Selection
The Quick Selection tool acts more like a brush, allowing you to "paint" your selection onto the image. This tool is excellent for quickly selecting areas with distinct edges and varying textures. You can customize the brush tip diameter in the top menu, enabling you to control the size of the area you're selecting with each stroke.
Beneath the surface of the Quick Selection tool lies a hidden layer. When you draw with the "Subtract" mode active, your strokes are effectively drawn using black. The remaining area is then intelligently deduced from this by analyzing the actual image content. This intelligent deduction is what makes the Quick Selection tool so effective at identifying and isolating subjects. You can add to your selection by brushing over areas you want to include, or subtract from it by using the subtract mode.
Object Selection Tool: Automated Subject Isolation
The Object Selection tool is a more advanced, often AI-assisted, tool used to automatically select a subject within a photo. You can either draw a rough rectangle or lasso around the object you wish to select, and Photopea will attempt to identify and select the precise boundaries of that object. This tool is a significant time-saver for common tasks like isolating a person or an item from its background.
Freehand Selection Tools: Drawing Your Own Paths
Photopea also offers freehand selection tools that allow you to make selections by drawing a path around the object or area you want to select. These include the Lasso tool (freehand drawing), Polygonal Lasso tool (straight-line segments), and Magnetic Lasso tool (snaps to edges). For more complex shapes, you can click to make points and then click and drag to create curves, offering a high degree of control over the selection's shape.
Refining and Modifying Selections
Once an initial selection is made, it's rare that it will be perfect. Photopea provides several ways to refine and modify your selections.
Adding and Subtracting from Selections
You can add to or remove from an existing selection using the selection tools themselves. When a selection tool is active, the settings bar usually provides options to "Add to Selection," "Subtract from Selection," or "Intersect with Selection." You can also hold down the Shift key to add to a selection and the Alt (or Option on Mac) key to subtract from a selection while using most selection tools.
Transform Selection
Once a selection has been created, right-clicking within the selection and choosing "Transform Selection" will bring up transform controls. This allows you to scale, rotate, skew, or distort the selection itself, independent of the image content within the selection. This is useful for repositioning a selection or making its shape fit a new context.
Using the Selection Menu
The "Select" menu in Photopea is a central hub for modifying selections. Here you can find options to:
- Deselect: This is the most fundamental operation, removing any active selection.
- Reselect: This brings back the last selection you made.
- Modify: This submenu offers powerful tools to expand, contract, feather, or smooth your selection.
- Expand/Contract: Grows or shrinks the selection by a specified number of pixels.
- Feather: Softens the edges of the selection by creating a gradual transition between the selected and unselected areas. This is crucial for blending cut-out objects seamlessly.
- Smooth: Attempts to smooth out jagged or pixelated edges of a selection.
- Color Range: This tool allows you to select a specific color from the image. When you start the tool by pressing
Select > Color Range, a window shows a preview of the selection. The brightness corresponds to the degree of selection of each pixel. This is an advanced way to select based on color hues across the entire image, not just contiguous areas.
The Art of Deselecting
Sometimes, you may make a selection that you no longer need, or the selection is simply not accurate. Knowing how to deselect is as important as knowing how to select.
The Primary Method: Deselect Command
The most straightforward way to deselect is by going to the Select menu and choosing Deselect. Alternatively, you can use the keyboard shortcut Ctrl + D (or Cmd + D on Mac). This will remove all active marching ants from your canvas, returning your entire image to an editable state.
Deselecting with Tools
In some cases, you can deselect by simply switching to a different tool that doesn't inherently create selections, or by clicking outside of any active selection area with certain tools. However, the Ctrl + D shortcut is the most reliable and universally applicable method.
Magic Cut: Effortless Background Removal
Magic Cut is a specialized tool within Photopea designed for removing backgrounds, essentially "cutting out" an object from its photo. This is a common task, and Magic Cut aims to simplify it.

When Magic Cut is opened, an initial "guess" of the object and background is pre-marked with red (background) and green (foreground). You can work with this initial guess or clear it with a "Clear" button and start from scratch.
The process often involves starting with a "Border" of 0. This setting helps determine an initial result quickly, and Magic Cut works faster with Border = 0. By default, with Border = 0, Magic Cut marks every pixel as either Foreground or Background, creating hard edges between these areas.
You can then gradually increase the "Border" value until you find the right balance for your image. This border setting helps refine the edges, especially for areas like hair or fur. If you are dealing with an object that contains hair or fur, the edges may appear too harsh and unnatural with a Border of 0. Increasing the border allows for a softer transition, making the cut-out more realistic.
When the result on the right side of the Magic Cut workspace looks well, press "OK" at the top to confirm the selection and have the background removed.
Exporting Your Cut-Out Image
Once your object is successfully cut out, you can export it. Go to File > Export As > PNG. Confirm with "Save." Saving as a PNG is crucial because PNG supports transparency, meaning the areas around your cut-out object will be transparent, not a solid color. Instead of saving as a PNG, you could also add a new background layer and then save the combined image as a JPG.
How to Remove Complex Backgrounds From Images in Photopea
Advanced Selection Scenarios and Tips
Making complex selections with basic tools can sometimes take a lot of time. Photopea's advanced features are designed to mitigate this.
Dealing with Hair and Fur
As mentioned with Magic Cut, hair and fur present a common challenge. For these areas, using a combination of the Magic Wand tool with a soft brush for refining edges, or specialized selection brushes if available, can be effective. Feathering the selection edges slightly after initial selection can also help blend these fine details more naturally.
Improving Selection Accuracy
If your selection isn't accurate, don't hesitate to use the "Modify" options under the "Select" menu. Expanding or contracting the selection by a few pixels can often fix minor inaccuracies. Feathering is also a lifesaver for creating softer, more believable edges, especially when dealing with soft subjects or blending elements.
Practice Makes Perfect
Learning the selection tools in Photopea, like any powerful software, requires practice. Experiment with each tool on different types of images. Understand their strengths and weaknesses. The ability to create precise selections is a fundamental skill that will significantly enhance your photo editing capabilities.
By mastering these selection and deselection techniques, you'll unlock a new level of control and efficiency in Photopea, transforming your image editing workflow.