This tutorial delves into the process of creating custom stickers using Clip Studio Paint, focusing on the crucial step of generating outlines for cutting machines. We will explore the artistic workflow from initial sketch to final print-and-cut preparation, highlighting essential tools and techniques within Clip Studio Paint and offering insights for users of various skill levels.
From Concept to Sketch: Laying the Foundation
The journey of creating a custom sticker begins with a clear vision. For this tutorial, we'll follow the process of developing a character concept: a blonde girl adorned in a pink dress and a bow. The initial stage involves defining the pose of the character, followed by the creation of a rough sketch. This foundational step is crucial for establishing the overall composition and flow of the artwork.
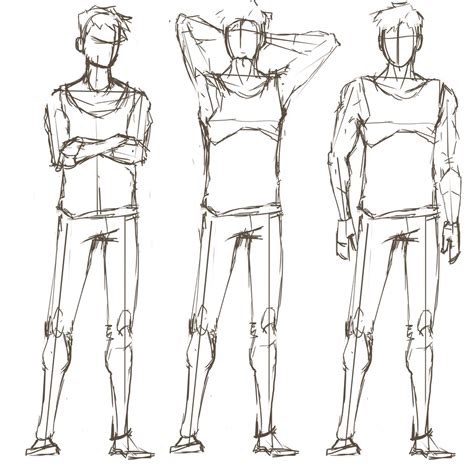
The canvas size often used for this type of work is 3000x4000 pixels, providing ample resolution for detailed artwork and subsequent printing.
Sketching and Line Art: The "SU-Cream Pencil" Method
A common and effective approach for both sketching and line art is to utilize a textured brush. The "SU-Cream Pencil" brush is a popular choice because it mimics the feel of drawing on paper, offering a realistic texture. However, the choice of brush ultimately depends on the desired aesthetic of the artwork. Exploring the standard brushes provided within Clip Studio Paint or venturing into the vast resources available on Clip Studio Assets can reveal a multitude of options suited to different artistic preferences.
When transitioning from sketch to line art, the aim is to refine the lines, making them more precise and softer where needed. A valuable technique for enhancing line art is to thicken and darken the lines at their intersections. This simple adjustment can significantly improve the visual clarity and depth of the drawing.
Easier Line Art Using Vector Layers in Clip Studio Paint
Clip Studio Paint offers a suite of powerful tools that aid in refining the sketch and line art. The Transform tool, accessible via Edit > Transform, is indispensable for making adjustments. This tool allows for resizing elements, repositioning parts of the drawing that may not be satisfactory, and ensuring overall balance and proportion. To utilize this tool effectively, one typically employs the Lasso tool to select specific areas for modification.
Building Your Color Palette
Establishing a cohesive color palette is a vital step in bringing your artwork to life. Clip Studio Paint provides a dedicated Color Set tab, which can be accessed through Window > Color Set. This feature allows you to organize and manage your chosen colors efficiently.
Filling Base Colors: Layer Management and Precision Tools
With the line art established, the next phase involves filling in the base colors for all the elements of the illustration. This includes the character's skin, hair, dress, and any other components of the design. To maintain organization and prevent confusion, it is highly recommended to create separate layers and folders for each element, assigning clear and descriptive names. This structured approach facilitates easier editing and color adjustments later in the process.
For the base coloring stage, two tools found on Clip Studio Assets are particularly beneficial: the "Close and fill tool without gaps" and the "Tool to remove without gaps." These tools function similarly to the Lasso tool (or the Magnetic Lasso tool in CSP versions 4.0 and above). They enable precise filling of outlined areas with color or the removal of existing color within a selected region, ensuring clean and accurate base color application.

Shading and Detailing: Adding Depth and Dimension
Once the base colors are in place, the focus shifts to adding depth and dimension through shading and detailing. It is crucial to avoid working directly on the base color layer. Instead, create a new layer positioned directly above the base color layer and utilize the "Clip to layer below" function. This ensures that any painting or adjustments made on the new layer will only affect the underlying base color, maintaining the integrity of your initial color fills.
For applying highlights, the Airbrush tool is often employed. It allows for soft and gradual application of color, creating a naturalistic blend. When shading, using colors that are two shades darker than the base color for elements like hair can add significant depth. The Blend tool is then used to seamlessly merge these darker tones with the base color, achieving smooth transitions.
Enhancing Colors and Values with Correction Layers
Sometimes, the initial colors or values in a drawing may not be entirely satisfactory. Clip Studio Paint offers powerful tools to rectify these situations. The "New Correction Layer" option, found under Layer > New Correction Layer, provides access to various adjustment tools. The "Tone Curve" is particularly useful for fine-tuning the overall brightness, contrast, and color balance of your artwork. By manipulating the curve, you can precisely control how tones are rendered, achieving the desired mood and visual impact.
Adding Texture with Perlin Noise
A subtle yet effective way to add visual interest and a unique texture to your artwork is by using Perlin noise. This can be achieved by selecting Filter > Render > Perlin noise. Applying this effect on a new layer provides flexibility in adjusting its properties. The Perlin noise pop-up window allows for modification of settings such as scale, amplitude, and other parameters. A common practice is to set the Perlin noise scale to 1.0, which results in a minimal grain and noise effect. Subsequently, reducing the opacity of the Perlin noise layer to a low percentage and setting its Blending mode to "Lighten" can create a subtle, organic texture that enhances the overall aesthetic without being overpowering.
Preparing for Sticker Cutting: The Outline Effect
To prepare your digital artwork for cutting with a machine, creating a precise outline is essential. Clip Studio Paint's "Border effect" is the go-to tool for this purpose. This effect automatically generates a clean border around your artwork, which the cutting machine will use as a guide. After applying the border effect, it's important to turn off the visibility of the "Paper" layer. This ensures that only the artwork and its generated outline are exported for the cutting machine software.
CMYK Color Mode for Printing
For physical printing, the CMYK color mode is the standard. While Clip Studio Paint primarily operates in RGB, there are ways to prepare your file for CMYK printing. A common workflow involves saving your work as a .PSD file from Clip Studio Paint and then opening it in Adobe Photoshop, which offers robust CMYK conversion tools.
However, if you prefer to stay within Clip Studio Paint, it is still possible to create CMYK data and prepare your files for print. This typically involves specific export settings or the use of specialized plugins or actions designed for print preparation. Understanding the nuances of CMYK conversion is crucial for achieving accurate color reproduction in your printed stickers.
The Print-and-Cut Process with a Cutting Machine
The LOKLiK iCraft cutting machine is a versatile tool capable of cutting various materials, including paper, vinyl, faux leather, fabric, and cardboard, making it ideal for custom sticker production.
To begin the printing process, open the cutting machine's dedicated software, such as LOKLiK IdeaStudio. Once the cutting machine is connected to the software, upload your design file, ensuring it's in PNG format and includes the sticker border. The next step involves adjusting the sticker size. For instance, character stickers might be set to a height of 3 inches.
A critical consideration during this stage is ensuring that all design elements are contained within the area demarcated by the four black brackets in the software's interface. The cutting machine will only operate within this designated zone.
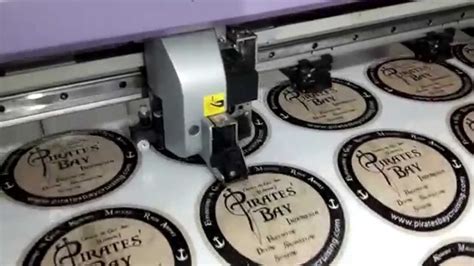
In the software's Selection Mode, choose the "Print-Then-Cut" option. You can experiment with different types of paper for printing. However, be aware that the appearance of colors can vary depending on the paper's properties. Glossy paper, with its smooth and reflective coating, tends to make colors appear more vibrant and saturated. For sticker printing, Lzerking Vinyl Sticker Paper is a popular choice.
After printing, carefully place the printed sheet onto the cutting mat and load it into the cutting machine. Back in the software, navigate to the "Cutting Parameters" section and check the "Colors" box. Select the appropriate cutting material from the available options; for this example, "Matte Printable Vinyl Sticker Paper" would be chosen. You can also fine-tune the cutting force to ensure a clean and precise cut.
Embracing Your Unique Style
For those new to custom sticker creation, a key piece of advice is to start with simple designs and focus on characters you genuinely enjoy creating. Avoid striving for absolute perfection, as your individual artistic style is what will truly make your stickers distinctive and appealing. The satisfaction of holding a finished sticker that you've brought to life from concept to creation is a rewarding experience. This tutorial has outlined a comprehensive process, and the hope is that it proves to be a valuable guide in your sticker-making endeavors.