The allure of the golden hour, that magical period shortly after sunrise and before sunset, has long captivated photographers. It's a time when the sun's low angle casts a warm, soft, and ethereal glow, transforming ordinary scenes into breathtaking visuals. While many photographers strive to capture this fleeting light naturally, the desire to recreate its magic extends beyond the confines of the actual golden hour. Fortunately, with powerful editing tools like Picsart, achieving a convincing golden hour effect, and even enhancing it with realistic shadow play, is now within everyone's reach, regardless of when or where the original photo was taken. This tutorial delves into the techniques for not just mimicking the golden hour glow but also for adding sophisticated, faux blind shadows to elevate your images from amateur to influencer-worthy.
Understanding the Golden Hour Phenomenon
Before diving into editing techniques, it's crucial to understand what makes the golden hour so special. The golden hour is not a precisely defined term; its duration and intensity vary based on latitude, season, and atmospheric conditions. Generally, it occurs for about an hour after sunrise and an hour before sunset. During this time, the sun sits low on the horizon, causing its rays to travel through a greater portion of the Earth's atmosphere. This extended journey means sunlight encounters more atmospheric particles, such as dust and water droplets. These particles scatter shorter, bluer wavelengths of light, allowing the longer, warmer wavelengths - reds, oranges, and yellows - to dominate, resulting in that signature soft, golden light.
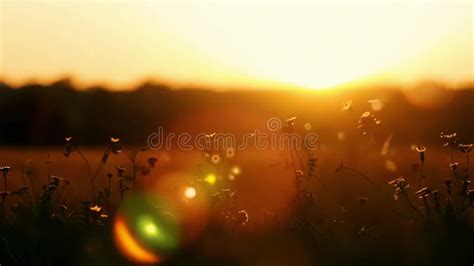
The visual impact of this light is profound. It softens facial features in portraits, adding a flattering warmth and reducing harsh shadows. In landscapes, it imbues scenes with a sense of depth, drama, and tranquility. The subtle diffusion of light creates a gentle, dreamlike quality, making everything it touches appear more inviting and aesthetically pleasing. This is why golden hour photography is particularly ubiquitous in landscape and nature photography, where the light can accentuate textures and create a mystical aura.
The Versatility of Golden Hour Photography
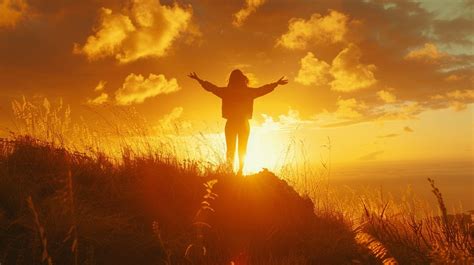
While landscapes are a common canvas for golden hour magic, its application is far more diverse. Golden hour portraits, for instance, are incredibly trendy. They have the power to cast the subject in an optimistic, vibrant, and warm light. Images of people dancing in fields of rye during this time evoke a sense of carefree joy, reminiscent of summer solstice celebrations. Alternatively, portraits featuring long shadows can convey a sense of introspection, resilience, and an open spirit, portraying the subject as an archetypal traveler, at peace with themselves and the world.
Beyond portraits, the golden hour lends itself beautifully to travel and street photography. Imagine the challenge of finding the perfect spot in a new city, waiting for that precise moment when the golden light "sparkles and dances in a glorious jubilee," as Emily Bronte might have put it. Such photos often capture dynamic scenes as the golden hour coincides with the bustling times of market openings or people returning home from work, infusing the images with life and movement. Macro and close-up photography also benefit immensely, with the soft light highlighting intricate details and textures in a way that harsher light cannot.
Capturing the Golden Hour: Preparation and Tips
To truly succeed in golden hour photography, some preparation is essential.
- Location Scouting: For urban landscapes or travel photography, choose a spot with a compelling composition that will be enhanced by the golden light.
- Subject Positioning: In portraits, consider the sun's placement. Positioning it to the right or left of the subject can create dramatic side lighting. For a dreamy, luminous effect, place the sun directly behind the subject, allowing the light to silhouette them or create a halo effect.
- Camera Settings: While modern smartphones are remarkably capable, understanding camera settings can be beneficial. For portraits, a low aperture can help achieve a shallow depth of field, blurring the background and making the subject pop.
- Vision and Intent: Before you even pick up your camera, visualize what you want to capture. Are you aiming for the carefree spirit of a portrait subject, the rugged maturity of a traveler, or simply the awe-inspiring beauty of a sunset? Do you want to include lingering shadows of passersby, or is an unadulterated natural scene your goal?
- Embrace Silhouettes: The golden hour is the perfect time to experiment with silhouettes. The strong backlight allows you to capture the shapes of objects and people against the vibrant sky.
- Observe the Light: Pay close attention to how the light shifts. It changes rapidly, so be ready to adjust your position and settings accordingly.
- Avoid Over-Editing: While editing is crucial, especially when faking the effect, resist the urge to overdo it. The goal is to enhance, not to create something artificial that detracts from the photo's natural beauty.
Faking the Golden Hour Glow with Picsart: Stickers and Filters
Picsart, a comprehensive photo and video editing platform and creative community, offers a powerful suite of tools that enable creators of all levels to achieve stunning results. With billions of downloads and over 150 million monthly active users, Picsart has become a go-to for enhancing photos and videos. It boasts a vast collection of free-to-use content, including photos, stickers, backgrounds, and templates, making it an accessible and inspiring platform.
Picsart allows you to infuse the golden hour effect into almost any picture, regardless of when or where it was taken. This means you can transform a bright midday shot or a studio portrait into a scene bathed in warm, late-afternoon light.
Method 1: Using Picsart Stickers for a Golden Glow
One of the most straightforward ways to add a golden hour glow is by using Picsart's extensive sticker library.
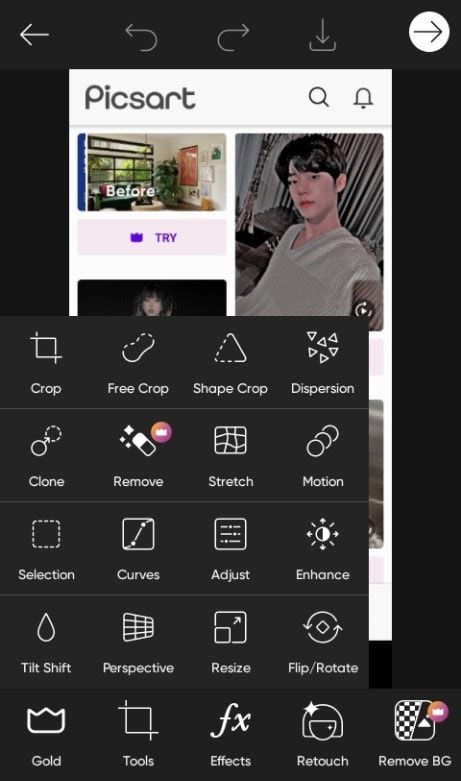
- Open Your Photo: Start by opening the photo you wish to edit in the Picsart app or on the web.
- Access Stickers: Navigate to the "Stickers" tool.
- Search for "Golden Hour": Use keywords like "golden hour," "sun flare," or "light leak" to find relevant stickers. You'll find a variety of options, from subtle light overlays to more pronounced sun flares.
- Apply and Adjust: Select a sticker that complements your image. Once applied, you can adjust its size, position, and opacity. Experiment with different stickers and placements until you achieve a natural-looking glow.
- Refine with Adjustments: After placing the sticker, you can further refine the effect. Use the "Adjust" tool to fine-tune brightness, contrast, saturation, and color balance. You might want to slightly increase brightness and warmth to enhance the golden hour feel. The beauty of using stickers is that you can often return to editing and reposition them or change their blend mode for further customization.
Method 2: Employing Picsart Filters for a Warm Hue
Stickers are fantastic, but Picsart also offers a wide array of filters that can simulate the golden hour effect.
- Open Your Image: Load your chosen photo into Picsart.
- Explore Filters: Go to the "Effects" or "Filters" section.
- Select Warm-Toned Filters: Look for filters with names like "Golden," "Warm," "Sunset," "Amber," or "Sepia." Many filters are designed to mimic specific lighting conditions.
- Apply and Adjust Intensity: Apply a filter and then use the slider to adjust its intensity. This allows you to control how strongly the filter affects your image. You can often layer multiple filters or combine them with FX effects for a more complex and nuanced look.
- Combine with Adjustments: After applying a filter, use the "Adjust" tool to fine-tune the colors, brightness, and contrast. This step is crucial for making the filtered effect look integrated with the original image.
How to edit fake golden hour in PicsArt | Golden hour | PicsArt tutorial | Aesthetic filter
Advanced Technique: Adding Realistic Faux Blind Shadows
Taking your golden hour photos to the next level involves more than just adding a warm glow; it's about creating a believable environment. One of the most effective ways to do this is by adding realistic faux blind shadows. This technique, when done correctly, can transform an ordinary photo into something that looks professionally lit and adds a sophisticated aesthetic. Picsart provides several methods to achieve this:
Method 1: Using Shadow Stickers
Picsart offers a growing library of stickers, including those designed to mimic light and shadow patterns.
- Find Shadow Stickers: Search the sticker library for terms like "blind shadows," "window shadows," "light streaks," or "shadow overlays."
- Apply and Position: Select a shadow sticker that fits the desired direction and style of light. Place it onto your image.
- Blend and Adjust: This is where the magic happens. Use the "Blend" tool to change the blending mode of the sticker. "Multiply" or "Overlay" are often good starting points for shadows, as they allow the underlying image to show through while darkening the areas where the shadow falls.
- Opacity and Transform: Adjust the opacity of the sticker to make the shadows appear more subtle or pronounced. You can also use the "Adjust" tool to fine-tune the color and brightness of the shadow itself, making it appear more natural. The "Transform" tool allows you to rotate, flip, and scale the shadow to match the perspective of your scene. Ensure the shadows align with the direction of your primary light source (even if that light source is also faked).
Method 2: Adding a Shadow Image and Blending
If you can't find the perfect shadow sticker, you can import an image of blind shadows yourself and then blend it into your photo.
- Find or Create a Shadow Image: Search online for free-to-use images of window blind shadows or create your own by photographing blinds with a light source behind them. Ensure the background of the shadow image is transparent (a PNG file is ideal).
- Add Image in Picsart: Use the "Add Photo" tool in Picsart to import your shadow image.
- Position and Blend: Place the shadow image over your main photo. Use the "Blend" tool, experimenting with modes like "Multiply," "Screen," or "Overlay," to integrate the shadow. "Multiply" is often best for dark shadows.
- Refine Opacity and Transform: Adjust the opacity to control the shadow's intensity. Use the transform tools to match the perspective and scale of the shadow to your photograph. You might need to use the eraser tool to remove parts of the shadow that fall outside the intended area.
Method 3: Utilizing Picsart's New Shadow Masks
Picsart continually innovates, and their "Shadow Masks" offer a more dynamic and often more realistic way to add shadows. These masks are specifically designed to simulate light passing through objects.
- Locate Shadow Masks: Depending on the app's current interface, you'll find these under "Effects," "Masks," or a dedicated "Shadow" category.
- Select and Apply: Choose a shadow mask that resembles the pattern you want - for instance, Venetian blinds, window panes, or leafy shadows. Apply it to your image.
- Adjust Parameters: Shadow masks often come with adjustable parameters. You can typically control the direction, intensity, and even the color of the shadow. Some masks allow for more granular control, letting you adjust individual shadow lines or their blurriness.
- Integrate with Golden Hour Effect: Combine the shadow mask with the golden hour glow you've already applied. Ensure the shadows fall in a direction consistent with the simulated light source.

Making Your Edits Believable: Consistency is Key
Regardless of the method you choose for adding shadows, maintaining consistency is paramount for a believable result.
- Light Source Direction: All shadows should emanate from the same apparent light source. If your golden hour glow suggests the sun is coming from the left, your blind shadows should also fall from the left.
- Shadow Softness: Real-world shadows have varying degrees of softness. Shadows cast by objects closer to the surface are sharper, while those cast by more distant objects are softer. Adjust the blur or opacity of your added shadows to mimic this.
- Color of Shadows: While shadows are areas of reduced light, they aren't pure black. They often pick up ambient color from their surroundings. For a golden hour effect, shadows might have a slightly warm or even purplish tint, depending on the environment. Use the color adjustment tools to subtly tint your shadows.
- Perspective: Ensure the perspective of your added shadows matches the perspective of your photograph. If your photo is taken from a low angle, your shadows should reflect that.
Picsart: A Creator's Ecosystem
Picsart is more than just an editing app; it's a complete creative ecosystem. With a billion downloads and over 150 million monthly active creators, it stands as the world's largest creative platform. Its extensive collection of free-to-use content, powerful tools, and a vibrant community provide endless inspiration. Picsart has a proven track record of successful collaborations with major artists and brands, including BLACKPINK, Taylor Swift, the Jonas Brothers, Lizzo, Ariana Grande, Jennifer Lopez, One Direction, Sanrio: Hello Kitty, Warner Bros. Entertainment, iHeartMedia, and Condé Nast, underscoring its influence and reach in the creative space.
Whether you're a casual user looking to enhance your social media posts or a professional seeking advanced editing capabilities, Picsart offers thousands of quick and easy tools, trendy filters, fun stickers, and brilliant backgrounds to meet your needs. The platform's AI-powered tools empower creators of all skill levels to design, edit, draw, and share content seamlessly.
Conclusion: Unleash Your Creative Potential
Mastering the golden hour effect in Picsart, especially when combined with realistic shadow manipulation, opens up a world of creative possibilities. You're no longer limited by the time of day or the weather. With the techniques outlined above - using stickers, filters, and advanced shadow-adding methods like masks and image blending - you can imbue any photograph with the warm, inviting glow of the golden hour and add sophisticated depth with faux shadows. Picsart's user-friendly interface and extensive features make these powerful editing techniques accessible to everyone. So, download the app or start editing on the web today, experiment with these tools, and watch your photos transform from ordinary to extraordinary. The ability to add super realistic faux blind shadows is just one example of how you can use the fundamental editing steps in Picsart to add any aesthetic shadow of your choice to your pictures, taking your creativity to new heights.
Have you ever tried to fake the golden hour effect on a photo? Did you use Picsart? The platform’s continuous updates and commitment to providing innovative tools ensure that the journey of creative exploration with Picsart is always exciting and rewarding.