Whether you're a beginner or an experienced artist, this tutorial will equip you with the skills to master the art of how to draw a line in Photoshop. It allows you to create clean and precise outlines, define shapes, add details, and enhance the overall composition of your artwork. Understanding the various methods for line creation in Photoshop is fundamental for any digital artist looking to refine their workflow and achieve professional-grade results. From the simplest straight lines to intricate curves and custom patterns, Photoshop offers a versatile toolkit to bring your vision to life. This guide will delve into the intricacies of each tool and technique, ensuring you can select the most appropriate method for any given task.
The Direct Approach: Utilizing the Line Tool
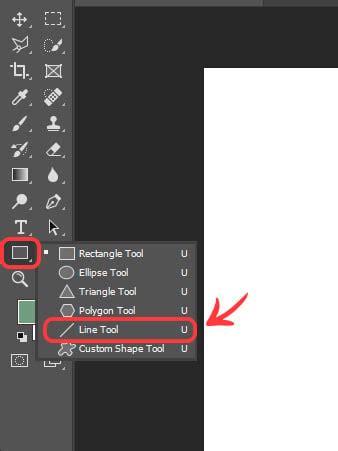
The easiest way to draw a straight line in Photoshop is by using the dedicated Line Tool, designed specifically for this purpose. This tool provides a straightforward method for creating sharp, unblemished straight lines. When using the Line Tool, remember to set it to "Pixels" in the mode settings at the top of the screen. This ensures that the line is rendered as a vector shape, which can be scaled without loss of quality, or as a pixel-based line depending on your chosen mode. For vector-based lines, you can later adjust the stroke weight, color, and style directly within the Properties panel. For pixel-based lines, the line is permanently rendered at the chosen dimensions.
Precision with the Brush Tool and the Shift Key
You can also utilize the Brush Tool for drawing straight lines, offering a more organic feel while still maintaining precision. This method is particularly useful when you want to integrate lines seamlessly with other brushwork or achieve a specific texture. To draw a straight line with the Brush Tool, simply click on the starting point of the line. Then, crucially, hold down the Shift key. While holding Shift, move your cursor to the desired endpoint of the line and click again. Photoshop will automatically draw a perfectly straight line between the two points. This technique is invaluable for creating grids, guides, or any instance where absolute straightness is required.
Furthermore, you can use the Brush Tool in Photoshop to create visually appealing straight-line patterns. By combining the Shift key technique with specific brush settings, such as spacing and shape dynamics, you can generate repeating patterns of lines, creating textures or decorative elements with ease. Experimenting with different brush tips and opacity settings can lead to a wide array of unique line-based patterns.
Crafting Curves with the Curvature Pen Tool
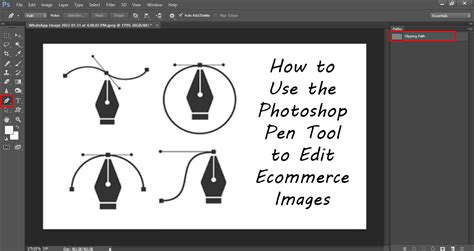
For creating smooth, editable curves, the "Curvature Pen Tool" is an indispensable asset. This tool is tucked away under the "Pen Tool" menu on the left side of Photoshop. To draw curves, you simply click and drag to create anchor points and control handles. The beauty of the Curvature Pen Tool lies in its intuitive nature; it automatically generates smooth curves between your points. The best part is that the lines created with the Pen Tool remain fully editable. You can easily click and drag any point to modify its shape, adjust the curvature of the line, or reposition it entirely without degrading the quality of the artwork.
To finish drawing with the Pen Tool, press the "Ctrl" key (or "Cmd" on Mac) and click. This deselects the path, finalizing your current shape. Once you have created your path, you can then stroke it with a brush, fill it with color, or convert it into a selection.
Customizing Dashed and Dotted Lines
Photoshop offers built-in options for creating dashed and dotted lines, adding another layer of versatility to your line work. Click on the Stroke Options above the Pen tool (or within the Stroke panel when working with shapes or paths). You will see two preset dashed line options readily available. These presets offer a quick way to add stylistic flair to your lines.
If you want to create your own custom preset for dashed lines, click on "More Options." This opens a dialog box where you can precisely define the length of dashes, the gaps between them, and even the offset. This level of customization allows you to create unique patterns for borders, technical drawings, or artistic effects. You can save these custom presets for future use, streamlining your workflow when similar line styles are needed repeatedly.
Enhancing Workflow Efficiency with Specialized Hardware
Is there a solution that can simultaneously enhance your workflow efficiency and provide precise control in creative software? For artists who frequently work with intricate line art or require rapid adjustments, specialized hardware can be a game-changer. TourBox, for example, offers a customizable interface that puts essential tools and functions right at your fingertips. By assigning frequently used tools, such as the Line Tool, Pen Tool, Brush Tool, and zoom functions, to dedicated buttons and dials, you can significantly reduce the time spent navigating menus and searching for commands. This allows for a more fluid and intuitive creative process, enabling you to focus on the artistic execution rather than the technical operation of the software.
The Tourbox Controller for Photoshop & Lightroom: Is it Actually Useful?
Line Art for Colored Pencil Drawings: A Digital Approach
Lots of people ask me how I create the line art for my colored pencil drawings, so I thought I’d give you a quick guide to show you how it’s done. While traditionally colored pencil drawings are created entirely on paper, many artists now leverage digital tools to enhance or even create their line art. This often involves scanning a traditional drawing and then refining or redrawing the lines digitally in Photoshop. Alternatively, artists can create the entire line art digitally from the outset.
When preparing to draw the line art for a colored pencil piece, a common technique involves changing the color you’re going to be drawing into a bright, highly visible color. This makes it easier to see your lines clearly against the background and helps in the subsequent stages of coloring. Often, a vibrant red or blue is used for this purpose.
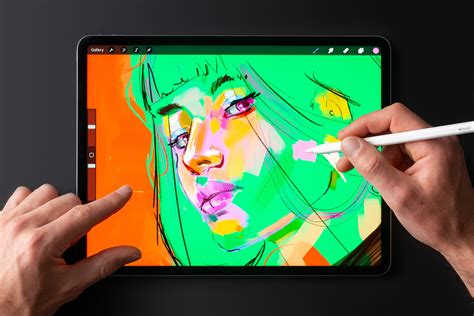
Integrating iPad and Photoshop for Drawing
For artists who prefer a more tactile drawing experience, integrating an iPad with Photoshop can offer the best of both worlds. Next, I connect to my iPad by going into System Preferences, choosing Sidecar, and selecting my device under “Connect to:”. Sidecar allows your iPad to function as a second display for your Mac, and more importantly, it enables you to use your Apple Pencil to draw directly into Photoshop on your computer. This setup provides the pressure sensitivity and natural feel of drawing with a stylus on a tablet, combined with the vast capabilities of Photoshop.
When using this setup, the process often involves sketching out the main forms of the artwork on the iPad. You simply draw around the image and add in a few of the really key details, remembering not to get carried away and add in every strand of fur. The goal is to capture the essential structure and defining characteristics of the subject without overworking the details at this initial stage. This approach ensures that the foundational line work is clean and well-defined, providing a solid base for subsequent coloring and shading.
The ability to draw precise lines, whether straight or curved, is a foundational skill in digital art. Photoshop provides a comprehensive suite of tools to achieve this, from the straightforward Line Tool to the versatile Pen Tool and the adaptable Brush Tool. By understanding and mastering these techniques, artists can elevate the clarity, precision, and overall impact of their digital creations. The integration of specialized hardware and the use of devices like the iPad further expand the possibilities, offering more intuitive and efficient ways to produce professional-quality line art.