Photoshop overlays are powerful tools that can transform ordinary photos into stunning works of art, opening up endless creative possibilities with elements like smoke, rain, fire, and much more. Decades ago, when Photoshop didn’t exist, photographers strived to achieve similar effects through laborious manual processes. Today, you can apply an overlay in a matter of minutes, dramatically improving your photos and turning them into captivating visual narratives. If you're looking for guidance on how to enhance your photos with Photoshop overlays, this comprehensive guide will explore everything you need to know to supercharge your images.
Understanding Photoshop Overlays
At its core, an overlay is an image that is added to your photo as an extra layer. These are typically JPEGs or PNGs that, when applied correctly, blend seamlessly into the base image without requiring extensive masking. Photoshop overlays are available all over the internet, with many resources offering free options. For instance, one store provides 120 free light overlays that can add texture and unique visual effects to your work, offering a great starting point for exploration.
The primary purpose of using overlay assets is to elevate a good image into a great one. They are instrumental in adding elements that weren't present during the photo shoot or are too difficult to capture in-camera. This can include anything from atmospheric effects like fog and snow to dramatic lighting or textural enhancements. While many free Photoshop overlays exist, it's important to note that the quality and types of these assets are crucial when building a library for portraiture or composite retouching work in Adobe Photoshop. Even seemingly simple additions to a portrait can be considered a composite when using overlays.
The Art of Applying Overlays in Photoshop
Applying an overlay in Photoshop is remarkably straightforward. The most common method involves a simple drag-and-drop action.
Step 1: Prepare Your Workspace
Begin by opening your desired image in Photoshop. It's advisable to make any necessary initial adjustments or edits to your base image before applying overlays. This ensures a clean foundation for your creative additions.
Step 2: Importing Your Overlay
Save the overlay file to an easily accessible location on your computer. Then, locate a photo that you feel would benefit from a Photoshop Overlay effect. Once you have your base image open, you can bring in the overlay file by dragging its thumbnail directly onto your base file in Photoshop. By using this drag-and-drop method, the imported image will appear as a Smart Object in a separate layer. The Smart Object functionality is highly beneficial as it allows for non-destructive editing, meaning you can apply filters and make edits later without permanently altering the original overlay pixels.
Step 3: Resizing and Positioning
After the overlay is imported, it might need to be resized to adequately cover your image. Use the transform tools (Ctrl/Cmd + T) to scale and position the overlay layer as needed. Once you are satisfied with its placement and size, commit the changes by hitting Enter or clicking the checkmark icon in the top toolbar.
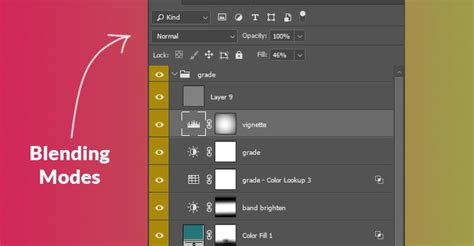
Step 4: Mastering Blend Modes and Opacity
This is where the magic truly happens. Once your overlay is positioned, you'll likely need to adjust its Blending Mode in the Layers panel and potentially its Opacity. The optimal blend mode and opacity will depend heavily on your base image and the specific type of overlay you've chosen.
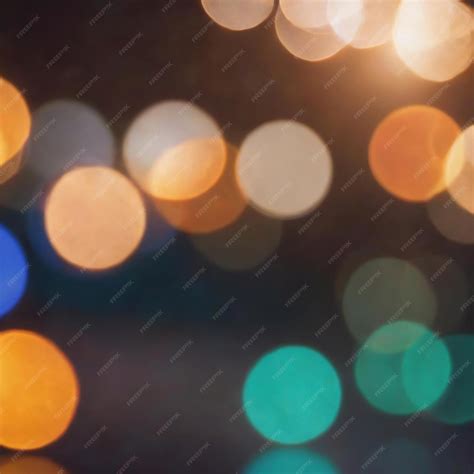
- Transparent Background Overlays: If your overlay is a PNG file with a transparent background (like many light leaks or bokeh effects), you may not need to change the blending mode at all, as the transparent areas will simply allow the base image to show through. You can then adjust the opacity to control the intensity of the effect.
- Dark Background Overlays: For overlays with a dark background (often seen with smoke, fog, or texture overlays), you'll want to use blend modes that make the dark areas transparent while retaining the effect. Modes like Screen, Lighten, or Overlay are excellent choices. For instance, using the Screen blend mode will make the black background transparent, allowing the white or colored elements of the overlay to interact with your base image.
- Soft Light and Overlay: These modes are particularly useful for blending colors and adding subtle texture without being too harsh. They can create a more integrated and natural look.
- Experimentation is Key: Each blending mode affects the pixels differently, so don't be afraid to experiment. Try Add, Linear Dodge (Add), Soft Light, Overlay, and others to see which yields the most compelling result for your specific image.
Step 5: Refining with Layer Masks and Adjustments
While blend modes are powerful, sometimes hard edges or unwanted areas of an overlay can disrupt the seamless integration. This is where layer masks become invaluable.
- Creating a Layer Mask: With the overlay layer selected, click the "Add layer mask" icon at the bottom of the Layers panel. This adds a white mask thumbnail next to your layer.
- Using a Black Brush: Select the Brush Tool, set its color to black, and adjust its size and hardness. Painting with black on the layer mask will conceal parts of the overlay, effectively erasing them from view. This is perfect for removing harsh lines or blending the overlay more naturally into specific areas of your photo. Conversely, painting with white will reveal the overlay.
- Color Adjustments: It's common to want to match the color of the overlay to your image. You can achieve this by adding an adjustment layer. Select your overlay layer, then go to Layer > New Adjustment Layer > Hue/Saturation. You can then check the "Colorize" option and adjust the Hue slider to match the dominant colors of your base image. You can also adjust the Saturation and Lightness sliders to further fine-tune the overlay's appearance. For example, if you have a lens flare overlay with a yellow tone and your image has a yellow tint, you can use Hue/Saturation to enhance this compatibility.
Master Photoshop Blending Modes in Just 7 Minutes!
Step 6: Fine-Tuning and Saving
Take your time to refine the finer details. Adjust the overlay's brightness, contrast, or color if needed. Don't be afraid to explore different combinations. You can even stack multiple overlays on a single image to build complex and unique effects. For instance, a realistic rain effect is often achieved by layering different types of rain overlays: build depth first with small rain, then add medium rain, and finish with a soft, blurred foreground layer. Similarly, the most realistic snow effects are built in layers, not with a single strong overlay.
Once you are completely satisfied with your masterpiece, save your edited image in your preferred format (e.g., JPEG for sharing, TIFF or PSD for further editing). Now it's time to share your creation with the world!
Specific Overlay Techniques
Let's delve into some popular types of overlays and how to best utilize them:
Light Ray Overlays
Light Ray overlays are among the easiest ways to add depth, direction, and a cinematic glow to your edits. They can simulate sunlight breaking through clouds, stage lighting, or create ethereal beams. When applying, consider their direction and how they interact with the existing light in your photograph.
Dust & Film Grain Overlays
Dust and film grain overlays are used to add texture, depth, and an organic, film-like feel. When applied correctly, they make digital images feel more natural and less "perfect," adding a subtle atmosphere. Dust, in particular, can add a tangible sense of environment.
Fog / Smoke Overlays
Fog and smoke overlays are perfect for adding depth, mood, and separation between a subject and the background. The key to achieving a realistic fog effect is subtlety and proper placement-not necessarily high opacity or strength. Overusing fog can make an image look muddy.
Snow Overlays
Snow overlays are ideal for creating atmosphere, depth, and a seasonal mood. As mentioned, the most realistic snow effects are built in layers, mimicking the varied sizes and densities of falling snow.
Realistic Rain Overlays
Creating realistic rain is rarely achieved with a single overlay. It's a layered process. Start by building depth with smaller rain elements, then introduce medium-sized rain, and finally, consider adding a soft, blurred foreground layer to enhance the sense of depth and motion.
Fire Overlays
Fire overlays can add drama and intensity. When using fire, pay close attention to the light it emits and how it would realistically illuminate the surrounding scene. Blend modes like "Screen" or "Add" can help create the fiery glow.

Advanced Techniques and Tips
Stacking Multiple Overlays
Yes, you can absolutely stack multiple overlays on a single image. This is where true creative potential lies. You can combine a light leak with a subtle texture, or fog with a hint of dust, to build complex and nuanced effects. Remember to manage your layers and use layer masks to keep things organized and refined.
Saving Overlay Settings as Actions
If you find yourself repeatedly using the same combination of overlays, blend modes, and adjustments, you can save these settings as an Action in Photoshop. This will allow you to apply your custom effect with a single click, significantly speeding up your workflow. To do this, open the Actions panel (Window > Actions), create a new action, record your steps (applying and adjusting overlays), and then stop recording.
Avoiding Pixelation
Pixelation usually occurs when using low-resolution overlays or when scaling them up too much. Always try to use high-resolution overlays whenever possible. If you must scale up, do so judiciously and consider using Photoshop's Smart Objects, which help mitigate some quality loss.
Organizing Your Overlay Library
As your collection of overlays grows, organization becomes paramount. Tools like Adobe Bridge are excellent for previewing your library of overlays. The ability to rate your overlays and tag image assets is a great feature that helps you quickly find your favorite assets for various scenarios.
Understanding Blend If Sliders
Beyond standard blend modes, Photoshop's "Blend If" sliders offer another layer of control. By double-clicking an overlay layer, you can access the "Layer Style" window and find the "Blend If" options. Dragging the black point (left handle) in the "This Layer" slider to the right, for example, will start removing the darkest parts of the overlay, revealing your composite behind it. You can use "Blend If" in conjunction with blend modes for even more sophisticated results.
The Evolution of Image Enhancement
The desire to enhance images with effects like smoke, rain, or fire is not new. Photographers have always sought ways to add these elements to their work. While historical methods were time-consuming and often involved physical manipulation of prints or film, digital tools like Photoshop overlays offer an accessible and efficient pathway to achieving professional-looking results. What once took hours or days can now be accomplished in minutes, democratizing creative image manipulation for a broader audience.
Beyond Simple Application
While drag-and-drop and blend modes are the foundation, don't be afraid to explore further. Consider creating your own overlays from scratch or combining existing ones in unique ways. The possibilities are truly endless, limited only by your imagination.
By understanding the fundamental principles of Photoshop overlays, mastering blend modes and layer masks, and embracing experimentation, you can unlock a new level of creativity in your photography and graphic design work.