Achieving the illusion of text seamlessly weaving behind a subject in Photoshop is a popular and impactful technique used across various visual media, from striking magazine covers to dynamic movie posters. This effect, while appearing sophisticated, is remarkably accessible and can be mastered with a foundational understanding of Photoshop's selection and masking tools. This tutorial delves into the non-destructive methods to recreate this compelling text-behind-person effect, empowering both beginners and experienced users to elevate their image editing skills.
The Foundation: Setting Up Your Image and Text
The journey begins with selecting a suitable image. For this guide, we'll utilize an image that offers a clear subject against a relatively uncluttered background, facilitating easier selections. A free watermarked version of a sample image can be sourced from Adobe Stock, providing a practical starting point for practice.
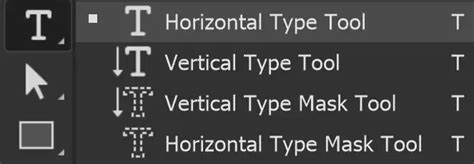
The first crucial step involves introducing text to your composition. Select the Horizontal Type Tool from the Photoshop Toolbar. While the specific font choice is not critical to the technique itself, using a font like Gotham Light, as demonstrated, can offer a clean and readable result. Type any desired text over your chosen photograph.
Once your text is in place, it's essential to position it appropriately. Initially, the text will appear in front of the subject. To refine its placement and size, enter Free Transform mode by pressing Ctrl + T (or Command + T on a Mac). After adjusting the text's dimensions and position, select the Move Tool by pressing V on the keyboard to finalize these transformations.
Isolating the Subject: The Power of Selections
The core of this effect lies in accurately isolating the person from the background. Photoshop offers a suite of powerful selection tools, and the method chosen can depend on the complexity of the image and your Photoshop version.
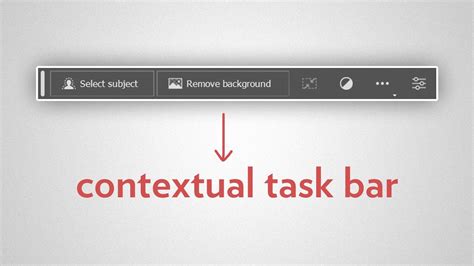
For many modern images, especially those with well-defined subjects, the "Select Subject" feature, powered by Adobe Sensei, offers an excellent starting point. This automated tool intelligently identifies and selects the primary subject within your image. However, it's crucial to understand that "Select Subject" rarely produces a perfect selection on its own. It's a powerful assistant, but manual refinement is almost always necessary.
If you are using an older version of Photoshop, such as CS6 or earlier, the equivalent option will be found under "Refine Edge." While the interface may differ slightly, the underlying tools and settings for refining selections remain consistent.
Regardless of the tool used, the initial selection is a stepping stone, not the final destination. Don't become overly fixated on achieving absolute perfection at this stage. The goal is to get a reasonably accurate mask that can be further refined.
Refining the Edges: Achieving Natural Transitions
Jagged or overly sharp edges can immediately betray the artificiality of the effect. To counteract this, Photoshop provides robust tools for refining selections.
For images featuring intricate details like hair, a more nuanced approach to edge refinement is required. Consider utilizing the "Smooth" slider within the selection refinement options. This slider helps to soften any harsh, aliased edges, creating a more natural and organic transition between the subject and the background. The ideal adjustment for the Smooth slider, along with other refinement settings, will vary depending on the specific characteristics of your photograph. Areas with fine hair will necessitate a broader refinement area than areas with straight edges, such as shoulders or clothing.
When working with hair, for instance, you might need to increase the refinement radius to capture individual strands. Conversely, for solid, straight edges, a more conservative approach is usually best. The "Select and Mask" workspace in Photoshop CC offers a comprehensive suite of tools for this purpose, including options for adjusting the radius, smoothing, feathering, and contrast.
Remember, the objective is not to create an impossibly perfect, razor-sharp edge, but rather a selection that looks natural when placed behind the text. Again, avoid spending an excessive amount of time on minute details at this stage; focus on the overall accuracy of the selection.
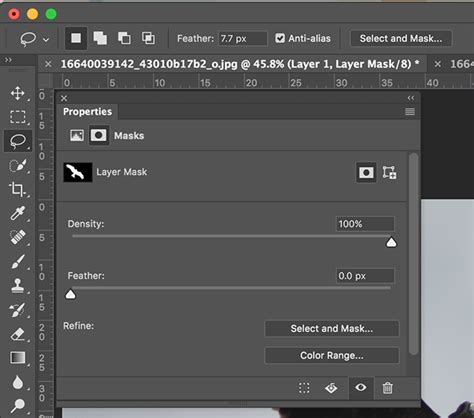
The Crucial Role of Layer Masks
Layer Masks are the lynchpin of this non-destructive editing technique. They allow you to selectively hide or reveal parts of a layer without permanently deleting pixels, offering immense flexibility.
In this specific effect, we will apply the Layer Mask to a duplicate of the image layer, ensuring the original image remains intact. This approach is more efficient and provides greater control than applying the mask directly to the text layer.
Here's a common workflow:
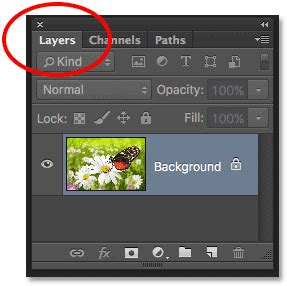
Duplicate the Background Layer: In the Layers panel, select your background image layer and create a duplicate by going to
Layer > New > Layer via Copy(or by using the shortcutCtrl + J/Command + J).Position the Duplicated Layer: Drag this newly created layer above your text layer in the Layers panel. You'll see a highlight bar appear. Release the mouse button when the highlight bar is positioned directly above the text layer. This ensures the duplicated image layer will visually overlay the text.
Create a Layer Mask: With the duplicated image layer selected, you need to create a mask that will reveal only the parts of the subject that should appear in front of the text. A powerful way to do this is by using your refined selection.
- Using "Select Subject" and Layer Mask: If you used "Select Subject" earlier, you can convert this selection directly into a Layer Mask. With the duplicated image layer active, click the "Add layer mask" icon at the bottom of the Layers panel. Photoshop will automatically create a mask based on your current selection. If you need to invert the mask (to hide the subject and reveal the background), select the mask thumbnail and press
Ctrl + I/Command + I. - Using Quick Selection Tool and Layer Mask: Alternatively, you can use the Quick Selection Tool to manually select the parts of your subject that will appear in front of the text (e.g., the person's head, arms, or any objects they are holding). Once you have this selection, create a layer mask on the duplicated image layer. The selected areas will remain visible, while everything else will be hidden. If you accidentally selected the background, you can refine the mask by painting on it with black to hide areas or white to reveal them.
- Using "Select Subject" and Layer Mask: If you used "Select Subject" earlier, you can convert this selection directly into a Layer Mask. With the duplicated image layer active, click the "Add layer mask" icon at the bottom of the Layers panel. Photoshop will automatically create a mask based on your current selection. If you need to invert the mask (to hide the subject and reveal the background), select the mask thumbnail and press
Advanced Refinement: Painting Details with the Brush Tool
Even with precise selections, certain areas, particularly hair, might require more delicate attention. This is where the Brush Tool becomes invaluable for fine-tuning the Layer Mask.
Select the Brush Tool by pressing B on the keyboard. Ensure that your Layer Mask is selected in the Layers panel (you'll see a border around the mask thumbnail).
Instead of solely relying on automated selection tools to capture every strand of hair, you can manually "paint" in the details directly onto the Layer Mask. This allows for a more artistic and controlled approach.
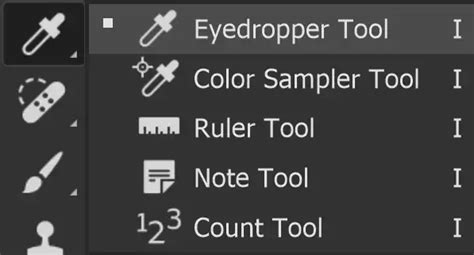
To sample colors directly from the image for painting, temporarily enable the Eyedropper Tool by holding down the Alt key (or Option key on a Mac). Click anywhere on the canvas to pick up a color. Then, release the Alt/Option key and begin painting on the mask with the Brush Tool. You can use colors sampled from the hair itself to paint in individual strands, creating a more realistic and integrated look where the text appears to pass behind. Experiment with different brush sizes, hardness settings, and opacities to achieve the desired effect. Painting with a soft-edged brush can help create subtle transitions, while a harder brush might be useful for defining sharper edges.
By painting with black on the mask, you will hide parts of the duplicated image layer, allowing the text underneath to show through. Painting with white will reveal those parts of the image layer again. This ability to selectively paint on the mask offers unparalleled control over the final appearance of the text-behind-person effect.
Adding Depth and Realism: Further Enhancements
While the core effect is now in place, you can further enhance its realism and impact.
- Drop Shadow: To make the text more legible against the background and to create a sense of depth, consider adding a subtle drop shadow to the text layer. This can be done by double-clicking the text layer in the Layers panel and selecting "Drop Shadow" from the Layer Style options. Adjust the opacity, distance, and size of the shadow to complement the lighting in your image.
- Color Adjustments: You might find that the text doesn't quite harmonize with the image's color palette. You can use adjustment layers (such as Hue/Saturation, Color Balance, or Photo Filter) applied to the text layer to subtly shift its colors and make it blend more seamlessly with the overall scene.
- Glow Effects: For a more dramatic or stylized look, consider adding a subtle outer glow to the text. This can help the text "pop" and create an ethereal or illuminated appearance.
Understanding the Tools: Selections and Masking Mastery
The ability to execute this "text behind person" effect relies heavily on a solid understanding of Photoshop's selection and masking capabilities. These are fundamental skills that extend far beyond this single tutorial.
For those who wish to deepen their expertise in these areas, dedicated courses are available. A comprehensive "Selections and Masking Mastery Course," for instance, typically includes extensive step-by-step lessons, structured modules, downloadable practice files, and custom Photoshop brushes designed to accelerate your learning. Such courses often cover advanced techniques for refining selections, working with complex subjects like hair and fur, and mastering various masking workflows.
Jesús Ramirez, a renowned digital graphics expert, speaker, and educator specializing in Adobe Photoshop, is a prominent figure in this field. As the founder of the Photoshop Training Channel, one of the most popular Photoshop YouTube channels globally, he offers a wealth of knowledge and practical tutorials. His expertise, shared through accessible lessons, empowers users to tackle complex editing challenges with confidence.
Master Hair Selection - Best Technique for Every Situation
Conclusion: A Versatile and Accessible Effect
Mastering the technique of placing text behind a person in Photoshop opens up a world of creative possibilities. By understanding and applying the principles of selection, Layer Masks, and strategic brushwork, you can effortlessly create professional-looking effects that enhance your photographs and designs. This straightforward process, accessible even to Photoshop beginners, allows for sophisticated visual storytelling, making your images more engaging and impactful. The key lies in practicing these fundamental tools, experimenting with different approaches, and understanding that refinement is often an iterative process.
This technique is not just for single subjects; it can be adapted to place text behind various objects within an image, offering a versatile tool in your Photoshop arsenal. Whether you're aiming for a subtle integration or a bold, graphic statement, the methods discussed provide a robust framework for achieving stunning results. Happy editing!