In the digital age, preserving and showcasing memories has evolved significantly from the days of physical photo frames. For Mac users, creating visually engaging photo collages is now an accessible and enjoyable process, achievable with the built-in applications you likely already possess. This guide will walk you through the intricacies of using Pages and Keynote to design stunning photo collages, catering to both print and digital display needs.
Leveraging Pages for Print-Ready Collages
Pages, Apple's word processing application, offers a robust platform for creating photo collages intended for printing. Its page layout capabilities provide the flexibility needed to arrange and manipulate images with precision.
Setting Up Your Canvas in Pages
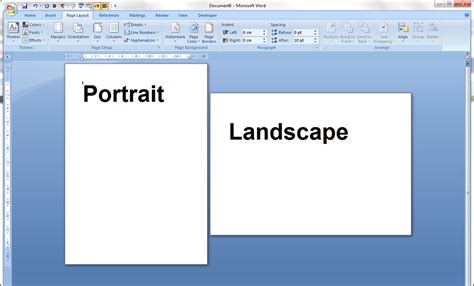
To begin, launch Pages and select "New Document." Choose the "Blank Landscape" template and click "Create." This provides a clean slate for your collage. Since the focus is on visual arrangement rather than text, it's crucial to convert the document to "Page Layout" mode. Navigate to "File" and select "Convert to Page Layout." This action transforms the document into a freeform canvas, ideal for image placement.
If you have a collection of photos stored outside your Photos Library, Pages makes it simple to incorporate them. You can directly drag and drop these images from a Finder folder into your Pages document. Alternatively, if your photos are organized within the Photos app, click the "Media" button in the toolbar at the top of the page and select your desired images.
Arranging and Enhancing Your Photos
Once photos are on your canvas, the creative possibilities unfold. Small white squares, known as handles, appear around the perimeter of each image. Dragging a corner handle allows you to resize the image, making it larger or smaller. Clicking on an image brings up these handles and also enables you to reposition it by dragging.
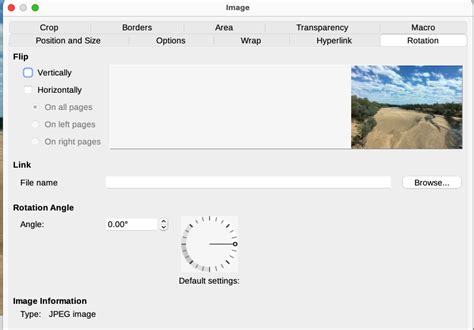
To add a dynamic element, you can rotate your photos. Press and hold the Command (⌘) key, then hover your pointer over one of the image's handles. A small arc with an arrow at each end will appear, indicating that the image can be rotated by moving your pointer. This feature is invaluable for creating a more organic and less rigid collage layout.
To give your collage depth and a polished look, consider adding frames to your pictures. Pages offers various frame styles, including a popular "picture frame" option that mimics a printed photo with a white border. Other creative frames, like one resembling a pushpin for a corkboard effect, are also available. The "Scale" slider allows you to adjust the width of the white border, while the "Shadow" pop-up menu lets you fine-tune shadow types, width, and even color. The "Reflection" option adds a mirrored image below your photo, further enhancing its visual appeal.
Layering and Replacing Images
When arranging multiple photos, you might need to control their layering. To move one image in front of another, click on the photo you wish to reposition, then access the "Arrange" pane in the sidebar. Click "Forward" to bring the photo closer to the viewer or "Backward" to move it behind other elements. This is particularly useful for creating depth and visual interest, for instance, by placing a specific element in the foreground over a background image.

Sometimes, a chosen image might not perfectly fit the overall aesthetic or may require adjustment. Pages provides a straightforward way to replace an image. Click on the photo you want to change, then navigate to the "Image" pane in the sidebar. The "Replace" button will open a Finder file picker, allowing you to select a new image from your folders to substitute the existing one. The new image will seamlessly integrate into the collage.
Adjusting Photo Appearance
The "Adjustments" section within the Image pane offers powerful tools to modify how your photos look. The "Exposure" slider controls the brightness or darkness of an image, while the "Saturation" slider can be used to intensify colors or convert an image to grayscale. These adjustments allow you to ensure visual consistency across all the photos in your collage.
Adding Text and Customizing Backgrounds
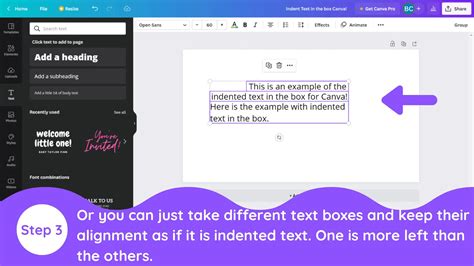
To add a title or captions to your photo collage in Pages, click the "Text" button in the toolbar. This action inserts a text box that you can then style with your desired font, size, and color.
The default white background of the collage can be easily transformed. Click on the background of the collage itself, then select "Format" from the toolbar on the right. Under the "Background" section, you'll find various fill options. "No Fill" is the default. You can opt for "Color Fill" for a solid color, "Gradient Fill" for a smooth transition between two colors, or "Advanced Gradient Fill" for more complex, angled, or multi-shaded gradients. For a more integrated look, "Image Fill" or "Advanced Image Fill" allows you to use another photo as the background, potentially combined with a gradient.
Exporting Your Pages Collage
Once your photo collage meets your approval, it's essential to save it. For printed output, exporting to a PDF file is recommended. Go to "File" > "Export To" > "PDF," ensuring "Best Image Quality" is selected. This high-quality PDF can be sent to professional printing services or printed at home. However, be aware that PDF files with many high-resolution images can become quite large, which is where Keynote offers a distinct advantage.
Harnessing Keynote for Digital and Optimized Collages
Keynote, Apple's presentation software, is exceptionally well-suited for creating photo collages destined for online display, screen presentations, or for generating smaller file sizes compared to PDFs from Pages.
Initiating Your Keynote Collage
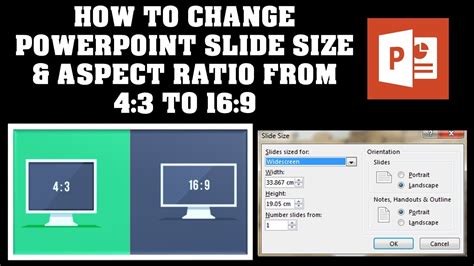
Launch Keynote and select an aspect ratio and theme. For a direct transfer from Pages or for a standard screen display, choose "4:3" as the aspect ratio and the "White" presentation theme. This provides a clean, blank slide.
The Keynote toolbar closely resembles that of Pages, meaning many of the image manipulation techniques are transferable. To begin with a clean slate, remove the default "Title" and "Subtitle" text boxes by clicking on them and pressing the "Delete" key.
Transferring Content from Pages to Keynote
If you've already designed a collage in Pages, you can easily transfer it to Keynote. With your Pages collage open, select "Edit" > "Select All" (or Command ⌘ - A), then "Edit" > "Copy" (or Command ⌘ - C). Switch to your blank Keynote presentation and select "Edit" > "Paste" (or Command ⌘ - V). While the photos and title will transfer, the background will not. This is easily rectified.
Reapplying Backgrounds and Resizing in Keynote
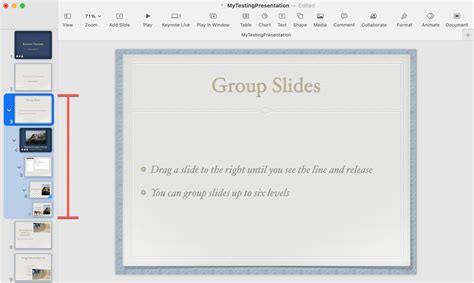
To reapply a background in Keynote, click on the blank slide background, then select "Format" from the toolbar. You'll find familiar controls for "Advanced Image Fill," similar to those in Pages. You might notice that the transferred elements appear smaller in Keynote. This is because Keynote is optimized for full-screen display. To adjust this, you'll first group the photos and title, then resize the entire group. With all elements selected, click the "Group" button in the sidebar. Now, instead of individual image handles, you'll see handles around the entire group. Click and drag these handles to resize the collage to your desired dimensions. Once resized, ensure the group remains selected and choose "Format" > "Ungroup" from the sidebar. If you need to adjust the title's size, click on it, select the "Text" pane in the sidebar, and change the font size.
Advanced Formatting and Export Options in Keynote
Keynote offers advanced formatting for text, such as applying an "Image Fill" to the title. You can drag and drop an image from your Photos app into the text fill to create a unique textual design. You can also add outlines and drop shadows to text for added visual flair.
When it comes to exporting, Keynote provides more versatile options than Pages for digital use. The "File" > "Export to Images…" command offers choices to save your collage as JPEG (High Quality), JPEG (Smaller File Size), PNG, or TIFF. This is a significant advantage for managing file sizes. For example, a 7.9 MB PDF exported from Pages could be reduced to a 890 KB High Quality JPEG or an incredibly small 182 KB JPEG (Smaller File Size) in Keynote.
Create a Picture Collage in Keynote | PYP Lesson | Technology in Education
Exploring Third-Party Collage Apps
While Pages and Keynote are powerful built-in tools, the App Store offers a plethora of dedicated photo collage applications, each with its unique features and user interfaces. Some popular options include Posterino and Instantane, which often come with a price tag.
For those seeking free alternatives with extensive creative control, apps like "PicCollage" stand out. PicCollage is lauded for its ease of use, extensive template library, and a wide array of editing tools. It allows users to create freestyle collages, photo dumps, and even video collages. Features such as cutouts, doodles, animations, and AI-powered highlight detection enhance the creative process. The app also provides a vast collection of exclusive backgrounds, stickers, and fonts, often updated weekly. For users who desire advanced features, a premium subscription offers watermark removal and ad-free experience.

When considering third-party apps, it's important to note potential issues, such as apps accessing older photo libraries instead of the current Photos app library, or import functionalities that may unexpectedly cease to work. Troubleshooting these issues might involve checking app permissions, ensuring the Photos app is correctly configured, or looking for specific import settings within the app itself. Some users report issues with importing photos from iPhones or download folders into the Photos app, sometimes encountering messages like "Another import session is in progress," which may require restarting the app or the Mac.
Considerations for Different Collage Outputs
The choice between Pages and Keynote, or a dedicated app, often depends on the intended output.
Print vs. Digital Display
For physical prints, Pages offers precise control over layout and high-resolution PDF export, ensuring that your collage looks sharp on paper. Keynote, while capable of creating visually appealing collages, is primarily optimized for screen display. Its strength lies in generating smaller, web-friendly image files.
File Size Management
A key differentiator is file size. High-resolution PDFs from Pages can be substantial. Keynote's ability to export directly to various JPEG formats significantly reduces file size, making collages ideal for sharing online, via email, or on social media without lengthy upload times or excessive data consumption.
Cross-Platform Compatibility
Exporting your collage as a PDF from either Pages or Keynote ensures broad compatibility. A PDF can be viewed on virtually any device or operating system, making it a universal format for sharing your creations. If you need to create a JPEG from a PDF, you can often do so using Preview on your Mac, adjusting the resolution to balance image quality with file size.
Advanced Techniques and Creative Exploration
Beyond basic grids, both Pages and Keynote allow for more artistic and freeform collage creation. Instead of relying on pre-defined grids, you can insert various shapes (circles, rounded rectangles, etc.) and manipulate them to form unique layouts. Photos can then be placed within these shapes.

The ability to layer elements, rotate shapes (which also rotates the image within), and apply effects like borders and shadows opens up a world of creative possibilities. Experimenting with different arrangements, overlaps, and visual styles can lead to highly personalized and eye-catching photo collages. Remember that when working with shapes, the order in which you add and arrange elements matters for how they appear layered. Tools like "Bring Forward," "Send Backward," "Bring to Front," and "Send to Back" are crucial for managing these layers effectively.
Ultimately, creating photo collages on your Mac with Pages and Keynote is a straightforward yet powerful process. By understanding the strengths of each application and exploring their various features, you can transform your cherished photographs into compelling visual narratives, whether for a cherished printed keepsake or a vibrant digital display.