Inkscape, a powerful open-source vector graphics editor, offers robust tools for image manipulation, including the often-sought-after ability to remove backgrounds. While primarily a vector program, its unique approach to path creation and node manipulation makes it surprisingly intuitive for extracting main subjects from their backgrounds, often yielding superior results compared to traditional raster-based photo editors. This guide will explore various methods for achieving clean background removal in Inkscape, catering to both simple and complex images.
Understanding Inkscape's Transparent Canvas
By default, Inkscape operates with a transparent background. This means that unless a specific background color or image is added, any area not occupied by an object or path remains see-through. This fundamental characteristic is key to understanding how background removal works within the software. When you export an image from Inkscape, you can choose formats like PNG that preserve this transparency, allowing you to place your extracted object onto any new background.
Method 1: Trace Bitmap for Simple Images
For images with distinct color differences between the foreground object and the background, the "Trace Bitmap" feature is an excellent starting point. This tool converts raster images (like JPEGs or PNGs) into vector paths.
- Import Your Image: Open Inkscape and import your image by going to
File > Import. - Access Trace Bitmap: With the image selected, navigate to the
Pathmenu and chooseTrace Bitmap. This will open a dedicated panel. - Choose a Scan Type: Within the
Trace Bitmappanel, you'll find several scanning modes. For many background removal tasks,Single Scanis a good choice. - Select Brightness Cutoff: From the dropdown list under
Single Scan, selectBrightness cutoff. This method traces areas based on their luminance. - Update and Adjust: Click the
Updatebutton to see a preview of the traced path. You can adjust theThresholdvalue to control how much of the image is included in the trace. A lower threshold will trace lighter areas, while a higher threshold will trace darker areas. Experiment with this slider until the outline closely matches your main object. - Apply the Trace: Once you are satisfied with the preview, click
OK. Inkscape will create a vector path directly on top of your original image. - Separate and Delete: Select the original raster image (it will likely be the top layer) and press the
Deletekey. You should now be left with the vector outline of your object. - Refine the Path (Optional): If the traced path isn't perfect, you can switch to the
Edit paths by nodes tool(the second icon in the toolbox, or pressF2). This allows you to manipulate the individual nodes and handles of the vector path, enabling precise adjustments.
It's important to note that the Trace Bitmap feature works best on images where there's a clear contrast. If the image has a complex, multi-colored background or the foreground object blends too much with the background, this method might require significant manual refinement.
Method 2: Manual Path Creation for Precision
When Trace Bitmap doesn't yield satisfactory results, or for images requiring pixel-perfect extraction, manually drawing a path is the most effective approach. This method leverages Inkscape's core vector editing capabilities.
- Import and Lock: Import your image (
File > Import). Once imported, it's a good practice to lock it in place to prevent accidental movement. Select the image, go toObject > Lock selected objects. - Select the Pen Tool: Choose the
Create and edit paths by nodestool (often referred to as the Pen tool, shortcutB). - Outline Your Object: Begin clicking around the perimeter of your main object. Each click creates a node.
- Straight Lines: For straight edges, simply click from one point to the next.
- Curved Lines: For curves, click and drag your mouse. This will create Bezier handles that control the shape of the curve. You can adjust these handles later.
- Close the Path: Continue clicking until you have outlined the entire object. To close the path, click on the very first node you created. The outline will become a continuous shape.
- Fill and Stroke: At this stage, your path might not have any visible color. You can assign a fill color by clicking on a color swatch in the palette at the bottom of the screen. For background removal, the fill color itself isn't as important as the shape it defines.
- Positioning: You can now unlock your original image (
Object > Unlock all). Select both your newly created path and the original image. - Clipping: The "Clip" function in Inkscape is a powerful way to use one object to mask another.
- Ensure your manually drawn path is on top of the image you want to clip. You can use
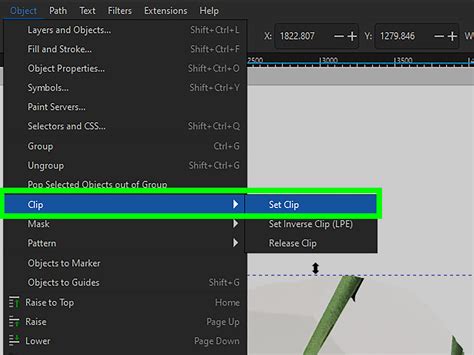
Object > RaiseorObject > Lowerto adjust the stacking order. - With both the path and the image selected, go to the
Objectmenu and chooseClip, then selectSet. This will "cut out" the portion of the image that falls within your drawn path, effectively removing the background.
- Ensure your manually drawn path is on top of the image you want to clip. You can use
Method 3: Utilizing the Fill Tool for Specific Scenarios
Inkscape's Fill bounded areas tool (often called the "Paint Bucket" tool) can be a quick way to select and remove backgrounds, particularly in images with solid or contiguous background colors. This tool functions similarly to the magic wand in other graphics software.
- Import and Select: Import your image.
- Activate Fill Tool: Select the
Fill bounded areastool from the toolbox. - Adjust Threshold and Options: In the Tool Controls Bar at the top, you'll find options for
ThresholdandGrow/Shrink. TheThresholddetermines how sensitive the tool is to color variations. A higher threshold will select a wider range of similar colors.Grow/Shrinkallows you to expand or contract the selection. - Click on the Background: Click on an "empty" space outside your main object. If the background is a single, solid color, this should select it.
- Delete the Background: Once the background area is selected (indicated by animated dashes), press the
Deletekey. - Handle Complex Backgrounds: If the initial click doesn't select the entire background, try clicking on other unselected background regions. You may need to adjust the
ThresholdandGrow/Shrinkvalues and repeat the process. - Addressing "Holes" and Compound Objects: Sometimes, an image might appear as lines, but is actually a complex composition of shapes. For example, a black circle with white pieces on top, over a white background. In such cases, clicking on a white part inside the circle might only select a tiny piece. To address this:
- Change Background Color: Go to
File > Document Properties. Click the "background color" swatch and pick a color that is neither black nor white. This helps visualize the different layers. - Delete White Background: Select the white rectangle and press
Delete. - Select Similar Fills: Click any white part inside the circle. Then, go to
Edit > Select Same > Fill Color. This should select all similarly colored white pieces. - Union: With all white pieces selected, go to
Path > Union. This combines them into a single object. - Difference (Cookie-Cutting): Now, hold
Shiftand click on a black part of your object. You should have both the black part and the combined white parts selected. Go toPath > Difference. This will "cookie-cut" the white shape from the black shape, leaving you with a solid black object.
- Change Background Color: Go to
ADVANCED Path Commands In INKSCAPE
Method 4: Using Online Tools as an Alternative
For users who prefer not to install software or require a very quick solution for straightforward background removal, online tools offer a convenient alternative. Aiseesoft Free Background Remover Online is one such option.
- Upload Your Image: Navigate to the web app. You will typically be presented with an upload interface.
- Automatic Removal: Many online tools are designed to automatically recognize the main subject and remove the background.
- Editing and Refinement: After the automatic process, you may be presented with an editing tab. Here, you can often manually refine the edges or add new backgrounds.
- Download: Once satisfied, click the download button to save your image with a transparent background.
While these online tools are fast and accessible, they may offer less control and precision compared to dedicated desktop software like Inkscape, especially for complex images.
Exporting Your Transparent Image
After successfully removing the background, it's crucial to export your image in a format that preserves transparency.
- Choose PNG: Go to
File > Export PNG Image. - Select Area: In the export dialog, you can choose to export the entire page, a drawing, or a selection. Ensure the correct area containing your object with a transparent background is selected.
- Set Resolution and Save: Choose your desired resolution and click
Export Asto save the PNG file.
Inkscape natively exports to SVG, but it also supports a wide range of raster formats including JPG, PNG, BMP, ICO, TIFF, GIF, WPG, and EPS. For transparent backgrounds, PNG is almost always the preferred choice.
Considerations for Specific Applications
The method you choose for background removal in Inkscape can depend on the intended use of the final image.
- Passport Photos: Passport photos often have very specific requirements for background color (typically plain white or light gray) and uniformity. Manual path creation or careful use of
Trace Bitmapwith precise thresholding is recommended to ensure compliance. - Product Photography: For e-commerce or catalogs, clean, crisp product images with transparent backgrounds are essential. This allows products to be placed on various website layouts or marketing materials. Inkscape's precise path tools are ideal for achieving this professional look.
- Presentations (e.g., Google Slides): When incorporating images into presentations, transparent backgrounds ensure that the image blends seamlessly with the slide's design, preventing a boxy or out-of-place appearance. Exporting as PNG from Inkscape is key here.
- Engraving and Manufacturing: For applications like laser engraving or CNC machining, the "logical" graphic representation is paramount. Simply having an image that looks correct is insufficient. You need a single, solid vector object. Methods involving
Path > UnionandPath > Difference(as described in Method 3) are vital for creating these clean, single-object vector files.
Inkscape's flexibility means that with a little practice, you can master background removal for a wide array of projects. Whether you're a professional designer or a hobbyist, understanding these techniques will significantly enhance your image editing capabilities.
tags: #removing #background #in #inkscape