The world of digital art is vast and varied, offering a multitude of styles and techniques. Among these, Pixel Art has experienced a significant resurgence, captivating audiences with its retro charm and unique aesthetic. Once a necessity dictated by the limitations of early graphics technology, pixel art is now a deliberate stylistic choice, allowing modern creators to evoke a nostalgic yet fresh feel that truly stands out. This tutorial will guide you through the process of crafting a unique environment in Pixel Art using Clip Studio Paint, a powerful and intuitive software suitable for everything from concept art for video games to finished in-game illustrations.
Why Clip Studio Paint for Pixel Art?
Clip Studio Paint, originally known as Manga Studio 5, is a robust digital art application that excels in illustration, comic creation, and, as we will explore, pixel art. Its comprehensive feature set makes it an ideal choice for artists looking to dive into this retro-style medium.
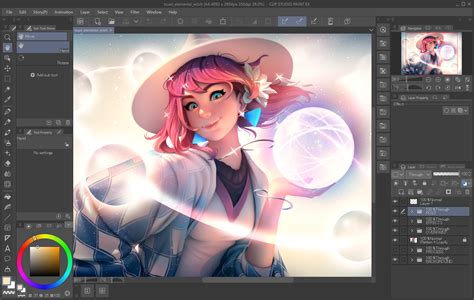
The software boasts a powerful brush engine with a built-in stabilizer, a wide array of brushes mimicking traditional media like watercolors, oils, pencils, and markers, and advanced features such as gradient maps and non-destructive tonal adjustment layers. For pixel art specifically, Clip Studio Paint offers several key advantages:
- Pixel-Accurate Tools: It provides tools that allow for precise pixel control, essential for maintaining the integrity of the pixel art style.
- Customizable Brushes: You can create and customize brushes, including a dedicated pixel art pen, to achieve the hard-edged, aliased look characteristic of the style.
- Grid Functionality: A configurable grid system helps in visualizing and placing individual pixels accurately.
- Vector Pen Tool: An innovative vector pen tool offers a natural drawing feel, which can be beneficial even when working with pixel-based outputs.
- Intuitive Interface: Compared to some other professional art software, Clip Studio Paint is often considered more intuitive and easier to learn, making it accessible for beginners.
- Affordability: Clip Studio Paint offers a more budget-friendly pricing structure than some competitors, with single payments for lifetime access to its Pro and EX versions.
While Photoshop is a capable tool, Clip Studio Paint provides a well-rounded and cost-effective solution for pixel art creation, with features that directly support the workflow required for this distinct style.
Setting Up Clip Studio Paint for Pixel Art
Before diving into the creative process, it's crucial to configure Clip Studio Paint to optimize it for pixel art. These initial setup steps ensure that you have the necessary tools and settings for precise pixel manipulation.
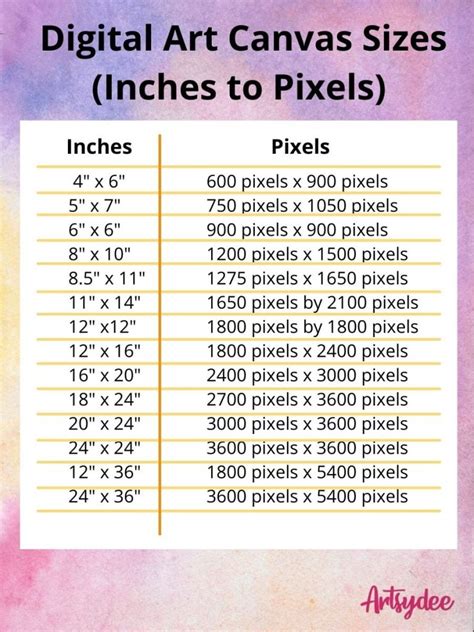
Canvas Size and Resolution
The first step is to create a new illustration with specific dimensions. For a strong retro feel and the ability to showcase detail, a canvas size of 256 x 128 pixels at 72 dpi is recommended. This resolution provides a good balance, allowing for a manageable file size while still offering enough space to render a detailed environment. While higher resolutions are possible, starting with a smaller canvas makes the individual pixel units more apparent, which is fundamental for learning and practicing pixel art. The aspect ratio for this setup is 2:1.
Grid Configuration
To ensure pixel-level accuracy, configuring the grid is essential. Navigate to View > Grid Settings. Within the grid settings, set both the Gap and Number of divisions to 1 pixel. This creates a grid where each cell corresponds to a single pixel on your canvas, acting as a visual guide for placement and alignment. You can toggle the grid on and off at any time using the shortcut Shift+G.

Customizing Brushes for Hard Edges
A hallmark of pixel art is its sharp, aliased edges, meaning there are no smooth transitions or anti-aliasing. To achieve this, you need brushes that render pixels with hard edges.
- The Pixel Art Pen: Clip Studio Paint conveniently includes a basic drawing brush that is perfect for pixel art. In the
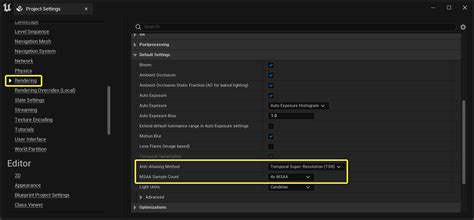
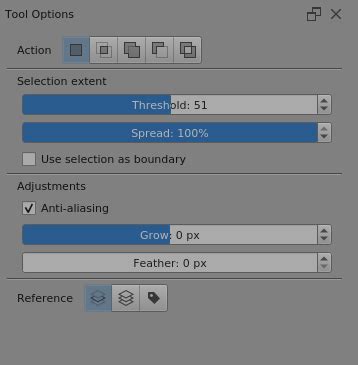
Pen Sub Toolpanel, under theMarkerssection, select the Fill-in Mono pen. - Disabling Anti-Aliasing: The critical step is to ensure that anti-aliasing is disabled for the tools you use. For the Fill-in Mono pen and other tools like Selection, Fill, and Text, look for an anti-aliasing checkbox and ensure it is toggled off. This ensures that each pixel you place has a distinct, hard edge. The aliased edge is what we’re looking for when creating pixel art.
While hard edges are foundational, it's important to note that color gradations and softer edges are not entirely forbidden in pixel art; they depend on the desired artistic outcome. However, for a foundational understanding and a classic retro look, disabling anti-aliasing is paramount.
Setting Up the Eraser
Similar to brushes, the eraser needs to be configured for pixel-perfect removal. The standard eraser might introduce unwanted smoothing. Therefore, select the "Hard eraser" and ensure that its anti-aliasing is also turned off. This guarantees that when you erase, pixels are removed cleanly without any feathered edges.
Creating a Custom Organic Textured Brush
For adding organic elements like foliage, terrain textures, or subtle details, a custom brush can be invaluable. This process involves creating a texture and registering it as a brush tip.
- Create a Texture: Start a new document (e.g., 200x200 pixels) and paint an organic texture or paste an existing texture.
- Set Layer Properties: In the layer properties panel, set the
Expression colorto "Gray". This is crucial for the custom brush to function correctly with the texture. - Register as Material: Go to
Edit > Register as material > Image. In theMaterial Propertiesdialog box, check the "Use for Brush Tip Shape" option and click OK. This saves your texture to the Material Library. - Duplicate and Edit Brush: In your
Pen Sub Toolpanel, right-click on your Fill-in Mono pen and select "Duplicate sub tool". Give this new sub-tool a descriptive name. - Assign Brush Tip: Click the small wrench icon on the new sub-tool to open the
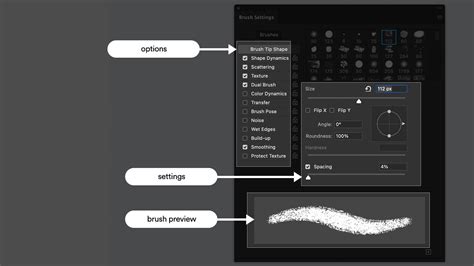
Sub Tool Detailpanel. Navigate toBrush Tip, set theTip shapeto "Material", and click "Add brush tip shape". Select the texture material you just registered. - Adjust Spray Properties: Within the
Sub Tool Detailpanel, you can fine-tune theSprayproperties to achieve a desired randomness and organic feel for your brush. This custom brush can then be used for elements like foliage, rocks, or uneven terrain.
Preparing Selection Tools
Finally, ensure your selection tools are also set to avoid anti-aliasing. This includes the Lasso, Polyline, and Pen selection tools. By setting them to "no anti-aliasing," you maintain pixel precision when making selections, which is vital for accurate edits and color placement.
With these preparations complete, Clip Studio Paint is now fully optimized for your pixel art endeavors.
Choosing Your Color Palette
A well-defined color palette is fundamental to creating a cohesive and visually appealing pixel art piece. Historically, color limitations were imposed by hardware, leading to the distinctive palettes of classic video games. Adhering to a limited palette not only honors this retro aesthetic but also helps in creating a balanced and unified artwork.
For this tutorial, we will employ a dual, warm-cool palette approach. This doesn't mean using every shade in a gradient but rather selecting specific color swatches from different color families. An excellent starting point is the 56-color palette used by the NES (Nintendo Entertainment System), which provides a good range while maintaining a distinct retro feel.

The process involves selecting a few key colors from various gradients-for instance, three tones each of red, orange, and yellow, and seven shades of blue. These sampled colors form the initial 16-color palette, serving as a guideline. While these guidelines are beneficial, you are not strictly bound by them, especially when adding finer details and subtle color variations later in the process. The goal is to create a harmonious blend of warm and cool tones that will define the mood and atmosphere of your scene.
The Initial Sketch: Laying the Foundation
With your tools and palette ready, you can begin the sketching phase. This initial stage is about defining the composition, light, and primary shapes. It's advisable to keep the sketch monochromatic and limited to about three to four light values.
For a landscape scene, such as a snowy environment, using cool colors from your palette is a logical starting point. Use the Fill-in Mono pen with its hard edges to block out the basic structure. This should be a simple, blocky representation of your scene.
After establishing the elementary structure, begin to carve out more detail, still maintaining a simplified, blocky aesthetic. Continue adding depth and refining different areas of the sketch.
As the sketch progresses, introduce warmer color areas. These are still rough and flat at this stage, serving to establish key focal points. In this example, the house in the upper right and the traveler character in the lower left are designated as the main focus areas. These will contrast with the predominantly cool colors of the environment, drawing the viewer's eye.

The initial sketch is crucial for establishing the overall composition and flow of the artwork. By working with a limited color palette and simple shapes, you create a solid foundation upon which more complex details can be built.
Refining Your Pixel Art Environment
Once the initial sketch is in place, the process shifts to gradually polishing and adding detail. It's beneficial to move around the canvas, working on different areas rather than over-focusing on one section. This prevents certain parts from becoming overworked while others remain underdeveloped.
Begin by adding detail to the primary elements, such as the house and the foreground. This might involve refining the shapes, adding textures, or defining windows and doors.

Continue this process by detailing other elements like trees and the background. Here, the custom organic textured brush you created earlier can be used to imbue these areas with a more natural, less uniform appearance. This is particularly effective for foliage, rocks, or irregular ground surfaces.
As more detail is added, the image starts to take on a more finished appearance. Keep working across the canvas, incorporating organic shapes, refining the sky, and ensuring a consistent level of detail throughout.
At a certain point, you can revisit key elements like the house and introduce richer color variations. While the initial stages adhere to a more constrained palette, this phase allows for intermediate shades that add depth, texture, and character. For instance, using richer reds, oranges, and yellows for the wooden elements of the cabin, its door, and windows can significantly enhance its visual appeal.
Continue refining the details, working on the snow, the sky, and any other elements that contribute to the scene's atmosphere.

Finally, introduce any characters or foreground elements. For the candlelight carried by the character, layer blending modes like "Screen" can be used to achieve a transparent, glowing effect, adding a magical touch to the scene.

The refinement stage is iterative. By moving from broad strokes to finer details and layering colors and textures, you gradually build complexity and depth into your pixel art environment. The progression from very sharp, rough edges in the initial sketch to more subtle details and effects in the final stages is a key principle in creating a compelling pixel art piece.
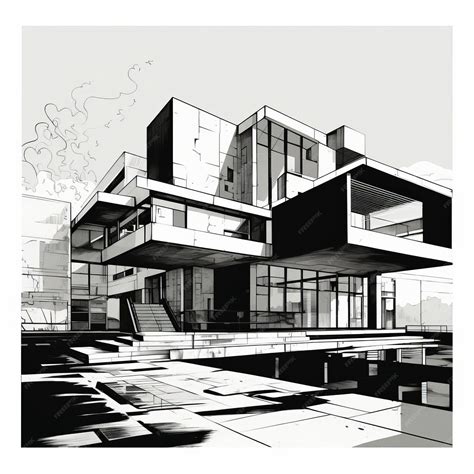
The Final Pixel Art Environment
After following the steps of setup, palette selection, sketching, and refinement, the result is a unique and detailed pixel art environment. This piece, crafted using Clip Studio Paint, demonstrates how the software's tools can be leveraged to achieve a classic retro aesthetic with modern precision.
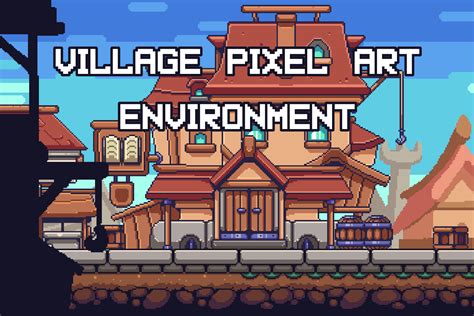
The journey from a simple blocky sketch to a richly detailed illustration highlights the power of working from general shapes to specific details. The use of hard-edged brushes, careful color selection, and strategic application of custom brushes and layer effects culminates in a visually striking artwork.
Technique for Creating Beautiful Level Design
Principles of Pixel Art Creation
The techniques employed in this tutorial are applicable across various pixel art styles, including isometric views, top-down environments, character design, and 2D backgrounds for games like Metroidvania-style platformers. The fundamental principles remain consistent:
- Pixel-Accurate Brushes: Utilizing brushes that allow for precise placement and control of individual pixels.
- Hard Edges: Avoiding anti-aliasing to maintain the distinct pixelated look.
- Constrained Color Palettes: Employing limited color palettes, reminiscent of older graphics technologies like EGA or VGA, to achieve a cohesive and retro feel.
- Controlled Complexity: Building detail gradually, moving from simple shapes to more intricate elements, ensuring a balanced and visually appealing composition.
Creating low-resolution images like these can be a challenging yet incredibly rewarding experience. The inherent limitations of color and resolution encourage thoughtful decision-making and a deep understanding of visual design principles.
The art of pixelation, while seemingly simple, requires a keen eye for detail, an understanding of color theory, and a deliberate approach to composition. By mastering these techniques, artists can breathe new life into retro aesthetics, creating captivating visuals that resonate with both nostalgic gamers and contemporary art enthusiasts. The ability to "fix those 'doubles'" - adjacent pixels on a curve that create an undesirable effect - by carefully removing pixels, and ensuring curves feel right through thoughtful pixel placement, are skills honed through practice and an understanding of pixel-level manipulation. It's about making conscious decisions while looking at the artwork through the real, not zoomed-in, canvas size to ensure proportions and overall appearance are correct. Even seemingly small details, like fixing "weird-looking cartoony eyes," become manageable with enough pixels and color control. The key is to avoid excessive compression or overly complex dithering, such as an "80% compressed version," which can degrade the clarity and impact of the pixel art. Instead, focus on clean lines, deliberate color choices, and a well-defined structure to create art that is both technically sound and artistically compelling.