Animated GIFs, those ubiquitous, endlessly looping visual snippets, have become an integral part of online communication, from expressing emotions and telling jokes to serving as dynamic marketing tools. While they might seem technically complex, creating them is surprisingly accessible, especially with powerful software like Adobe Photoshop. This guide will walk you through the process, from capturing the initial movement to exporting your final animated masterpiece.
Understanding the GIF Format: More Than Just a Meme
Before diving into creation, it's helpful to understand what a GIF actually is. GIF stands for Graphics Interchange Format, a file type introduced by CompuServe in 1987. Initially designed for displaying simple graphics like stock market quotations, its true enduring appeal lies in its ability to support animation. Unlike video formats, GIFs do not carry audio. A significant limitation of the GIF format is its 8-bit color palette, restricting it to a maximum of 256 colors simultaneously. This can lead to a grainy appearance in photographic images, making it less ideal for high-quality photography compared to formats like JPEG or PNG. However, for its primary purpose of short, looping animations, this limitation is often overlooked, especially considering its small file size and portability, which are crucial for web usage.
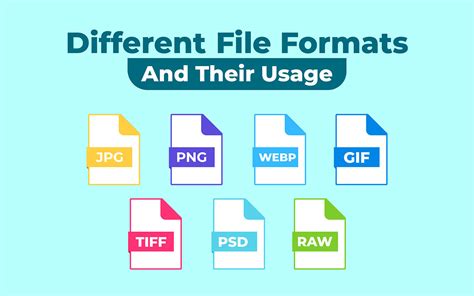
When considering image file types, it's important to distinguish GIFs from other common formats. JPEGs (JPGs) are compressed files supporting millions of colors, making them excellent for digital photos and many printed images, though with a slight loss of quality. PNGs are a lossless format offering transparency and a vast color range, intended as a successor to GIF. TIFFs are the go-to for high-resolution printing, preserving exceptional photographic quality. While memes are often static images with captions, GIFs serve a similar purpose as a quick visual medium for conveying humor, ideas, or emotions, contributing to their widespread popularity.
Capturing the Movement: From Camera to Computer
The foundation of any animated GIF is the sequence of images that will bring it to life. There are two primary approaches to capturing this movement:
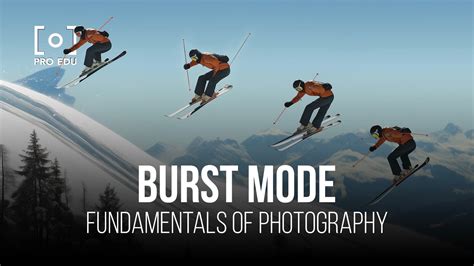
1. Burst Mode Photography: For dynamic animations, placing your camera in high-speed burst mode is an excellent starting point. Encourage your subjects to engage in lively actions like dancing, twirling, or jumping. The more pronounced the movement, the more engaging your GIF will be. Alternatively, if the background offers natural motion, you can have your subjects remain still while elements like wind-blown trees or passing crowds create the animation. When not using a tripod, strive to keep your camera as steady as possible to ensure better alignment of your shots, which simplifies the editing process.
2. Utilizing Existing Image Stacks or Video Frames: If you already have a series of images or a short video clip, these can be readily imported into Photoshop. This is particularly useful if you're working with pre-designed animation frames, perhaps created in another program like Adobe Illustrator. In such cases, you can import these source files directly into Photoshop by navigating to File > Load Layers.
Editing Your Source Images: Consistency is Key
Once you have your series of images, the next step is to ensure visual consistency. A common workflow involves using photo editing software like Adobe Lightroom. Edit the first image in your sequence with your desired aesthetic-using presets like "North Presets" is one method. Then, synchronize these edits across all other images in the series. This ensures that the animation will have a uniform look and feel, preventing jarring visual transitions.
Assembling Your GIF in Photoshop: Layers and Frames
Photoshop utilizes "Layers as Frames" for GIF animation. This means each distinct layer in your Photoshop document will correspond to a frame in your animation.
Method 1: Using Layer-Based Animation
- Open and Duplicate: Open the file you intend to animate in a blank Photoshop document. If you're starting with a single image, copy and paste it to create multiple layers.
- Strategic Movement: For each new layer, use the Move Tool to subtly shift the image a bit more than the previous layer. This gradual displacement is what creates the illusion of movement.
- Visualizing the Difference: To better understand the progression between frames, you can adjust the opacity of each layer in the Layers Panel. This allows you to see how each subsequent layer differs from the one before it.
- Iteration: Repeat this process until you have a sufficient number of iterations for your desired animation. Aiming for around 7 iterations is a good starting point. For a smoother animation, you can create more frames with smaller positional adjustments or rotations.
Method 2: Using Frame Animation (from an Image Stack)
- Load Layers: If your frames are in separate files, import them into Photoshop by going to File > Load Layers. If you already have a multi-layered Photoshop file, ensure each frame of your animation is on its own layer (or group of layers).
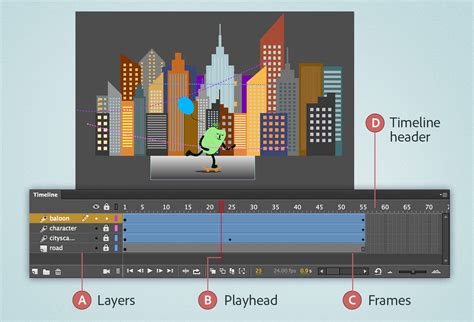
- Open the Timeline Panel: Navigate to Window > Timeline to open the Timeline panel.
- Create Frame Animation: At the bottom of the Timeline panel, click on the "Create Frame Animation" button.
- Populating the Timeline: Once you've clicked "Create Frame Animation," your first image (or layer) will appear as a single frame in the timeline. Photoshop will then automatically create frames for each subsequent layer.
- Cleaning Up the Timeline: You might find an initial empty, white frame (often associated with a "Background" layer). Select this frame and click the Trash icon in the bottom bar of the Timeline Window to remove it. Be cautious not to simply press "Delete" on your keyboard, as this could accidentally remove other frames.
Fine-Tuning Your Animation: Timing and Looping
With your frames in place, the next crucial step is to control the animation's pace and flow.
- Setting Frame Duration: In the Timeline panel, you need to tell the GIF how long each image should be displayed. Select all the frames in the timeline. Then, locate the duration dropdown menu under one of the frames and change the default time (often 0 seconds) to your desired duration. A common and effective setting is 0.1 seconds. The smaller the number, the faster the GIF will play.
- Previewing Your Work: Click the Play button on the Timeline panel, or press your computer's spacebar, to preview your animation.
- Adjusting Frame Order: If the sequence of your animation isn't quite right, you can easily rearrange the frames by simply dragging and dropping them within the Timeline panel.
- Setting the Loop: To ensure your GIF plays continuously, set it to loop. Click on the repeat menu within the Timeline panel and choose the looping option (e.g., "Forever"). You can adjust how long each individual frame is displayed and how long the GIF should loop.
Creating a frame-by-frame animated gif in Adobe Photoshop
Exporting Your Animated GIF: Ready for Sharing
Once you are satisfied with your animated GIF, it's time to export it.
- Save for Web (Legacy): Go to File > Export > Save for Web (Legacy).
- Format Selection: A new window will appear. Ensure that "GIF" is selected as the default format option.
- Review and Save: Here, you can make final adjustments to settings like color reduction and dither. Once you're happy with the preview, click "Done" to save your changes within this window. Crucially, clicking "Done" here does not save your GIF file; it only confirms the settings in the "Save for Web" dialog. You will then proceed to save the actual GIF file by clicking "Save" in the subsequent file dialog.
The Enduring Appeal of the Animated GIF
From its humble beginnings as a format for simple graphics, the animated GIF has evolved into a powerful and pervasive communication tool. Its ability to convey motion, emotion, and humor in a compact, easily shareable package has cemented its place in our digital culture. Whether you're looking to create a fun meme, a dynamic advertisement, or simply express yourself in a more visually engaging way, mastering the art of GIF creation in Photoshop opens up a world of creative possibilities. The process, while involving several steps, is straightforward and rewarding, allowing anyone to bring their visual ideas to life with a touch of animation.