Procreate, the renowned digital art application, offers a versatile toolkit for artists to bring their creations to life. A fundamental aspect of digital illustration is the ability to effectively fill shapes with color, gradients, and patterns. This guide delves into the various methods available within Procreate, from the intuitive drag-and-drop ColorDrop feature to more advanced techniques involving Alpha Lock, Clipping Masks, and blend modes. Whether you're a beginner looking to quickly color in a sketch or an experienced artist seeking nuanced control over your fills, this tutorial will equip you with the knowledge to achieve professional-looking results.
The Power of ColorDrop: Effortless Solid Color Fills
One of the most straightforward and widely used methods for filling shapes with solid colors in Procreate is the ColorDrop feature. This intuitive tool allows for quick application of color, with options to fine-tune its behavior.
Dragging and Dropping Color
The core of the ColorDrop feature lies in its drag-and-drop functionality. After selecting your desired color from the active color button, you simply tap and drag your stylus from that color swatch towards the area on your canvas you wish to fill. As you drag, the color will begin to spread outwards from the point of origin. This fill process is designed to be intelligent; the color will automatically stop at existing borders or distinct color boundaries within your artwork, preventing unintended overflow.
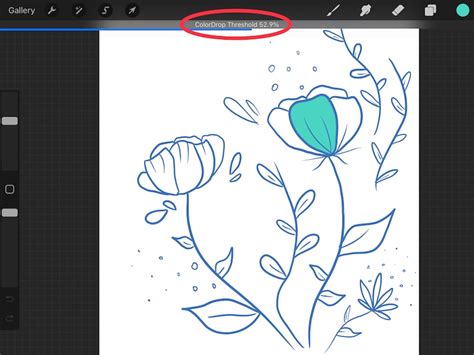
Adjusting the ColorDrop Threshold
A crucial aspect of mastering ColorDrop is understanding and utilizing the ColorDrop Threshold. Once you have initiated the drag-and-drop action and your stylus is still on the canvas, you can slide your stylus left or right. This action directly manipulates the ColorDrop Threshold percentage, which is displayed at the top of the interface. The Threshold dictates how aggressively the color will "bleed" or spread beyond the intended boundaries. A lower percentage will result in a more contained fill, respecting tighter edges, while a higher percentage allows the color to spread further, accommodating areas with less defined borders or slightly open shapes. Experimenting with this setting is key to achieving precise fills for various shapes and line weights.
Continuing Fills with ColorDrop
After an initial ColorDrop fill, Procreate offers a "Continue Filling" option. This allows you to tap on other areas of your artwork to apply the same color fill with the previously set Threshold. Alternatively, you can tap and hold in subsequent areas and drag to adjust the Threshold for each individual fill, providing granular control across your canvas.
Exploring Advanced Fill Techniques
While ColorDrop is excellent for solid colors, Procreate offers more sophisticated methods for creating richer and more complex fills, including gradients and patterns. These techniques often involve layering and utilizing specific Procreate features.
Filling Shapes with Gradients
Gradients add depth and dimension to your artwork, and Procreate provides several avenues for incorporating them into your shapes. Two prominent methods involve leveraging Alpha Lock and the Lighten blend mode.
Utilizing Alpha Lock for Gradients
Alpha Lock is a powerful tool that restricts painting to the existing pixels on a layer. When combined with gradient creation, it allows you to fill a pre-defined shape with a smooth color transition without affecting anything outside that shape.
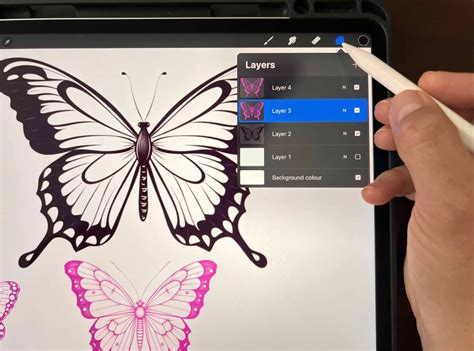
Step 1: Import Your Design and Enable Alpha LockBegin by importing your desired PNG image into Procreate or by drawing your own design. Navigate to the Layers panel, tap on the thumbnail of the layer containing your shape, and select "Alpha Lock" from the contextual menu. This action ensures that any subsequent drawing or coloring will be confined to the pixels already present on that layer.
Step 2: Create a Gradient on the Alpha-Locked LayerWith Alpha Lock enabled, you can now create your gradient directly onto the layer. Procreate offers various ways to create gradients, which can be found in dedicated gradient tutorials. The key is that the gradient will only appear within the boundaries of your alpha-locked shape.
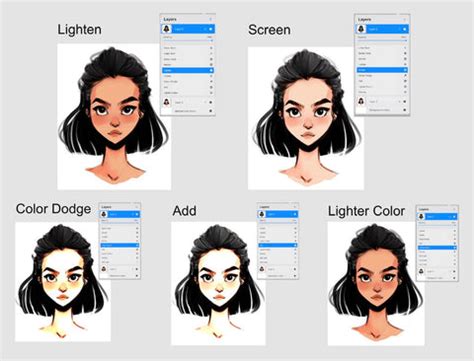
Employing the Lighten Blend Mode for Gradients
The Lighten blend mode offers a unique and often overlooked approach to filling shapes with gradients. This mode compares the colors of the layer it's applied to with the layer directly beneath it. When Lighten is active, only the lighter of the two colors will be visible in the final composite. This can be used with multiple solid colors, but it's particularly effective for applying gradients.
Step 1: Establish Your Base Shape LayersBegin by creating your shape(s) on a layer. While any color can be used, employing black is often recommended. This is because black is the darkest color, ensuring that a maximum amount of the gradient from the layer above will be visible when the blend modes interact. You can use brushes like the mystic stamp brush to fill in your shapes.
Step 2: Construct the GradientCreate a new layer directly above your shape layer. On this new layer, create your desired gradient.
Step 3: Apply the Lighten Blend ModeReturn to the Layers panel. Tap on the layer thumbnail of your gradient layer (the letter indicating the blend mode, typically "N" for Normal, will be displayed to the left of the checkbox). From the dropdown menu, select "Lighten." You will observe that the gradient now appears within the areas where your base shape layer was black, creating a visually appealing and integrated fill.
Filling Shapes with Patterns
Incorporating patterns into your designs can add texture, visual interest, and a distinct stylistic flair. Procreate provides flexible methods for achieving patterned fills, often involving pattern layers and clipping masks.
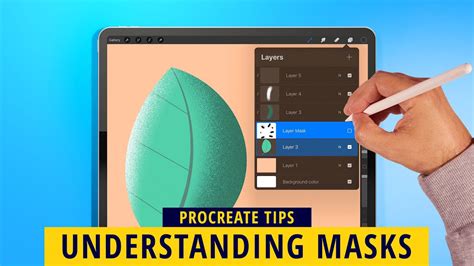
Using a Pattern Layer with a Clipping Mask
This method is ideal for applying intricate patterns to text or specific shapes.
Step 1: Create Your Base ElementOn your first layer, create the base element you wish to fill with a pattern. This could be text created with alphabet stamp brushes, or any other drawn shape. Ensure this layer has a solid base color.
Step 2: Prepare the Pattern LayerFor the layer that will contain your pattern, you have several options. You can import a pre-made pattern image, create your own seamless pattern within Procreate using a dedicated tutorial, or utilize a pattern brush. For instance, a star glitter brush can be used to fill an entire layer with a glittering pattern.
Step 3: Apply the Clipping MaskOnce your pattern layer is ready, open the Layers panel. Tap on the thumbnail of your pattern layer and select "Clipping Mask" from the contextual menu. This will constrain the pattern to only appear within the boundaries of the layer directly beneath it (your base element), effectively filling your shape with the pattern.
Employing a Pattern Brush for Direct Filling
Pattern brushes offer a more direct way to apply patterned textures. When using a pattern brush, you can choose to apply it directly within a shape, or use either an Alpha Lock or a Clipping Mask for more controlled application.
Using Alpha Lock with Pattern Brushes: Similar to filling with gradients, you can Alpha Lock your base shape layer and then use a pattern brush to "paint" the pattern into the shape. The pattern will only adhere to the existing pixels of the locked layer.
Using Clipping Mask with Pattern Brushes: Alternatively, you can create your pattern brush strokes on a separate layer above your base shape and then apply a Clipping Mask to that pattern layer, achieving the same result as using a pre-made pattern layer.
The flexibility of these methods allows for complex and layered designs. You can combine different techniques or reuse them to create highly detailed and customized fills, adding a unique artistic touch to your Procreate projects.
How To Create SEAMLESS PATTERNS In Procreate
Recolor: A Reimagined Tool for Quick Edits
Procreate has reintroduced the Recolor feature, previously removed but brought back due to popular demand. This tool offers a streamlined way to change the color of existing elements within your artwork.
Accessing Recolor via QuickMenu
The Recolor feature is exclusively accessible through the QuickMenu, which is disabled by default. To enable it, navigate to your Procreate settings and activate the "Color Fill" option within the QuickMenu settings. Once enabled, the Color Fill setting will be remembered, even if you exit and re-enter selections or close and reopen Procreate.
Utilizing Color Fill
With Color Fill enabled through QuickMenu, you can tap on different areas of your artwork to change their color. This is particularly useful for making quick adjustments or recoloring specific elements without needing to use the more involved ColorDrop or other filling methods.
Fill Layer: Respecting Selections and Alpha-Lock
The "Fill layer" command in Procreate is a powerful option that respects existing selections and the Alpha-Lock status of a layer. When you use Fill layer, the command will apply the active color to the entire layer, but only within the boundaries defined by any active selection or the constraints of an Alpha-Locked layer. This offers precise control for filling entire layers or specific masked areas with a uniform color.
By understanding and implementing these diverse methods for filling shapes in Procreate, artists can elevate their digital creations, achieving both efficiency and artistic precision. Whether it's a quick solid color fill with ColorDrop or a sophisticated patterned application using Clipping Masks, Procreate provides the tools to bring any visual concept to fruition.