Adding a frame or border to your photographs in Adobe Photoshop can elevate their visual appeal, providing a polished and professional finish. Whether you're aiming for a classic white border to impart elegance, a complex artistic design, or a functional frame for layout purposes, Photoshop offers a versatile toolkit. This guide explores several methods for creating frames and borders, from simple canvas adjustments to sophisticated vector mask techniques and the intuitive Frame Tool.
The Classic White Frame: Enhancing Elegance with Canvas Size
A straightforward yet effective way to add a touch of sophistication to your images is by incorporating a clean white frame. This method leverages Photoshop's Canvas Size functionality to expand the image area and then fill it with a chosen color.
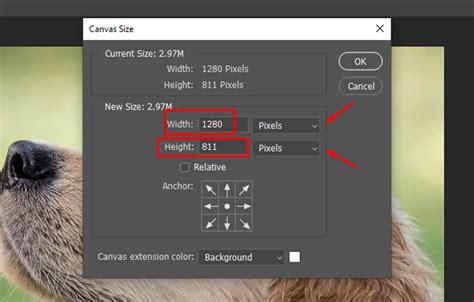
Begin by opening your desired image within Photoshop. The next crucial step is to determine the desired width of your frame. This is often visualized as a percentage of the original image dimensions. Once you have a clear idea of the frame's size, ensure that the Anchor point is set to the center of your canvas. This ensures that the expansion happens uniformly around your image. You will then select your desired frame color; white is a popular choice for its classic appeal. After setting these parameters and hitting "OK," you will have a basic frame. This is also an opportune moment to add any personal touches like a signature, watermark, or other identifying information.
To refine the frame, navigate to Image > Canvas Size. Here, you can precisely define the Width and Height of your frame, mirroring the percentage-based approach used earlier. Crucially, maintain the anchor in the center. You also have the option to select a "Canvas Extension Color" that harmonizes with your image, moving beyond a simple white. You can repeat this process multiple times, applying various frames and canvas extension colors to build up a layered framing effect. For custom frame colors beyond the standard options, select "Other" in the "Canvas Extension Color" dropdown menu.
Building Unique Borders: From Threshold to Layer Duplication
While frames often consist of solid rectangles, borders can be significantly more intricate, allowing for creative and complex designs. One method to achieve this involves transforming an existing image into a border element.
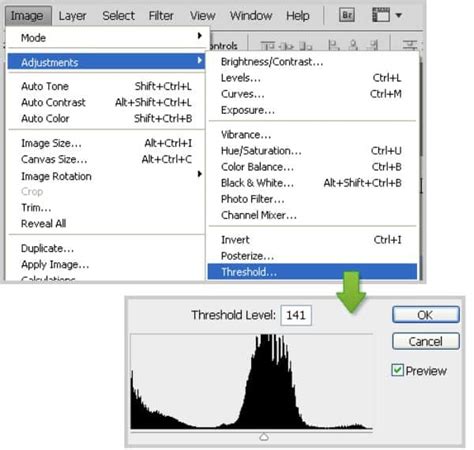
Start by selecting an image that will serve as the basis for your border. This could be a photograph of a skyline, be it urban or natural. For instance, using a photograph of trees reflected in a pond can yield interesting results. Next, access Image > Adjustments > Threshold. By setting a high threshold value (e.g., 125), you can convert the image into a high-contrast, silhouette-like graphic, effectively isolating the shapes you want for your border.
Once you have your threshold-adjusted image, select the entire image by pressing Ctrl/Cmd + A and then copy it using Ctrl/Cmd + C. Now, duplicate the current layer via Layer > Duplicate Layer. This duplication provides you with two identical border elements that can be manipulated. You can then strategically place the contents of each duplicated layer around the canvas to construct your original border. This technique allows you to create a unique, reusable border for any image you choose.
To apply this custom border to a new image, open the border file in Photoshop. Then, go to File > Place and select your main image file. At this stage, you will have your main image placed within the context of your custom border, though it might not yet appear fully integrated. Further adjustments may be necessary to blend the image and border seamlessly.
Decorative Frames with Vector Masks: Precision and Flexibility
For a more sophisticated and editable approach to decorative frames, vector masks offer a powerful solution. This technique can be implemented using either a standard layer mask (pixel-based) or a vector mask (path and point-based), with vector masks providing greater scalability and precision.
To create a vector mask, select a shape tool from the "Shape Tools" section of the Tools Panel. Ensure that the "Shape Layers" icon is active in the Options Bar. Set the "Radius" to suit your desired corner roundness; a higher number results in rounder corners. Once the shape is drawn, it's essential to center it within your image. Use Cmd+A (PC: Ctrl+A) to select all, then activate the Move tool (V key). Click the "Align vertical centers" icon and then the "Align horizontal center" icon to precisely center the shape.
Next, you'll need to arrange your layers. The layer mask layer should be positioned below the Smart Object layer containing your image. Apply a Clipping mask to "clip" the upper layer to the layer beneath it, ensuring the image conforms to the shape of the mask.
Now, you're ready to fill the bottom layer with a pattern to create the frame. Open the Fill dialog box and choose the desired pattern. If you've selected an additional group of patterns, a confirmation window may appear. Once the bottom layer is filled with your chosen pattern, apply a "Feather" to the vector mask. Click on the vector mask in the Layers panel to select it, then navigate to the Masks tab. Drag the Feather slider to the right until you achieve the desired softened edge effect. This frame can be reused on other images. To do so, right-click on the Smart Object layer name and select "Replace Contents." Then, choose a new background image to incorporate into the decorative frame.
When replacing the content, if the new image is smaller than the frame, you'll need to resize it. Turn off layer visibility for all layers except the new one by Option+Clicking (PC: Alt+Click) on its visibility icon. Use Cmd+T (PC: Ctrl+T) for Free Transform. Hold Shift+Option (PC: Shift+Alt) while dragging a corner handle to scale the image until it extends slightly beyond the canvas edges, obscuring the checkerboard pattern. Press "Return" (PC: "Enter") to accept the transformation.
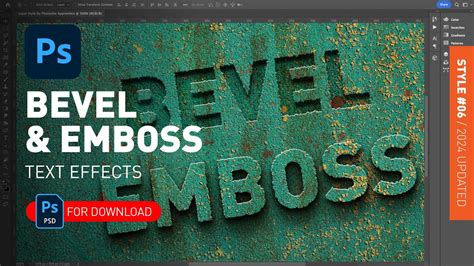
Further enhancements can be made by applying a "Bevel and Emboss" to the background image and a "Drop Shadow" and "Bevel and Emboss" to the vector mask layer, adding depth and dimension.
Photoshop Vector Mask Tutorial For Beginners
The Frame Tool: Intuitive Image Placement in Modern Photoshop
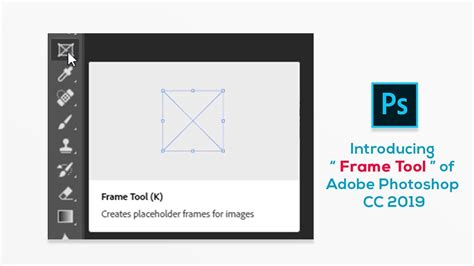
Photoshop CC 2019 introduced the Frame Tool, a significant feature designed to simplify the process of placing images into shapes. This tool transforms frames into a distinct layer type, automatically masking any image placed within them. When an image is placed into a frame, it becomes a Smart Object, allowing for non-destructive editing and resizing without loss of clarity.
To utilize the Frame Tool, select it from the Toolbar; it's identifiable by an icon resembling a box with an "X" through it. In the Options Bar, choose the desired shape for your frame, such as a rectangle or an ellipse. You can reposition the frame as you draw by holding down the spacebar. To constrain a rectangular frame to a perfect square, hold down the Shift key while dragging. Releasing the mouse button creates the frame, which appears as a new "Frame layer" in the Layers panel. The thumbnail on the left represents the frame itself, while the thumbnail on the right displays the content within.
To place an image into the frame, go to File > Place Embedded or Place Linked. "Place Embedded" embeds the image directly into your document, while "Place Linked" creates a link to the external file. The image will automatically be placed and resized to fit within the frame boundaries. The content thumbnail in the Layers panel will update, and a Smart Object icon indicates the image's non-destructive nature.
Switching between selecting the frame and the image within it is straightforward. Clicking on the image inside the frame selects the content. Clicking directly on the frame's outline selects the frame itself. To select both, double-click on the image. Free Transform (Cmd+T or Ctrl+T) is used to resize the image within the frame. In newer versions of Photoshop, the aspect ratio is locked by default during Free Transform, eliminating the need to hold Shift. Holding Alt (Win) / Option (Mac) while dragging a handle resizes the image from its center. To resize both the frame and its contents simultaneously, ensure both are selected before using Free Transform.
Replacing an image within a frame is as simple as selecting the frame and using File > Replace Contents. Photoshop will instantly substitute the existing image with the new one.
While standard layer styles don't directly apply to frames, you can add a stroke by clicking the swatch below the "Stroke" option.
Creating a Traditional Wood Frame: Canvas Expansion and Layer Styles
A classic approach to creating a picture frame involves expanding the canvas and then using layer styles to add depth and texture. This method is particularly effective for achieving a realistic wood-grain effect.
Begin by duplicating your Background layer (Ctrl+J or Command+J). This preserves your original image. Next, you need to add extra space around your photo, which will become the frame. Go to Image > Canvas Size. Enter the desired amount of space for both Width and Height; for a thick frame, values like 1.5 inches are suitable. This added space will appear around your photo.
Add a new blank layer above your existing layers by clicking the "New Layer" icon at the bottom of the Layers palette. With this new layer selected, go to Edit > Fill (or Shift+F5). In the Fill dialog box, set "Contents" to "Pattern" and select Photoshop's built-in wood texture. Ensure "Blending Mode" is "Normal" and "Opacity" is 100%. This layer is now filled with the wood pattern.
To reveal your photo through the wood pattern, you'll use a layer mask. Hold down Ctrl (Win) / Command (Mac) and click on the preview thumbnail for your photo layer (Layer 1). This loads a selection around your photo. Invert this selection by going to Select > Inverse (or Shift+Ctrl+I / Shift+Command+I). With the frame area selected, click the "Layer Mask" icon at the bottom of the Layers palette. This applies a mask to your wood pattern layer, making the photo visible in the center.
To give your frame depth, select the frame layer itself (not the mask) by clicking its thumbnail. Apply the "Bevel and Emboss" layer style. Within the Bevel and Emboss options, set "Technique" to "Chisel Hard" and increase "Depth" to around 150%. Adjust the "Highlight Mode" and "Shadow Mode" opacity to around 50% and 60% respectively.
If you wish to alter the frame's color, click directly on the words "Color Overlay" in the Layer Style dialog. Choose your desired color from the Color Picker. To retain the wood texture while applying the new color, change the "Blend Mode" of the Color Overlay to "Color Burn."
Finally, select your photo layer (Layer 1) and add an "Inner Shadow" layer style. Lower the "Opacity" of the Inner Shadow to around 65% to create a subtle shadow effect, enhancing the three-dimensional appearance of the frame.
By mastering these techniques, you can effectively add frames and borders to your images in Photoshop, enhancing their visual presentation and creative impact. Whether you opt for simple elegance, intricate designs, or functional layouts, Photoshop provides the tools to bring your vision to life.