Photo editing in Adobe Photoshop is an interesting and exciting process. It can turn an unfinished picture into a harmonious “candy” that gives aesthetic pleasure. With the help of the toolbox, you can do everything from changing the foreground color to creating complex animation. Sometimes, your task while editing is to create a composite image from two different elements, or to remove a crowd in front of the Colosseum, or to create a nice vignette of a man you respect. In all these cases, the question of how to use smooth edges in Photoshop inevitably arises. In particular, this skill is necessary to make a composite image look natural. After all, it often happens that after cutting a person, fruit, or another object on the image, you notice jagged edges. They are not good for your project. After all, with rough edges, a picture looks sloppy and unattractive. To address this need for smooth edges, this step-by-step guide is designed to help you learn how to use smooth edges in Photoshop, or how to feather in Photoshop. For your convenience, commonly problematic steps in the sections on feathering edges (Photoshop) and refining smooth edges (Photoshop) are accompanied by answers and useful tips. So, let's start the enjoyable, creative, and smooth process of creating blurred edges in your photos!
Why are Photoshop Smooth Edges Essential?
Have you ever cut a person, animal, fruit, or another object in a photo in Photoshop CC and pasted it into a different background? If your answer is "Yes," then you've probably experienced jagged and pixelated edges on your cutout, especially in the area of hands, feet, and hair. Photoshop smooth lines will help you solve this problem.
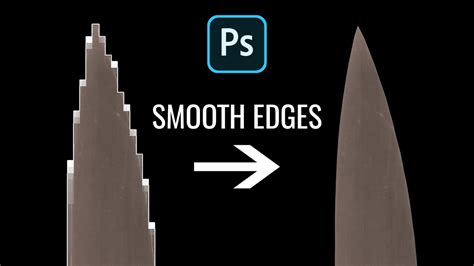
There are several reasons why this happens: Selection tools don't perfectly circle areas with hair or fur. The low resolution of a picture makes the edges look pixelated. There's a subtle contrast between the object and its original background. In any case, uneven edges are not good. After all, when you paste the cutout object onto a different background or object, it may look completely out of place, as if it were artificial. Smooth edges, on the contrary, look very natural. For example, if you stick together two images of yourself taken by a camera in the same location but in different dresses, it will seem as if twins are standing next to each other. That's why you need to refine your picture in Photoshop with anti-aliasing and feathering edges.
Why Should You Use Feathering in Photoshop?
If you want to design logos for your company, create a selection of pictures for a collage, edit product photos for an online store, or prepare images for a magazine, it's important that the content is perfect and clear. Feathering in Photoshop can help you with this. But how? Everything is simple: this process smooths the edges of the selected object so that the transition between edge pixels and the background pixels is smoother. It's worth noting that there is no loss of details here, since the photo editor only changes the outermost pixels, leaving the rest unaffected.
How to Soften Edges in Photoshop: A 5-Stage Approach
There are several simple ways to smooth edges in Photoshop, each good in its own way. In most cases, the process boils down to the following actions:
- Select a tool: Magic Wand for uniform colors, Elliptical Marquee for circular objects, or one of the Lasso tools for freeform shapes.
- Choose anti-aliasing in the options bar to smooth the edges of your selection.
- Click and drag your chosen tool in the image window to select the area you want to edit.
Below, we'll explore one of the easiest methods for smoothing lines in Photoshop, step by step.
Stage 1: Extracting a Photo - Basic Adjustments
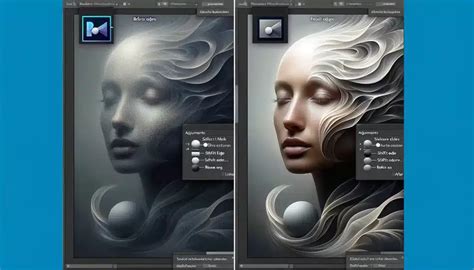
Anti-aliasing and feathering take place in 5 stages. To start softening your edges, you should create a proper selection for the foreground. For this, "Select and Mask" (formerly Refine Edge in older versions) is a very useful tool. Note: "Refine Edge" may be absent in newer versions of Photoshop, so this guide includes the more sophisticated path for accessing its functionality. At the same time, some people skip this step and proceed to Photoshop feathering directly. It's up to you what you choose before you blur the edges. Just keep in mind that the more prepared your raw material (in this case, the selected image), the easier you'll fit it into a new photo.
If you want to use the "Select and Mask" functionality, follow these steps:
- Choose the "Select" menu and proceed to "Select and Mask." Alternatively, use a quick selection tool (like Quick Selection, Magic Wand, or Lasso), then choose "Select and Mask."
- After clicking "Select and Mask," refine your selection using the functionality in the Properties Panel. It is by using the selection of the main object in this way that you get the perfect result.
- Go to "View Mode" to choose how the selection preview is presented (Onion Skin, Marching Ants, Overlay, On Black, On White, Black & White, or On Layers) and refer to the Opacity slider to adjust it.
- Use the Quick Selection brush to make broad-brush changes to the selection.
- Use the Refine Edge brush (often found within the Select and Mask workspace) to make precise adjustments, especially around areas like hair and fur.
- Add final improvements with the Brush tool if needed.
Advanced selections & masking in Adobe Photoshop - Select Anything! - Adobe Photoshop CC
Stage 2: Feather Edges - The Most Common Way to Refine Your Selection
There is a wide selection of tools that help to make your selection in the best way. Pay special attention to feathering. In general, Photoshop feathering is used for softening the transition between a selection and a background. This tool perfectly addresses the concern of how to use smooth edges in Photoshop. Moreover, most people use only this tool and achieve awesome results when they want to blur the edges of cut-out objects. So, how can you use Photoshop feathering for anti-aliasing correctly and effectively? This simple guide is the answer:
- Method 1: Via the Properties Menu (after masking): After you have created your selection and are working with it (e.g., on a new layer or mask), you can access feathering options. If you've pasted your selection onto a new layer, you might need to re-select the object.
- Method 2: Via the Select Menu:
- Access the Marquee tool (Rectangular or Elliptical) or any other selection tool to make a selection that you'll copy and paste onto a new image later. Complete this step if you skipped the previous stage.
- Drag your cursor around the edges of the image to create a border - the space for those smooth edges Photoshop introduces.
- Access the Feather tool through the "Modify" option in the "Select" main menu.
- Choose the value of your Photoshop feather in the dialog box by typing a number in the "Feather Radius" field.
Wondering how to feather in Photoshop correctly? The feather radius you enter sets the number of pixels by which the edges of your selection will be softened. So feel free to play with these numbers. For a good start, choose something between 1 and 5 pixels for subtle adjustments, or 20-30 pixels for a more pronounced vignette effect. Wondering how to use smooth edges in Photoshop better if the soft edges become too wide? In this case, simply repeat the previous step, but now enter a smaller number. In the opposite case, too narrow edges can be optimized by using a wider radius.
As a result of these actions, you'll receive a vignetted image. In certain cases, that will be enough to smooth edges in Photoshop. However, most editing goals require further retouching of a photo after completing the adjustments with Photoshop feathering.
Tip: For a non-destructive workflow, it's highly recommended to create a layer mask from your selection rather than directly feathering the selection itself. Then, you can apply a layer mask feather or a Gaussian Blur to the mask.
Stage 3: Photoshop Blur Tool - For a Professional Finish
At an advanced level, the Photoshop Blur tool, particularly Gaussian Blur, is an excellent method to create a smooth transition in terms of lighting and to accurately merge two images. Why is it so popular among creative people? It's because it's able to blur the edges in the most natural way.
So, how to feather edges in Photoshop using blur? This simple guide is the answer:
- Identify the Edges: Determine the harsh edges by holding Alt (or Option on Mac) and using the mouse scroll wheel to zoom. You can still create Photoshop blur edges if you don't have a mouse; use the Zoom tool to view the edges that need to be refined.
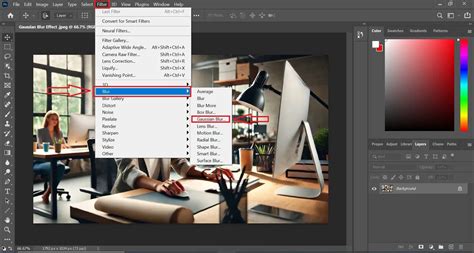
- Prepare the Selection: Ensure you have a selection or a layer mask ready. If you're working with a selection, it's often best to convert it into a layer mask first. Select your layer, then click the "Add layer mask" icon at the bottom of the Layers panel.
- Apply Gaussian Blur (to the mask): With the layer mask thumbnail selected in the Layers panel, go to "Filter" > "Blur" > "Gaussian Blur."
- Adjust the Radius: The recommended value for Gaussian Blur in Photoshop depends on the specific image and the desired effect. Start with a low value (such as 1-5 pixels) and increase as needed. The larger the radius, the smoother and broader the edge transition will be. This will result in accurate blurring that doesn't touch the surrounding area unintentionally.
- Use the Strength Slider (if applicable): While Gaussian Blur itself doesn't have a "Strength" slider, you can control the intensity of the blur by adjusting the layer mask's opacity or by using blending modes if you were applying a blur directly to a layer.
Alternative: The Blur Tool
While Gaussian Blur is generally preferred for its controlled and non-destructive nature when applied to a mask, Photoshop also has a dedicated Blur Tool.
- Select the Blur Tool from the toolbar.
- Press
]or[to adjust the size of the brush. This is a necessary procedure that provides smooth selection in Photoshop. We advise selecting a size that's slightly larger than the edge thickness. - Adjust the "Strength" slider in the options bar. The higher the percentage, the more vivid the application of the Photoshop blur tool becomes.
- Carefully paint over the harsh edges you want to soften.
Important Note: The Blur Tool is a destructive editing tool if applied directly to a layer. It's best used on a duplicated layer or with careful, light strokes.
Stage 4: Evaluate the Result and Consider Post-Processing
Now you know how to soften edges in Photoshop. But that’s not all. When applying so many magic tricks to a photo, it's important to stop and evaluate the result of each action. Check whether you've achieved the right effect at each stage:
- Stage 1 (Selection): After practicing the main actions in the "Select and Mask" workspace, be sure that the selection you wanted is completely present. In other words, you've chosen enough of the photo area so as not to cut something important after all the adjustments.
- Stage 2 (Feathering): The edges on your selections are of an optimal softness and don't appear harsh. If you didn't work with them enough, an inverse effect will occur, making the edges too soft or blurry.
- Stage 3 (Blurring): All the details on the blurred edges are preserved where needed, and the transition is smooth without creating an unnatural halo.
If everything looks good, meaning you have made the edges perfect, consider post-processing. After making so many important adjustments, all you'll need is some basic editing that won't destroy the quality of your photo. Basic color correction, contrast adjustments, or sharpening can enhance the overall image.
Stage 5: In Case Something Goes Wrong - Use a Life Preserver!
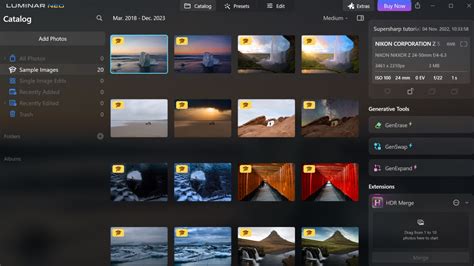
If you realize that after spending so much time and energy on creating smooth edges in Photoshop, the result isn't good, don't get upset too early. There are several programs on the market that are simpler to use and can create soft edges of the same quality. For instance, Luminar Neo offers a more intuitive approach with many useful tools for working with photos, often featuring smooth sliders for adjustments. Luminar Neo can handle many tasks described above and even comes with a feathering tool similar to Photoshop's.
Among Luminar Neo's numerous tools is one for blurring edges, which allows you to divide an image into layers and apply simple tools to each. Masking can be more straightforward in Luminar Neo compared to Photoshop's multi-step "Select and Mask" workspace. By covering all the basic needs for creating smooth edges while remaining simple and user-friendly, Luminar Neo can be a helpful alternative for those struggling with Photoshop's complexity.
Final Thoughts on Photoshop Blur Edges
Photoshop smooth edges and cutting off the edges of the main object can seem like a puzzle. But using the tips provided, this process will not take you much time, and you'll get the most realistic picture that will harmoniously fit into the selected background or blend with another picture as if it were one. We wish you success and creative inspiration!
One of Photoshop's most powerful features is the ability to cut out an element from an image using the Selection tool and a layer mask, and then add it into a different image. It's a fundamental component of the photo editing process. And once you've combined elements from multiple images, you need to smooth out their jagged edges in order to make them look natural occupying the same space. Adding something new to an existing image? Anti-aliasing gently softens the opacity and color transition between edge pixels and background pixels, preserving the image's clarity and detail.
Another way to smooth the edges of your image is feathering. Feathering basically softens up the edges of your selection by gently fading between the pixels on the border and the pixels in the surrounding area.
- Feather it: Enter a number into the "Feather Radius" field. This number determines how many pixels away from the edge of your selection the Feather tool will go before it starts smoothing and blending.
- Strengthen it: Use the "Strength" drop-down menu at the top of the screen (if available in your workflow, e.g., with the Blur tool) to select how intense you want the blurring to be.
Smooth edges when cutting out subjects from the background to prevent jagged edges. Minimal smoothing has little effect on quality. So, how can you solve this problem? Smoothing image edges enhances clarity and seamlessly integrates the image content.
Advanced Techniques and Workflow Tips
This tutorial has focused on using the Feather option and Gaussian Blur for a non-destructive editing process.
- Open your Image: Start by opening the image you want to work with in Photoshop.
- Duplicate Layer: Use the keyboard shortcut "Ctrl/Command + J" to duplicate the layer. This is a crucial step for non-destructive editing.
- Make a Selection: You can use any selection tool, but the Object Selection Tool is highly recommended for its intelligence. Click on the Object Selection Tool in the toolbar or press "W" on your keyboard. The Object Selection Tool in Photoshop is smart and can recognize objects.
- Refine Selection (Select and Mask): After selecting the object or area, go to "Select" > "Select and Mask." Here you can fine-tune your selection using various brushes.
- Feathering Options: Within "Select and Mask," you can adjust the "Feather" slider to soften the edges. The larger the radius, the smoother and broader the edge transition will be. Start with a low value (such as 1-2 pixels) and increase as needed. You can also explore the "Smooth" option in the "Modify" menu (accessible from the main "Select" menu as well, or sometimes within Select and Mask itself) to further smooth the edges.
- Output Options: In the "Select and Mask" interface, you can choose output options such as outputting the selection, a new layer, or preferably, a layer mask in the "Output To" module.
- Gaussian Blur (on Mask): If you need further smoothing beyond feathering, you can apply a Gaussian Blur directly to the layer mask. Select your layer mask thumbnail, then go to "Filter" > "Blur" > "Gaussian Blur." Adjust the radius as needed.
Automating the Process:
For repetitive tasks, consider using Photoshop's Actions panel. Click on the "Create new action" button in the bottom right corner of the Actions panel, give your newly created action a name, and a function key (shortcut). Then, proceed with your normal workflow: open the Feather and Smooth panels in Photoshop, input your commonly used parameters, and then stop the action recording.
Enhancing Your Workflow with Hardware:
While these tips can help you get better results, the right tools can significantly elevate your Photoshop experience. For instance, TourBox is a creative tool beloved by digital artists and designers. TourBox's built-in presets help you quickly master this creative controller, while advanced settings provide unlimited possibilities. TourBox is designed to fit comfortably in one hand, leaving your other hand free to use a graphics tablet or mouse.
Key Takeaways for Smooth Edges:
- Subtlety is Key: Always start with a lower feather radius or blur value. You can always increase it, but it's harder to undo over-softening.
- Multiple Passes: Don't try to get the perfect result in one go. Refine your selection, apply feathering, then consider a subtle blur.
- Zoom In: Zoom in close to examine the edges and ensure your adjustments are precise and look natural.
Mastering smooth edges in Photoshop is a process that requires patience, precision, and a keen eye for detail, but with these techniques, you can achieve professional-looking results.