Adobe Lightroom stands as a cornerstone in the digital photography landscape, offering a powerful suite of tools for photographers of all levels. While its extensive features can initially seem daunting, at its core, Lightroom is designed to streamline three fundamental aspects of a photographer's workflow: organizing, post-processing, and exporting images. This article delves into the intricate workings of Adobe Lightroom Classic, providing a detailed walkthrough for beginners and offering insights that can benefit even advanced users. It's important to note that this guide focuses on Lightroom Classic, distinct from the newer, cloud-centric "Lightroom / Lightroom CC." For a deeper understanding of the differences, further resources are available.
Introducing Lightroom Classic: More Than Just an Editor
Lightroom Classic is not merely a photo editor; it's a comprehensive photo management and editing software. It empowers photographers to sort, refine, and export their images efficiently. This multifaceted nature is where its true power lies, offering an end-to-end solution for image management.
The Three Pillars of Lightroom Classic
Organizing Your Photos: One of Lightroom's primary functions is to help photographers sort and organize their image libraries. When you import photos, Lightroom displays their location on your computer's file structure, typically visible in a panel on the left side of the screen. It's crucial to understand that photos on your computer do not automatically appear in Lightroom. Importing is a necessary step to bring them into the Lightroom catalog. Beyond simply showing file locations, Lightroom offers numerous ways to categorize and find specific images. Features like star ratings, flags, and collections allow for detailed organization, making it easy to locate cherished photographs later.
Editing Your Photos: While organization is key, Lightroom's editing capabilities are equally vital. It provides a robust set of post-processing tools, covering essential adjustments like brightness, contrast, color, and sharpness. A significant advantage is its ability to perform local edits, allowing specific areas of an image to be adjusted without affecting the rest. Although Lightroom doesn't possess the same breadth of deep manipulation as software like Photoshop, its features are more than sufficient for the vast majority of photographic editing needs. Many professionals find Lightroom's built-in tools adequate for their entire editing workflow.
Exporting Your Photos: The final crucial function of Lightroom is exporting images. This process is essential for sharing, printing, or using your edited photos in various contexts. Lightroom allows for precise control over export settings, including file size, compression, resolution, and file naming conventions. This capability is particularly useful for managing file sizes for online sharing or preparing images for professional printing. When you export a photo, Lightroom creates a new file with all your applied edits, leaving the original image untouched.
Why Lightroom Stands Apart: The Power of Non-Destructive Editing
A fundamental aspect that distinguishes Lightroom from other editing software, including Photoshop, is its non-destructive editing approach. When you make a change to a photo within Lightroom, that alteration is not applied directly to the original file. Instead, the edit is recorded in the Lightroom catalog.
What is Non-Destructive Editing? | Photoshop Tutorial | PHLEARN
The Non-Destructive Workflow Explained
Imagine you brighten a photo in Lightroom. If you were to open that same photo in a different application, it would appear unchanged. This is because the original image file remains precisely as it was. The "edit" is a set of instructions stored within Lightroom's catalog. This system is not a limitation but a powerful feature.
Benefits of Non-Destructive Editing:
- Preservation of Originals: Your original image files are never altered. This means you can always revert to the unedited version or re-edit at any time without fear of permanent changes.
- Flexibility: You can experiment with different edits and return to any previous stage of your work.
- Safety Net: It's virtually impossible to "ruin" an original file beyond repair within Lightroom. Unlike software where saving can overwrite original data, Lightroom's catalog-based system ensures your source files are always safe.
- Efficiency: While changes are only visible within Lightroom until exported, the export process applies all your edits to create a new, final image. This allows for a highly efficient workflow, especially when processing multiple images.
This non-destructive workflow is a critical feature that makes Lightroom an indispensable tool for nearly every photographer.
Demystifying the Lightroom Catalog: The Heart of the System
The term "catalog" is central to understanding how Lightroom functions. A Lightroom catalog is essentially a database that stores all the information related to your photo library. This includes details about where your images are stored, any keywords or metadata you've added, and, crucially, all the editing adjustments you make.
How Catalogs Work
When you import photos into Lightroom, you are not actually moving or copying the image files into the Lightroom application itself. Instead, you are importing a "reference" to the file into the catalog. Lightroom then keeps track of this reference and all associated data, such as edits, ratings, and keywords.
- Single Database: A catalog is a single file that holds all the modifications and information for every photo within it.
- Storage Efficiency: Catalogs are remarkably efficient in terms of storage space. Even with thousands of photos and extensive edits, a catalog file can remain relatively small, often just a few hundred megabytes.
- Importance of the Catalog: The catalog is vital. It contains all your organizational data and editing history. Losing a catalog means losing all this information. Therefore, regular backups are essential.
- Multiple Catalogs: While you can use multiple catalogs (e.g., one for each major project or client), for beginners, it's recommended to start with a single catalog to simplify management.
Creating and Managing Catalogs
When you first launch Lightroom, you'll be prompted to create a catalog. This catalog will serve as the central hub for your photo management. You can choose where to store this catalog file; an SSD (Solid State Drive) is recommended for optimal speed, though external drives can also be used.
Importing Photos into Lightroom Classic
The process of bringing your images into Lightroom begins with the Import Dialogue. This module is designed to be navigated from left to right, guiding you through the source of your images, the actions to take, and the destination for them.
The Import Dialogue Explained
- Source (Left Panel): Here, you select where your images are located. This could be your computer's hard drive or a connected memory card.
- Options (Top Middle): When importing new images, you'll typically select the "Copy" option. This ensures your original files are duplicated to a designated location on your computer, keeping them safe and organized.
- Image Selection (Middle): Thumbnails of your images will appear, usually pre-selected. You can deselect any images you don't wish to import.
- Destination (Right Panel): This is where you choose the folder on your computer where Lightroom will store the copied images. There are also options for renaming files, adding keywords, and applying metadata during import, which are useful for establishing a robust workflow from the outset.
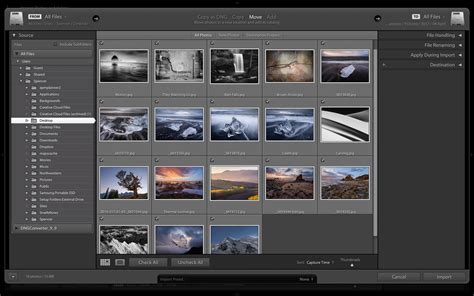
Once you've configured these settings, clicking the "Import" button initiates the process. It's advisable to allow Lightroom to complete the import without interruption.
Navigating Lightroom's Modules: Library and Develop
Lightroom is structured into various modules, each dedicated to a specific part of the workflow. The two most fundamental modules for beginners are the Library and Develop modules.
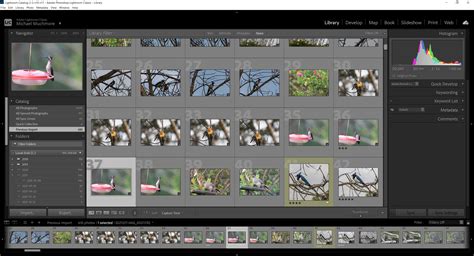
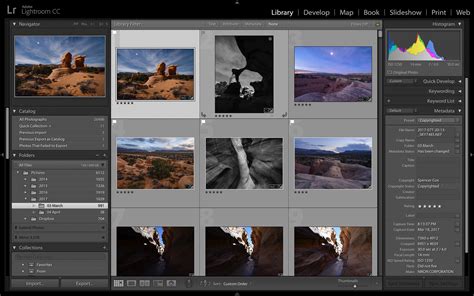
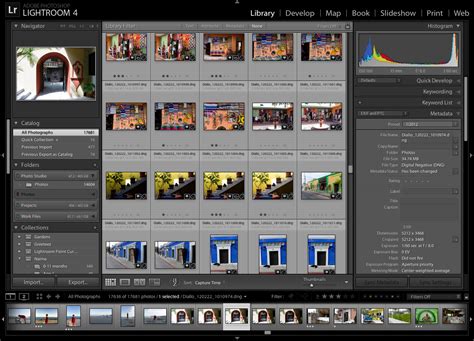
The Library Module: Organization and Culling
The Library module is your command center for organizing, sorting, and reviewing your imported photos.
- Navigator Panel: On the left, you'll find the Navigator panel, which includes a "Folders" section displaying your imported image directories.
- Center View: The main area displays either a grid of thumbnails or a single, larger image. Many users prefer the single-image view, using the filmstrip at the bottom to cycle through images.
- Evaluation Tools: Within the Library module, you can zoom in to 100% (by clicking "1:1" in the Navigator panel) to check critical focus and detail. This is crucial for deciding if an image is worth further editing.
- Organization Features: While it's tempting to immediately start applying ratings and flags, it's often best to establish a consistent organizational system first. Features like star ratings, color labels, and flags can be assigned to categorize images, making them easily searchable. "Collections" are virtual groupings of photos that don't affect their physical location on your hard drive, offering another layer of organization.

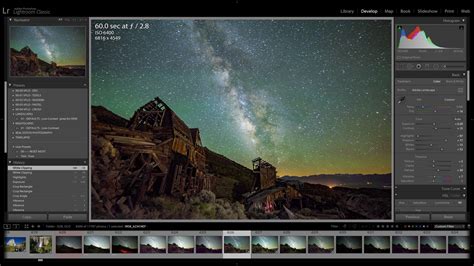
The Develop Module: Bringing Images to Life
The Develop module is where the magic of post-processing happens. Here, you transform your raw images into polished photographs.
- Accessing Develop: You transition to the Develop module by clicking the "Develop" tab at the top right of the screen.
- Right-Hand Panels: The right-hand side of the Develop module houses various panels containing editing tools. Key panels include:
- Basic: This panel offers fundamental adjustments like White Balance, Exposure, Contrast, Highlights, Shadows, Whites, and Blacks. These sliders are the workhorses for correcting and enhancing the overall look of your image.
- Tone Curve: Provides finer control over the tonal range of your image.
- HSL / Color / B&W: Allows for detailed manipulation of individual colors, including Hue, Saturation, and Luminance.
- Effects: Contains tools for Clarity, Texture, Dehaze, and Vignetting, which add punch and style to your images.
- Detail: This panel is where you can adjust Sharpening and Noise Reduction.
- Optics: Used for lens correction and removing chromatic aberration.
- Geometry: For correcting perspective distortion and straightening horizons.
Essential Develop Module Tools for Beginners:
- White Balance: Correcting the color temperature to ensure whites appear white and colors are accurate.
- Exposure: Adjusting the overall brightness of the image.
- Highlights and Shadows: Recovering detail in the brightest and darkest areas.
- Contrast: Controlling the difference between light and dark tones.
- Clarity: Enhancing mid-tone contrast to bring out detail and texture.
- Vibrance/Saturation: Adjusting the intensity of colors.
For RAW files, exploring the "Camera Calibration" section can offer quick starting points by applying camera-specific profiles, giving your RAW image a more "finished" look akin to JPEGs.
Post-Processing Your Photos in Lightroom
Lightroom's editing capabilities are extensive, allowing for both global and local adjustments.
Global Adjustments
These are adjustments that affect the entire image. The Basic panel is your primary tool for these. By carefully manipulating the sliders for Exposure, Contrast, Highlights, Shadows, Whites, and Blacks, you can significantly improve the dynamic range and tonal balance of your photograph.
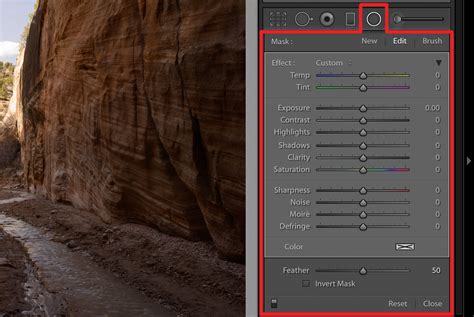
Local Adjustments
Lightroom also excels at making targeted edits to specific parts of an image. Tools like the Adjustment Brush, Graduated Filter, and Radial Filter allow you to apply edits (such as changes to exposure, color, or sharpness) to selected areas. This is invaluable for drawing attention to a subject, brightening a face, or darkening a distracting background.
Presets: A Starting Point, Not an End Goal
Lightroom offers a vast library of presets â pre-defined sets of editing adjustments. These can be a great way to quickly experiment with different looks or to apply a consistent style to a series of photos. However, it's crucial to remember that presets are best used as a starting point. Fine-tuning the edits after applying a preset will yield superior results and help you learn more about the editing process.
Exporting Your Photos from Lightroom
The final step in the Lightroom workflow is exporting your edited images. This process makes your photos ready for sharing online, printing, or using in other applications.
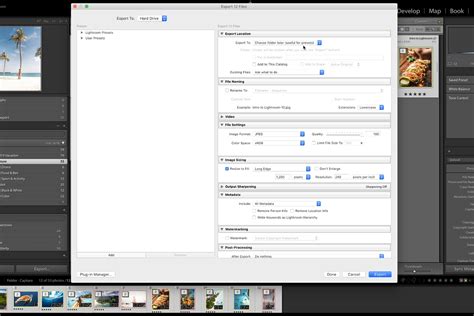
Export Settings Explained
When you choose to export (File > Export), a dialogue box appears with numerous options:
- Export Location: Specifies where the exported files will be saved on your computer.
- File Settings:
- File Type: Commonly JPEG for general use, TIFF for high-quality printing, or DNG for a universal RAW format.
- Color Space: sRGB is standard for web and most consumer printing, while Adobe RGB or ProPhoto RGB offer wider color gamuts for professional printing.
- Quality: For JPEGs, a quality setting of 80-100 is typical.
- Image Sizing: Allows you to resize your image to specific dimensions or resolutions. For printing, setting the Resolution to 300 pixels per inch is common.
- Watermarking: You can add a text or graphical watermark to your exported images to protect your copyright.
By carefully selecting these settings, you can ensure your exported photos meet the requirements for their intended use.
Backing Up Your Lightroom Catalog
Given the catalog's critical role in storing all your editing and organizational data, regular backups are non-negotiable. Lightroom provides a built-in backup system.
Lightroom's Backup Feature
When you close Lightroom, you may be prompted to back up your catalog. It's highly recommended to enable this feature. You can configure the backup frequency and location. It's best practice to store your catalog backups on a separate physical drive from your primary catalog file. This safeguards your work against hardware failure.
Conclusion
Adobe Lightroom Classic is a powerful and indispensable tool for photographers. By understanding its core functionsâorganization, editing, and exportâand embracing its non-destructive workflow, you can significantly enhance your photographic process. While the software offers a deep feature set, starting with the fundamentals of importing, organizing in the Library module, making adjustments in the Develop module, and exporting correctly will lay a strong foundation for mastering this essential photography application. Remember to regularly back up your catalog to protect your valuable work.