The world of video production often involves navigating a complex landscape of technical specifications, and aspect ratios are a prime example. Clients may request content shot for "2:35" or "1:85," leaving creators to decipher these seemingly cryptic numerical relationships. This article delves into the fundamental concepts of pixel aspect ratio and its practical application within DaVinci Resolve, providing a clear understanding of how to manipulate and achieve desired aspect ratios for diverse viewing platforms.
The Foundation: Understanding Pixels and Ratios
At its core, an aspect ratio describes the proportional relationship between a video's width and its height. High Definition (HD) video, a prevalent standard, typically operates with a resolution of 1920 pixels wide by 1080 pixels tall. To derive a single numerical representation of this ratio, we divide the width by the height: 1920 / 1080 ≈ 1.77. This is often referred to as 16:9, and it signifies that for every 16 units of width, there are 9 units of height. Thus, a client stating they shot for "1.77" or "16:9" means their footage is intended to fill this standard HD screen.
However, filmmaking and television have a rich history of diverse aspect ratios, each contributing to a distinct visual aesthetic. Understanding these historical and contemporary standards is crucial for effective storytelling and platform optimization.
A Brief History of Aspect Ratios
The evolution of aspect ratios is intrinsically linked to the development of visual media.
- The 4:3 Standard: In the early days of filmmaking, the standard film size was 4:3. This ratio, somewhat tied to the principles of the "golden ratio," offered pleasing visual aesthetics. The birth of this aspect ratio is significantly linked to Thomas Edison. In 1909, the Motion Picture Patents Company, controlled by Edison, declared the 4:3 aspect ratio as the standard for all American films to be shot and screened. Similar to the 4:3 aspect ratio is the 1.37:1 ratio, also known as the Academy ratio, which closely followed. This was the dominant aspect ratio for television for many decades.

The 16:9 Revolution: The 16:9 aspect ratio has become the international standard for high-definition television. This aspect ratio falls between the older 4:3 and the wider 2.35:1, making it suitable for displaying almost all types of films and content. Today, 16:9 is the preferred aspect ratio for streaming videos and most online content, providing a balanced viewing experience across various devices.
The Rise of Widescreen Cinema (2.35:1 and beyond): The 2.35:1 widescreen aspect ratio, often referred to as "cinemascope," originated in the 1940s as movie theaters sought to compete with the growing popularity of television. This wider format offered a more immersive cinematic experience, allowing for grander vistas and a broader sense of scope. For instance, if a client shoots in HD (1920 pixels wide) but desires a 2.35:1 aspect ratio, they are effectively working with a resolution of approximately 1920 x 817 pixels. This implies cropping the top and bottom of the standard 1080-pixel height. The standard cinematic widescreen aspect ratio is often cited as 2.39:1, which translates to a resolution of 4096x1716 pixels.
Vertical Video (9:16): In contrast to cinematic widescreen, the 9:16 ratio provides a narrow, vertical frame. This aspect ratio is predominantly used for short-form mobile video content, such as TikTok, Instagram Stories, and YouTube Shorts. The common size for vertical short videos with a 9:16 aspect ratio is 1080x1920 pixels. Compared to other aspect ratios, the 9:16 ratio provides a narrow frame that can make it challenging to create visually appealing compositions with significant depth, requiring creative framing techniques.
The existence of various aspect ratios is a testament to the continuous evolution of film, television, analog photography, and digital photography, each responding to technological advancements and changing audience consumption habits.
Implementing Aspect Ratio Changes in DaVinci Resolve
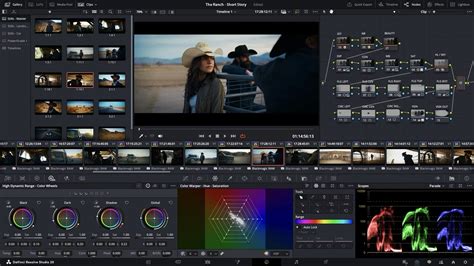
DaVinci Resolve, a powerful and versatile video editing software, offers robust tools for managing and manipulating aspect ratios. Whether you're starting a new project or adjusting an existing one, the process is designed to be intuitive.
Project Settings: The Starting Point
The foundational step to controlling aspect ratio lies within DaVinci Resolve's Project Settings.
Step 1: Open Your Project & Go to Project Settings
- Launch DaVinci Resolve and load your project.
- Click on the gear icon, typically located in the bottom right corner of the interface, to open Project Settings.
Step 2: Adjust the Aspect Ratio in Timeline Settings
- Within the Project Settings window, navigate to the "Master Settings" tab.
- Locate the "Timeline Resolution" setting. Here, you can select a preset resolution that corresponds to your desired aspect ratio (e.g., 1920x1080 for 16:9, 1080x1920 for 9:16, or 4096x1716 for 2.39:1 cinematic widescreen). Alternatively, you can enter custom dimensions to define a specific aspect ratio.
- The "Pixel Aspect Ratio" setting usually defaults to "Square Pixels (1.0)," which is appropriate for most modern digital video. However, options for anamorphic (16:9) or standard definition (4:3) are available if you're working with older footage.
- Click "Save" to apply your changes.
- Pro Tip: Changing the timeline resolution affects the entire project. It's highly recommended to adjust this before adding extensive text, graphics, or overlays to avoid potential misalignment issues.
Handling Mismatched Footage
When your imported footage's resolution or aspect ratio doesn't match your project's timeline settings, DaVinci Resolve provides several options for how to handle this discrepancy. These settings are crucial for maintaining image quality and achieving the desired look.
In the "Create New Timeline" panel, or within the clip attributes, you'll encounter the "Mismatched Resolution" option. This setting dictates how DaVinci Resolve scales and adjusts the image when the clip resolution differs from the timeline resolution.
Center Crop with No Resizing: This option maintains the original clip's dimensions. If the clip is smaller than the timeline, it will be centered with black bars around it. If it's larger, it will be centered, and the excess will be cropped without scaling. This is useful for preserving the original fidelity of specific shots.
Scale Full Frame with Crop: This option scales the clip proportionally based on its shorter edge, aligning it with the timeline resolution's shorter edge. This ensures the entire frame is filled, but parts of the image at the longer edges might be cropped.
Scale Entire Image to Fit: This is often the default behavior. It scales the clip proportionally based on its longer edge, aligning it with the timeline resolution's longer edge. This preserves the entire image content, but may result in black bars (letterboxing or pillarboxing) if the clip's aspect ratio doesn't match the timeline.
Stretch Frame to All Corners: This option stretches the clip non-proportionally to fill the entire timeline resolution. This can lead to significant distortion and is generally not recommended for professional work unless a specific artistic effect is desired.
Reframing and Cropping in the Edit Page
After setting your project's aspect ratio, you'll likely need to adjust individual clips to fit the new frame. This is where the Edit page and its Transform controls become invaluable.
Step 3: Crop & Reframe the Footage
- Navigate to the "Edit" tab.
- Select the clip you wish to adjust on your timeline.
- In the Inspector panel (usually located in the top right), scroll down to the "Transform" settings.
- Here, you can manipulate:
- Zoom: Adjusts the magnification of the clip. Increasing zoom will crop the edges and enlarge the visible portion.
- Position (X/Y): Allows you to pan left/right and up/down to reposition the zoomed-in clip within the frame.
- Rotation: Tilts the clip.
- Crop: This section allows for precise cropping of the edges (left, right, top, bottom).
- Pro Tip: For dynamic reframing, such as simulating a "pan and scan" effect on footage originally shot in a wider aspect ratio, utilize keyframes. By animating the Zoom and Position parameters over time, you can create smooth, controlled movements that follow the action within the frame.
Advanced Techniques and Best Practices
Beyond the fundamental steps, several advanced techniques and best practices can elevate your aspect ratio management in DaVinci Resolve.
Utilizing Presets and Shortcuts
While manual adjustments are powerful, DaVinci Resolve offers shortcuts for common aspect ratios.
Cut Page Presets: Switching to the "Cut Page" in DaVinci Resolve reveals a dropdown menu next to the timeline settings. This menu often includes presets for common resolutions like 3840x2160 (4K 16:9), 1920x1080 (HD 16:9), 1080x1920 (Vertical 9:16), and 1080x1080 (Square 1:1). This is often the easiest method for quickly setting up a timeline with a specific aspect ratio.
External Control Surfaces: For those who frequently change aspect ratios, tools like TourBox can be integrated. By using its macro functions, you can create custom shortcuts to simulate manual aspect ratio changes within DaVinci Resolve, allowing for single-click modifications.
Super Scale for High-Quality Upscaling
Ordinarily, the resolution of a clip is fixed to how it was originally shot or rendered. Resizing clips beyond their native resolution can lead to a visible softening of the image. However, DaVinci Resolve's "Super Scale" feature (available in the Studio version) provides advanced image processing for high-quality upscaling. This can be enabled in the Inspector or Clip Attributes, allowing you to resize clips beyond their native resolution while maintaining a perceptible sharpness that mimics native resolution quality. This is an illusion, but a convincing one.
Managing Multiple Aspect Ratios
When creating different versions of a video for various platforms (e.g., a cinematic cut for YouTube and a vertical cut for social media), DaVinci Resolve offers flexible solutions:
Adjustment Clips: Adding an Adjustment Clip on top of your timeline allows you to apply global transformations, including scaling and cropping, to all clips beneath it. This is an efficient way to manage aspect ratio changes across multiple clips simultaneously and is particularly useful when creating different versions of the same project.
Creating New Timelines: For distinct versions, creating separate timelines within the same project is a clean approach. You can set each timeline to a different aspect ratio and then copy and paste or re-edit the content as needed.
Best Practices for Aspect Ratio Changes
- Start High: Always aim to edit in the highest resolution possible (4K is preferred) to allow for more flexibility when reframing for different aspect ratios without significant quality loss.
- Set Before Adding: Establish your project's aspect ratio before adding text, titles, or graphical overlays. This prevents the need to readjust these elements later.
- Mind the Edges: When reframing, pay close attention to the edges of your frame. Ensure that important subjects or details are not being unintentionally cropped out.
- Keyframe for Dynamics: For more engaging content, use keyframes to animate zoom and pan movements, guiding the viewer's eye within the reframed footage.
- Review and Export: Always double-check your framing and export settings to ensure your video is optimized for its intended platform.
The Ultimate Beginner's Guide to Aspect Ratio
Common Aspect Ratios and Their Applications
To further clarify the practical use of aspect ratios, here's a breakdown of common ones:
- 1.33:1 (4:3): The classic television and early film standard. Ideal for vintage aesthetics or recreating historical looks. In DaVinci Resolve, you might set the resolution to 1440x1080 for this ratio.
- 1.77:1 (16:9): The current standard for HD television, computer monitors, and most online video platforms like YouTube. Standard resolution: 1920x1080 or 3840x2160 for 4K.
- 1.85:1: A common theatrical aspect ratio, slightly wider than 4:3.
- 2.35:1 / 2.39:1 (Cinemascope/Widescreen): The ultra-wide cinematic look, offering an immersive experience. In DaVinci Resolve, this is often achieved with custom resolutions like 4096x1716.
- 1:1 (Square): Popular for social media platforms like Instagram feeds, offering a balanced, centered composition. Standard resolution: 1080x1080 or higher.
- 9:16 (Vertical): Designed for mobile viewing on platforms like TikTok, Instagram Stories, and YouTube Shorts. Standard resolution: 1080x1920.
By understanding the nuances of pixel aspect ratio and leveraging the powerful tools within DaVinci Resolve, creators can confidently tailor their video content to meet the demands of any platform, ensuring a professional and visually compelling presentation. Whether you're aiming for a grand cinematic feel or a compact vertical story, mastering aspect ratios is a fundamental skill in modern video production.