When most people think of the History panel in Photoshop, they think of multiple undo. The History panel, however, in conjunction with the History Brush, Art History Brush, Snapshots, Eraser, and Fill Command is far more powerful than simply traveling back through time in your document. Understanding its intricacies allows for unparalleled control over your creative workflow, enabling complex edits and the recovery from accidental changes with remarkable ease. This guide delves into the various facets of Photoshop's undo capabilities, moving from the fundamental concept of history states to advanced techniques that leverage this powerful feature.
Setting the Number of History States: Controlling Your Temporal Reach
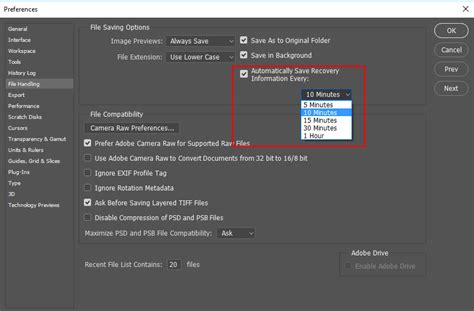
The fundamental mechanism behind Photoshop's undo functionality is the History panel, which tracks a sequence of actions performed on an image. To adjust how many of these actions Photoshop remembers, you need to navigate to Preferences > Performance. Within this dialog box, you'll find an option to set the "History States."
Setting a higher number of history states means Photoshop will meticulously record more of your actions. This directly translates to the ability to step farther back in time through your editing process, undoing a greater number of individual commands. However, this increased record-keeping comes at a cost. Photoshop needs to allocate more system resources, specifically Random Access Memory (RAM), to store this historical data. If your RAM becomes fully utilized, Photoshop will then resort to using your scratch disk, which is typically a hard drive, for this additional information. Using the scratch disk for history states can significantly slow down performance, especially when performing complex operations or working with large files.
It's also important to note that the amount of data Photoshop needs to track for each history state can vary. Making broad changes to the entire document, such as adding new layers, applying global filters, or resizing the canvas, requires Photoshop to store more information for that particular state compared to making small, localized changes like a few paint strokes on a specific area of the image. Therefore, the impact of increasing history states on performance can also be influenced by the nature of your edits.
Understanding Non-Linear History: Branching Your Creative Paths
By default, the History panel operates in a linear fashion. History states are added chronologically from top to bottom, with the oldest state at the top and the most recent at the bottom. The standard behavior is that if you navigate back in time to an older state and then decide to perform a new action (like applying a filter or painting), you will lose all the history states that were recorded after the state you chose to return to. Essentially, your previous forward progress is discarded.
However, Photoshop offers a powerful feature called Non-linear History. To enable this, open the History panel and access its fly-out menu (usually represented by a small icon with horizontal lines or an arrow). Within this menu, you'll find an option to enable "Non-linear History." When this option is active, if you go back in time and then execute a new command, Photoshop will no longer discard the subsequent history states. Instead, it will create a new branch of history. This allows you to explore different editing directions from a single point in your history without losing the work you've already done in other branches. You can then switch between these different branches to compare results or even merge elements from one branch into another.
Duplicating History States: Preserving Crucial Edit Points
There are moments in your editing process where you reach a state you particularly like, perhaps a specific color balance, a unique brush stroke, or a well-composed arrangement of elements. You might want to experiment further from this point but also want to ensure you can easily return to this exact configuration. This is where duplicating history states becomes invaluable.
To duplicate a history state, simply Option-click (on Mac) or Alt-click (on Windows) on the history state you wish to preserve, except for the current, active state. Clicking on a past state will create an exact copy of that state. This duplicated state will appear directly below the original, allowing you to branch off from it and make further modifications without affecting the original state. This is incredibly useful for A/B testing different approaches to a specific part of your image or for creating a stable reference point before embarking on a potentially risky editing maneuver.
Snapshots: Anchoring Your Document's State
When Photoshop opens a document, it automatically creates a "Snapshot" of the document's initial state. This snapshot appears at the very top of the History panel, serving as a reliable baseline. It's essentially a saved version of your image the moment it was opened.

Creating Additional Snapshots: Safeguarding Against History Roll-off
As you continue to edit your image, new history states are constantly being added. Depending on the number of history states you've set in your preferences and the sheer volume of changes you make, older history states can eventually "roll off" the top of the History panel. This means Photoshop will start discarding the earliest recorded actions to make room for new ones.
To prevent crucial states from being lost, you can manually create additional snapshots. To do this, simply click the camera icon located at the bottom of the History panel. This action captures the current state of your entire document and saves it as a distinct snapshot, independent of the sequential history states. These snapshots remain available even if the sequential history states roll off.
Snapshot Options: Customizing Snapshot Creation
For more control over how snapshots are created, you can access additional Snapshot options through the History panel's fly-out menu. Here, you can enable the "Show New Snapshot Dialog by Default" option. When this is enabled, every time you click the camera icon to create a snapshot, a dialog box will appear, allowing you to name the snapshot. Giving your snapshots descriptive names can be extremely helpful for organization, especially when working on complex projects with numerous saved states.
Undoing an Accidental Save: A Lifeline for Your Work
The automatic creation of a snapshot when Photoshop opens a file provides a powerful method for undoing an accidental save. Imagine you've been working diligently on an image, and then, by mistake, you hit "Save" or "Save As" with unintended consequences - perhaps overwriting a crucial layer or making an irreversible change.
Because Photoshop automatically creates a snapshot upon opening, you can use this as a recovery point. First, click on the initial snapshot in the History panel. This will revert your document to its state when it was first opened. Then, immediately perform a "Save As" operation. This saves the original, pristine version of your file. After saving, you can then navigate back to your current, albeit flawed, state in the History panel. Now, you have the option to "Save As" the file again, but this time, you're saving over your current state, effectively discarding the accidental save and retaining your desired edits up to that point, while still having the clean original saved separately.
Automatically Create New Snapshot When Saving: Ensuring Access to Saved States
The "Save" or "Save As" command itself is usually added as a state in the History panel. This is intended to allow you to revert to the document's state immediately after saving, in case you make further changes and then decide you preferred the saved version. However, similar to other history states, the "Save" state can also eventually roll off the top of the panel if too many subsequent edits are made.
To ensure you always have access to a saved version of your document, regardless of how many changes you make, you can enable the "Automatically Create New Snapshot When Saving" option. You can find this setting in the History panel's fly-out menu under "History Options." When this is enabled, every time you save your document, Photoshop will automatically create a new snapshot of the file in its saved state. This provides a persistent backup point, giving you peace of mind that you can always revert to a clean, saved version.
Painting with History: Reintroducing Past Edits Selectively
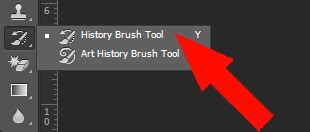
The History panel's power extends beyond simply undoing and redoing. The History Brush Tool and the Art History Brush Tool allow you to selectively reapply elements from any previous state in your history.
To use this feature, you first need to select the state you want to "paint from." Click in the empty well (a small square box) to the left of any Snapshot or history state in the History panel. This action designates that state as the source for the History Brush. Once a source state is selected, choose the History Brush Tool (or the Art History Brush Tool) from the Photoshop toolbar. Now, as you paint on your canvas, you will be painting with the pixels from the chosen history state. This is an incredibly powerful technique for recovering lost details, blending different editing approaches, or creating unique artistic effects by applying textures or colors from earlier stages of your work.
For the Art History Brush Tool, in particular, experimenting with a very small brush size can often yield more detailed and controlled results, allowing for finer manipulation of the painted history.
Clearing History: Managing Resources and Privacy
There are instances where you might want to clear the History panel. All Snapshots and History states are automatically discarded when a document is closed. However, while a document is open, selecting "Clear History" from the History panel's fly-out menu will remove all recorded states. This action can be beneficial for freeing up RAM or scratch disk space, especially when working on very large or complex documents where memory usage is a concern.
Crucially, after clearing history, you still have the option to Edit > Undo Clear History. This means Photoshop retains a temporary record of the "Clear History" command itself, allowing you to reverse the action if you cleared it by mistake.
However, there's a way to permanently clear history, akin to closing and reopening the file. By holding down the Option key (on Mac) or Alt key (on Windows) while selecting "Clear History," you will delete all history states without the option to "undo" them. This is a more drastic measure and should be used with caution. This method can be helpful for freeing up significant disk space or RAM when you are absolutely certain you will not need to revert to any previous states. It can also be a privacy measure if you don't want anyone else to see the editing process you've applied to an image, as it effectively erases the edit trail.
History Log: Creating a Detailed Command Record
For those who require a comprehensive audit trail of their editing process, Photoshop offers the History Log feature. To enable and configure this, navigate to Preferences > History Log. When enabled, Photoshop will keep a record of all the commands applied to a file. This log can be set to record commands to a separate text file or to the file's metadata itself. This is invaluable for documentation, collaboration, or troubleshooting, providing a precise account of every step taken during the image manipulation process.
Seven Tips for Working with the History Panel in Photoshop
By understanding and utilizing these advanced features of Photoshop's History panel, users can move far beyond simple undo operations, unlocking a powerful suite of tools for precise control, creative exploration, and robust error recovery.