DaVinci Resolve 18 stands as a powerful and comprehensive video editing suite, capable of transforming raw footage into polished, cinematic productions. Beyond the fundamental tasks of cutting and arranging clips, video editing encompasses a rich array of techniques, including the application of visual effects, color correction, and audio enhancement. Among these, blurring effects offer a versatile toolset for visual storytelling and practical application. Blurring softens details within a video frame, creating a hazy or dream-like aesthetic, or it can be strategically applied to specific areas. This technique finds its use in diverse scenarios, from obscuring sensitive information in documentaries and minimizing distracting backgrounds in vlogs to simulating depth-of-field in narrative projects. This article provides a detailed guide on how to implement various blur effects within DaVinci Resolve 18, focusing on blurring specific portions of a video and blurring the entire background.
Before embarking on the technical aspects of blur effects, it's essential to start with high-quality video footage. For those new to video editing or lacking immediate resources, Envato presents an exceptional platform offering access to millions of premium digital assets. An Envato subscription unlocks unlimited downloads, ensuring you have a steady supply of professional-grade material.
To utilize Envato:
- Create an account or sign in: Visit the Envato website and register if you are a new user, or log in to your existing account.
- Search for video footage: Once logged in, use the search bar at the top of the page to find the video footage you require. You can be as specific or as general as your project demands.
- Filter your search: Employ the filters on the left side of the page to refine your search results and narrow down your options.
- Preview clips: Hover over a thumbnail to get a quick preview of the clip. Click on it for more detailed information and a full preview.

- Download your choice: After identifying a suitable clip, click the 'Download' button. You will be prompted to link the download to a project.
- Use your downloaded footage: The downloaded file will be in a .zip format. Extract this file to access your video clip.
With your chosen footage ready, you can now import it into DaVinci Resolve 18 and begin experimenting with blurring effects. Remember, the foundation of any great video project lies in exceptional footage, and Envato simplifies the acquisition of professional-grade material.
Blurring Specific Portions of a Video in DaVinci Resolve
DaVinci Resolve 18 is a comprehensive video editing software offering a vast array of advanced features, including the capability to selectively blur specific areas of a video. Blurring particular regions of a video can effectively guide the viewer's attention to the elements you wish to emphasize, adding a professional polish to your productions.
Step 1: Launch DaVinci Resolve and Import Your Video
Begin by opening DaVinci Resolve on your computer and creating a new project. To import the video you intend to edit, navigate to 'File' > 'Import' > 'Media'.

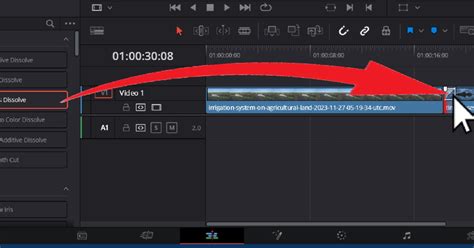
Step 2: Add the Video to the Timeline
Next, drag and drop your imported video onto the timeline. Ensure that the clip is selected.
Step 3: Navigate to the Color Page
The Color page in DaVinci Resolve is where the majority of tasks related to applying effects, including blurs, are performed. Click on the 'Color' tab at the bottom of the screen to access this workspace.
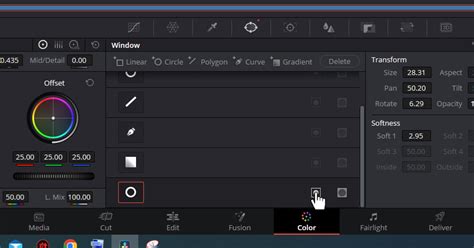
Step 4: Utilize Power Windows
On the Color page, locate the 'Power Windows' tool. This feature enables you to select specific areas of your video to which effects will be applied.
Choose a shape that best fits the area you intend to blur (e.g., circle, rectangle, polygon) and draw it over the relevant portion of the video.
Once you have precisely positioned your selection, you can adjust its size using the provided handles.
Step 5: Apply the Blur Effect
With your Power Window still active, navigate to the 'Blur/Sharpness' panel.

Adjust the 'Radius' slider to control the intensity of the blur. You can further refine the blur effect by modifying the 'H/V Ratio', 'Angle', and 'Aspect' sliders.
Step 6: Track the Object (Optional)
If the portion of the video you wish to blur is in motion, you will need to track it. With your Power Window still selected, click on the 'Tracker' panel.

Then, press the 'Start' or 'Track Forward' button. DaVinci Resolve will then follow the movement of your selected area throughout the clip.
Blurring the Entire Background of a Video in DaVinci Resolve
To isolate your subject and make it stand out, blurring the video background entirely is a highly effective technique. This method can add significant emphasis to your main subject or create a distinct aesthetic.
Step 1: Open DaVinci Resolve and Import Your Video
Launch DaVinci Resolve 18 and create a new project. Import the video you intend to edit by going to 'File' > 'Import' > 'Media'.
Step 2: Add the Video to the Timeline
Drag and drop your video onto the timeline. Ensure that the clip is selected.
Step 3: Go to the Color Page
Click on the 'Color' tab at the bottom of the screen to navigate to the Color page. This is where you will perform most of the background blurring tasks.

Step 4: Create a Power Window Around Your Subject
In the Color page, utilize the 'Power Windows' feature to select the subject of your video that you want to remain in focus. Draw a shape around your subject using one of the available shapes (circle, rectangle, polygon, etc.).

Step 5: Invert the Power Window
After creating the Power Window around your subject, you need to invert the selection so that the blur effect applies to the background instead of the subject. With the inverted Power Window selected, navigate to the 'Blur/Sharpness' panel.
Adjust the 'Radius' slider to increase or decrease the amount of blur applied to the background.

Step 7: Track the Subject (Optional)
If the subject in your video is moving, you will need to track it to ensure the Power Window follows along. Click on the 'Tracker' panel with your Power Window still selected.
Then, press 'Start'.

DaVinci Resolve will automatically track the subject's movement throughout the video.
Review and Export Your Blurred Video
Once you are satisfied with the blur effect, return to the 'Edit' page to review your work. If everything looks as intended, you are ready to export your video.
Follow these steps to export your blurred video:
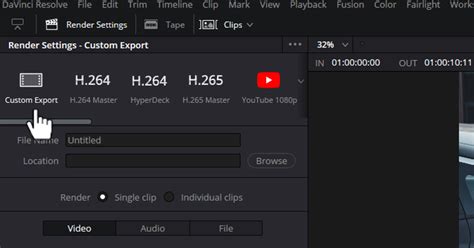
Access Custom Export Settings:Go to the 'Deliver' Tab.
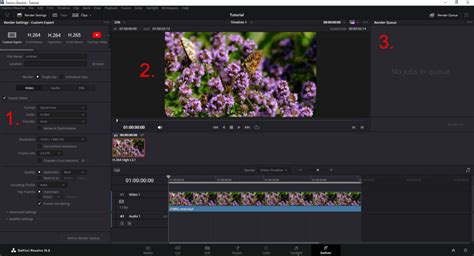
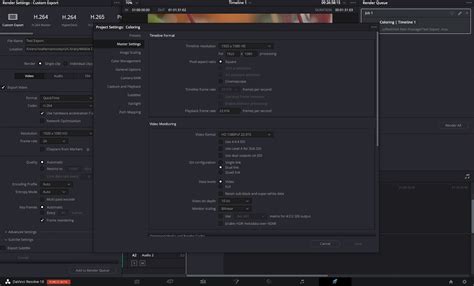

Select Desired Resolution:In the export settings, choose the resolution for your video. Opt for a resolution that matches your desired video quality, such as HD (1080p) or Ultra HD (4K).
Choose the Right Frame Rate:The frame rate is another crucial setting for exporting your video. Ensure you select a frame rate that matches your original footage or your intended output to guarantee smooth playback.

Choose the Right Quality Level:Consider the quality level for your video. Automatic settings are generally suitable for most scenarios. However, for enhanced quality, recommended bitrates include 10,000kbps for HD video or at least 40,000kbps for 4K.

Render the Video:Once all settings are configured to your preference, proceed to render the video by clicking the 'Add to Render Queue' button.

Locate and Play the Completed Video:After rendering, you can easily find your exported video. Right-click on the video in DaVinci Resolve and select "Reveal in Finder" (or the equivalent option for your operating system). This action will display the exact location of your video file on your computer, allowing you to play or move it as needed.
Congratulations! You have successfully learned how to blur parts of a video background in DaVinci Resolve 18. This technique serves as a potent tool in your video editing arsenal, capable of imparting a professional and polished look to your projects. Experiment with varying degrees of blur, as different videos may necessitate different levels of intensity. Remember, consistent practice is key to mastering any new skill, and blurring in DaVinci Resolve 18 will undoubtedly improve with time and application.
Advanced Blurring Techniques and Considerations
Blurring is a versatile and effective tool, whether you are obscuring specific areas or the entire background. DaVinci Resolve 18 provides the necessary tools and flexibility to achieve your desired aesthetic. The core of excellent video editing lies in understanding the available tools and knowing precisely when and how to deploy them.
Understanding Different Blur Effects
DaVinci Resolve offers a range of blur effects, each with unique applications:
- Gaussian Blur: A smooth, adaptable blur ideal for softening backgrounds, enhancing skin tones, and obscuring sensitive information.
- Box Blur: Produces a uniform, pixelated blur effect, suitable for more overt obscuration of elements like license plates and logos.
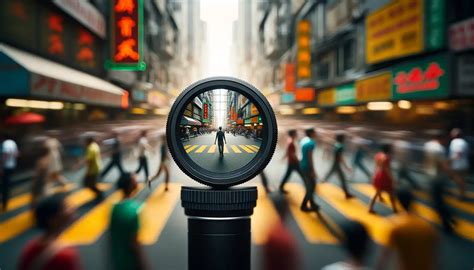
- Lens Blur: Mimics the natural blur created by camera lenses, achieving a realistic depth-of-field effect.
- Directional Blur: Applies blur in a specific direction, simulating motion or emphasizing speed within a shot.
- Radial Blur: Creates a blur that radiates from or around a central point, useful for simulating zoom effects or inducing a sense of dizziness.
- Mosaic Blur: Pixelates an area rather than smoothing it, making it an excellent choice for censorship.
It's important to note that some of these advanced blur settings, such as Lens Blur, Directional Blur, and Radial Blur, are primarily available in the DaVinci Resolve Studio version, not the free version.
Motion Blur in DaVinci Resolve
Motion blur is a fundamental visual effect in modern editing, crucial for making movement appear more natural. It can be applied to objects moving at high speeds or to simulate realistic camera movements, significantly elevating the perceived quality of your video.
What is the DaVinci Resolve Motion Blur Effect?
Motion blur is a special effect that adds an artistic touch by blurring specific objects, or it enhances realism by creating a natural blur during camera movement. It also serves functional purposes, such as blurring faces and license plates to protect privacy. Unconventional uses include creating "streaking" effects for time-lapses of cars on a highway or stars moving across the night sky.
How to Add Motion Blur in DaVinci Resolve (Free Version):
- Open DaVinci Resolve and navigate to the 'Media' tab.
- Right-click in the media pool and select "Import Media." Choose your clips.
- Right-click on the imported clips and select "Create New Timeline Using Selected Clips and Bins."
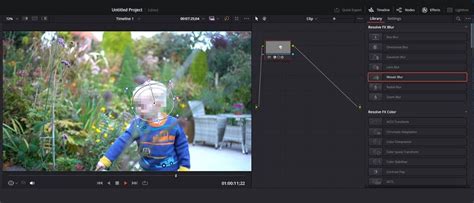
- Double-click the newly created timeline to open it, then click on the 'Fusion' tab.
- Press "Shift + Spacebar" to open the tool selection menu. Type "Optical Flow" and add it. (While optional, Optical Flow often improves results).
- Press "Shift + Spacebar" again, type "Vector Motion Blur," and add it. The Vector Motion Blur effect is generally recommended over the regular Motion Blur for better overall results.
- Ensure your nodes are connected appropriately.
- Click on the 'Vector Motion Blur' node to access its settings in the Inspector panel. Adjust the 'Scale' setting (overall motion blur value) and preview the changes. Further personalize with other motion blur settings as needed.
How to Add Motion Blur in DaVinci Resolve (Studio Version):
- Create your project, import media, and set up your timeline in the 'Edit' page.
- In the 'Edit' page, expand the 'Filters' section on the left.
- Use the search bar to find "Motion Blur" under the "Resolve FX Temporal" section.
- Drag and drop the Motion Blur effect onto your video clip on the timeline.
- Open the 'Inspector' tab in the upper-right corner, then select the 'Effects' section.
- Customize the motion blur parameters, including value, direction, and type, according to your content and requirements.
Using Third-Party Plugins for Enhanced Blurring
For editors seeking more advanced control and streamlined workflows, third-party plugins offer sophisticated blurring capabilities.
Boris FX Sapphire: This industry-leading plugin suite includes the "S_BlurMotion" effect, which provides extensive customization for motion blur.
- Apply "S_BlurMotion" from the Sapphire plugin collection (found under Open FX > BCC Match Move or similar categories depending on installation) by dragging it onto your clip or node.
- Use the Inspector panel to modify a wide array of parameters, including presets, for precise control over the blur effect.
Boris FX Continuum - BCC+ Witness Protection ML: This filter is particularly useful for documentary work or situations requiring the blurring of multiple faces.
- Install Continuum via the Boris FX Hub.
- Apply BCC+ Witness Protection ML from the Effects library (Open FX > BCC Match Move) to your clip or node.
- Explore and apply presets for quick blurring, or customize parameters within the FX Editor.
- The filter features Face Detection ML for automatic face tracking and masking, or you can utilize the integrated Mocha Planar Tracker for manual masking and tracking.
- Adjust the 'Obscuration Effect' to control blur amount, mosaic size, brightness, contrast, and even apply color tints.
Blurring for Specific Time Lengths
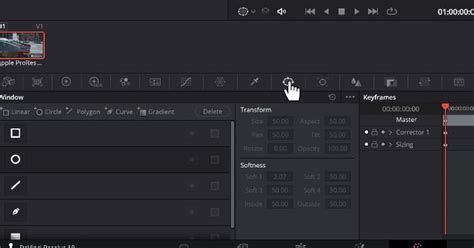
If you need to apply a blur effect for only a portion of a clip's duration, keyframing is the solution.
- After tracking and applying the blur effect, navigate to the 'Keyframes' panel, typically located in the bottom right of the screen.
- Under the relevant node's options (e.g., 'Corrector 1' or the specific effect name like "Gaussian Blur"), locate the blur intensity or 'Radius' parameter.
- Place the playhead at the point where you want the blur to begin or end.
- Click the diamond symbol next to the blur parameter to set a keyframe.
- Move the playhead to the desired endpoint of the blur effect and adjust the blur intensity or 'Radius' to zero (or the desired level for the start). DaVinci Resolve will automatically create the transition between these keyframes.
By mastering these techniques, you can effectively utilize blurring in DaVinci Resolve to enhance viewer engagement, protect privacy, create stylistic effects, and ultimately elevate the quality of your video productions.