For video producers and content creators aiming for that coveted wide cinematic aspect ratio, the challenge often arises when shooting in standard resolutions like 1920x1080p. Fortunately, DaVinci Resolve offers robust tools to achieve this desired aesthetic, whether you want to introduce cinematic black bars or intelligently remove unwanted ones. This guide will delve into the methods for both, ensuring you maintain flexibility in your editing workflow without resorting to simple overlay techniques.
As a certified DaVinci Resolve trainer and colorist with a decade of experience, my passion lies in sharing the knowledge I've acquired. This article aims to provide a comprehensive starting point for mastering these aspect ratio adjustments in DaVinci Resolve.
Understanding Aspect Ratios and Black Bars
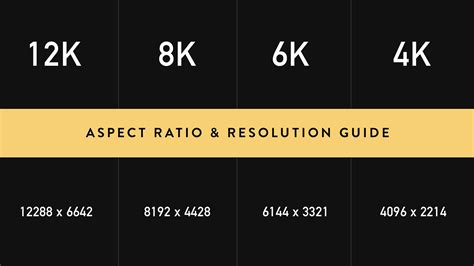
Aspect ratio refers to the proportional relationship between the width and height of an image or video frame. A standard 16:9 aspect ratio, common in television and many online videos, displays a wider image than older formats like 4:3. However, the truly "cinematic" look is often associated with wider aspect ratios, such as 2.35:1 or 2.39:1 (often referred to as 21:9).
When footage shot in a standard aspect ratio is displayed within a wider frame, black bars appear on the sides to fill the empty space. These are commonly known as "letterboxing." Conversely, if footage is shot in a wider aspect ratio but is displayed on a standard 16:9 screen, black bars will appear at the top and bottom, a technique sometimes called "pillarboxing" if the bars are on the sides of a narrower image, or more commonly, "windowboxing" when the bars surround the image on all four sides. The goal here is to discuss how to add the letterbox effect for a cinematic feel and how to remove unwanted black bars that might be present in source footage or created unintentionally.
Method 1: Utilizing Output Blanking for Cinematic Black Bars
One of the most straightforward and integrated ways to add cinematic black bars in DaVinci Resolve is through the "Output Blanking" feature. This method is ideal for applying a consistent cinematic look to your entire project or specific timelines without altering the underlying footage.
If you're working with footage that is already 16:9, but you want to present it in a wider format like 2.35:1, output blanking is your ally. You can observe this in the viewer; a full 16:9 image can be transformed by adjusting transform controls in the inspector, but this is not the most efficient or flexible method for achieving consistent black bars.
To implement output blanking:
- Access Timeline Menu: Navigate to the timeline menu at the top of your DaVinci Resolve interface.
- Select Output Blanking: Within the timeline menu, you'll find an option for "Output Blanking."
- Choose Aspect Ratio: A dropdown menu will present various blanking options. The most commonly used for a wide cinematic look is 2.35. Select this option.
- Observe the Effect: Upon selecting 2.35, you will immediately see the black bars appear in your viewer, effectively framing your 16:9 footage into a wider aspect ratio.
This method is non-destructive. When you export your project, DaVinci Resolve will render the video with these black bars applied, maintaining the original timeline resolution (e.g., 1920x1080p) but ensuring the output accurately reflects the chosen cinematic aspect ratio. This is incredibly useful because it means you can export a 1920x1080p file that already has the letterboxing applied, without needing to manipulate individual clips or use external overlays.
Method 2: Project Settings for Global Aspect Ratio Adjustments
For a more project-wide approach, adjusting the project settings can be an effective way to establish a consistent aspect ratio for all timelines within a project. This is particularly useful if you intend for all your video content to adhere to a specific cinematic look from the outset.
Before diving into the settings, it's important to understand how DaVinci Resolve handles image scaling.
- Input Scaling: This setting determines how footage is scaled when it's first brought into the timeline. You can choose to "Scale entire image to fit," "Center cropped," or "Stretch entire image to fill frame." For most workflows, "Scale entire image to fit" is a good starting point, ensuring that all footage is visible within the frame. Anything that doesn't match your timeline resolution will be scaled to fit.
- Output Scaling: This dictates how the final output is scaled. Typically, it's set to "Match timeline settings."
To adjust project settings for a cinematic aspect ratio:
- Open Project Settings: Go to the "File" menu and select "Project Settings."
- Navigate to Master Settings: In the Project Settings window, ensure you are in the "Master Settings" tab.
- Set Timeline Resolution: Your "Timeline Resolution" is usually set to your primary delivery format, such as 1920x1080p. Even if you have higher-resolution source media (like 4K), it's common practice to downscale and edit at your intended delivery resolution.
- Configure Image Scaling: Pay close attention to the "Image Scaling" section.
- Input Scaling: As mentioned, "Scale entire image to fit" is often preferred. This ensures that if you have footage with different aspect ratios, they will be scaled to fit within the frame without cropping initially.
- Output Scaling: Here, you'll want to change from "Match timeline settings" to a custom resolution that reflects your desired cinematic aspect ratio. For a 2.35:1 aspect ratio with a 1920 pixel width, the height would be approximately 816 pixels (1920 / 2.35 ≈ 816). So, you would set your custom resolution to 1920x816p.
- Disable Output Blanking (if active): If you have output blanking enabled on a timeline, ensure it's turned off before applying project-level custom resolutions.
- Save Settings: Click "Save" to apply the changes.
With these settings applied, your project will now render at the custom resolution, effectively creating the cinematic black bars as part of the frame itself. This approach affects all timelines within the project.
Method 3: Timeline-Specific Aspect Ratio Adjustments
While project-wide settings are convenient, there are situations where you might need to apply different aspect ratios to different timelines within the same project. For instance, you might have some clips intended for a standard 16:9 presentation and others that you want to present cinematically. In such cases, modifying individual timeline settings is the preferred approach.
This method is crucial for maintaining flexibility, especially if you have a mix of content or want to experiment with aspect ratios on specific sequences.
To adjust the aspect ratio for a specific timeline:
- Locate Your Timeline: Navigate to your media pool and find the specific timeline you wish to modify. You can use bins or smart bins to organize your timelines.
- Load Timeline into Viewer: Right-click on the timeline and select "Open in new tab" or load it into the viewer.
- Enable Stack Timelines (Optional but Recommended): For easier management of multiple timelines, go to the timeline view options (usually found in the top right of the viewer) and enable "Stack timelines." This provides timeline tabs, similar to web browser tabs, allowing you to switch between them effortlessly.
- Access Timeline Settings: Right-click on the timeline you want to crop and change. Select "Timeline Settings" from the context menu.
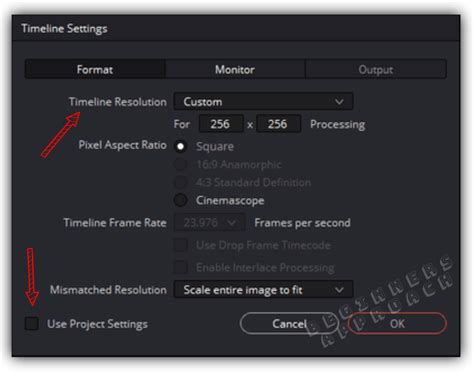
- Set Custom Output Resolution: In the Timeline Settings window:
- Under "Timeline Format," change the "Resolution" from "Use project settings" to "Custom."
- Crucially, uncheck the box that says "Use timeline settings for output scaling." This is what allows you to define a specific output resolution independent of the project's master settings.
- Enter your desired custom resolution. For a 2.35:1 aspect ratio with a 1920 width, this would be 1920x816p.
- Confirm Changes: Click "OK" to apply the settings.
After applying these settings, you might notice that the viewer still shows output blanking if it was previously enabled. Go back to the timeline menu and turn off "Output Blanking" if you want to see the true cropped image without additional bars. Your viewer should now display the cropped image within the 1920x816 resolution.
When you navigate to the Deliver page, ensure your custom resolution is correctly set, and DaVinci Resolve will render the timeline at this specific aspect ratio. This method ensures that only the selected timeline is affected, preserving the original settings for other timelines in your project.
Removing Unwanted Black Bars
The process of removing unwanted black bars is essentially the inverse of adding them. This is common when you've received footage that already has letterboxing or pillarboxing applied, and you want to reframe it to a different aspect ratio or fill a standard 16:9 frame.
The most effective way to remove black bars while retaining reframing flexibility is by using the timeline-specific settings, as described in Method 3, but with a different goal. Instead of setting a wider custom resolution, you'll be adjusting the timeline's resolution and then using the scaling options to fill the frame.
Here's how to approach removing black bars:
- Identify the Black Bars: Determine if the bars are on the sides (pillarboxing) or top/bottom (letterboxing) and their approximate size.
- Access Timeline Settings: As in Method 3, right-click on the timeline and select "Timeline Settings."
- Set Custom Resolution: Choose "Custom" for the resolution. If your source footage is 1920x1080 with pillarboxing, and you want to fill a 16:9 frame, you would typically set your output resolution to 1920x1080p.
- Disable "Use timeline settings for output scaling": This is crucial.
- Adjust Scaling in the Inspector: Once the timeline settings are adjusted, load the timeline and go to the "Edit" page. Select a clip (or all clips if you want to apply it universally, though this is less common for removal). In the Inspector panel, under the "Transform" controls, you'll find "Zoom." Increase the zoom level to effectively crop out the black bars.
- For Pillarboxing: Increase the zoom until the black bars on the sides disappear. This will zoom into the image, and you might lose some of the top and bottom.
- For Letterboxing: Increase the zoom until the black bars at the top and bottom disappear. This will zoom into the image, and you might lose some of the sides.
- Reframe Flexibility: The advantage here is that you've essentially "zoomed in" on your footage. You still have the "Position" controls within the Transform section to slightly reframe the image. This allows you to reposition the zoomed-in footage to ensure the most important elements remain in view.
- Export: When exporting from the Deliver page, ensure your render settings match your desired output resolution (e.g., 1920x1080p).
This method avoids simply overlaying black bars. Instead, it intelligently scales and reframes your existing footage to fit the desired aspect ratio, offering greater control and maintaining the original image data as much as possible.
Get rid of BLACK BARS - How to Handle Mismatched Resolutions - Davinci Resolve TUTORIAL
Advanced Considerations and Best Practices
- Resolution Mismatches: DaVinci Resolve is adept at handling various resolutions. When importing footage, the "Input Scaling" settings in Project Settings (Master Settings) play a vital role. Ensure they are configured to suit your workflow, typically by scaling to fit the timeline.
- Maintaining Reframing Flexibility: When adding black bars using output blanking or custom timeline resolutions, the original footage is still contained within the frame. This means you can still use the Transform controls (Zoom, Pan, Tilt) to make minor adjustments or reframe specific shots within the wider aspect ratio. This is a significant advantage over simply overlaying a black bar image.
- Adjustment Layers for Specific Effects: While not directly for adding permanent black bars, Adjustment Layers can be used for applying effects like blurs or color grades across multiple clips. For aspect ratio, they are less common than the methods described above, but could be used in conjunction with scaling effects if needed for very specific creative choices.
- PNG Overlays (Use with Caution): While mentioned as a method, using a static PNG image of black bars as an overlay on your timeline is generally the least flexible and professional approach. It "burns in" the black bars, eliminating any possibility of reframing or adjusting the aspect ratio later without re-editing. It's best avoided in favor of DaVinci Resolve's built-in tools.
- Understanding the Deliver Page: Always double-check your settings on the Deliver page before rendering. Ensure that the "Resolution" and "Aspect Ratio" settings in your render job accurately reflect your intended output. For custom aspect ratios like 2.35:1, you'll typically set a custom resolution (e.g., 1920x816 or 3840x1632 for 4K).
By mastering these techniques, you can effectively control the aspect ratio of your videos in DaVinci Resolve, whether you're aiming for a grand cinematic feel or need to clean up existing footage. The key is to leverage the software's built-in features for non-destructive editing and maximum flexibility.