Photoshop's ability to manipulate images is vast, offering a plethora of tools and filters to achieve desired visual effects. However, users can sometimes encounter frustrating issues, such as the "black and white filter not working" as expected. This problem can manifest in several ways, from filters not applying at all to producing unexpected color casts or failing to achieve a true monochrome image. This article delves into the common causes behind these issues and provides comprehensive solutions, drawing from user experiences and Photoshop's underlying functionalities.
The Core Problem: Beyond Simple Grayscale Conversion
Many users, when faced with a "black and white filter not working" scenario, initially try to convert their image to grayscale. While this is a fundamental step in achieving a black and white image, it often proves insufficient. The core of the problem lies in the nuanced understanding of what constitutes a "true" black and white image within Photoshop and how filters interact with image modes and color selections.
The user's observation that a grayscale conversion "is still not enough, it still allows non-black (gray gradient)" highlights a common misconception. Grayscale mode simply removes color information, replacing it with shades of gray. However, if the goal is a stark, high-contrast black and white image, where every pixel is either pure black or pure white, then grayscale mode alone is not the solution. This is where the need to "make sure if a pixel is not white then make it black" becomes paramount.
Advanced Techniques for True Black and White: The Threshold Function
To achieve a result where every pixel is definitively black or white, the Threshold function is the key. This function operates by setting a specific luminance value; pixels brighter than this value are converted to white, and pixels darker than this value are converted to black.
The process typically involves a series of mode conversions within Photoshop:
- Convert to Grayscale: If the image is in RGB mode, the first step is to convert it to Grayscale. This is done by navigating to
Image > Mode > Grayscale. Photoshop will prompt to discard color information, which is necessary for this conversion. - Convert to Bitmap: After converting to Grayscale, the next crucial step is to convert the image to Bitmap mode. This is achieved via
Image > Mode > Bitmap. Upon selecting Bitmap mode, a "Bitmap" dialog box will appear, offering various "Method" options. The default might not always yield the desired result, and experimentation with methods like "50% Threshold," "Diffusion Dither," or "Pattern Dither" can be beneficial depending on the source image and the desired aesthetic. This mode is designed to restrict pixel values to either black or white.
The "rendering options dialog box" mentioned in user feedback is precisely this Bitmap dialog. Understanding that the issue isn't merely about converting to black and white but ensuring the mode supports only these two values is critical.
Addressing "Feathering" and Blending Issues
Another common cause for filters appearing not to work, or producing unexpected results, is the presence of "feathering" or blending around the image. This is often a byproduct of using tools like the brush tool, where Photoshop attempts to create smooth transitions between the image and its background. When filters are applied, they can interact with these blended areas in ways that lead to perceived failures.
A workaround for this, though often a last resort, involves saving the image in a format that inherently supports monochrome bitmaps, such as .bmp. Opening this file in a simple image editor like Microsoft Paint, and then saving it again as a monochrome bitmap, can sometimes strip away unwanted blending or color data. Re-opening this processed file in Photoshop can then allow filters to behave as expected.
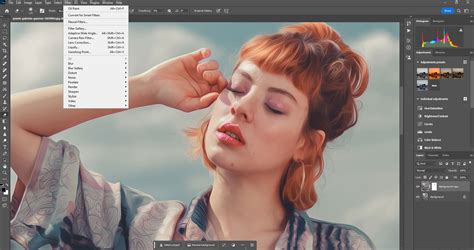
Filter Gallery Malfunctions: Preview and Application Problems
A significant portion of user queries revolves around the Filter Gallery itself. Common complaints include:
- No Preview: Users can open the Filter Gallery and see their image, but the preview pane remains blank or doesn't update as they adjust filter settings.
- Filter Not Applying: The filter is selected, settings are adjusted, and "OK" is clicked, but the image remains unchanged.
- Preview Refresh Issues: In some cases, the preview of a filter (like a normal map preview on a sphere) might not refresh dynamically, even though the filter does apply correctly when "OK" is clicked.
These issues can stem from several factors:
Color Picker and Foreground/Background Colors
A surprisingly common culprit for filters not working correctly, especially grayscale or colorizing filters, is the state of the Foreground and Background colors in the Photoshop toolbar. If these are not set to the default black and white, certain filters can behave erratically or apply unexpected color casts.
For instance, a user reported that grayscale filters "began showing up in green." This was traced back to an accidental selection of a green foreground color. The grayscale filter gallery filters, in this scenario, were taking their color information from the Foreground and Background colors. Correcting these to black and white by clicking the default color swatch (a small black square on top of a white square in the toolbar) or by pressing 'D' to reset them to default, and then 'X' to swap them if necessary, often resolves these color-related filter problems.
How To Quickly Access The Foreground And Background Color Pickers In Photoshop
Active Selections and Zoom Levels
The presence of an active selection can significantly impact how filters are applied. If a selection is active, the filter will only affect the pixels within that selection. If the selection is very small or not immediately visible, it can appear as though the filter isn't working at all. Users may not be "zoomed enough to see the preview" or the filter's effect on the small selected area.
Tip: Always check if a selection is active (marching ants). If you don't intend to have a selection, deselect everything by going to Select > Deselect or pressing Ctrl+D (Windows) / Cmd+D (Mac).
Image Resolution and Filter Parameters
For high-resolution files, some filters might require larger parameter values to produce a visible effect. For example, a "Blur" filter might need a value greater than 4.0 to be noticeable on a very large image. This is less about the filter "not working" and more about the magnitude of the effect being too subtle to perceive against the image's detail.
Layer Status
- Locked Layers: If the layer you are trying to apply a filter to is locked, the filter will not be able to modify it. Check the Layers panel to ensure the layer is not locked (indicated by a padlock icon). Unlock it by clicking the padlock.
- Hidden Layers/Effects: Ensure that the layer containing the effect has its Eye icon enabled in the Layers panel. If the eye is off, the layer and its applied effects will be hidden, making it seem as if the filter didn't apply.
Software Glitches and Reinstallation
In some instances, particularly after software updates or prolonged use, Photoshop can develop internal glitches that prevent filters from functioning correctly. When all other troubleshooting steps fail, a common and often effective solution is to uninstall and reinstall Photoshop. This process can reset corrupted preferences or system files that might be causing the filter malfunction. This was a solution that resolved the issue for several users who had tried various other suggestions.
Understanding the "Colorizing" Aspect of Filters
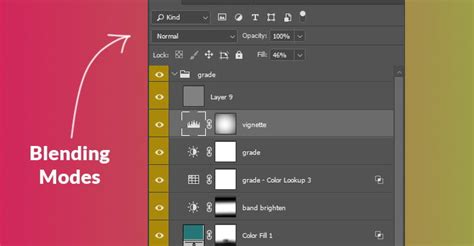
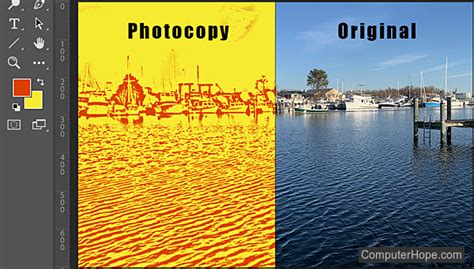
It's important to recognize that some filters, particularly those in the Filter Gallery, are not strictly designed for monochrome conversion. They can be used creatively to add color effects. For example, the Photocopy filter can be used to create a colorized line drawing from a detailed photo. This can then be composited onto other layers using blend modes like "Color Burn" to add a sunlit tone.
Furthermore, the interaction between these filters and blend modes can be powerful. Adding black and white layers set to "Multiply" or "Darken" blend modes can allow a background image to show through, creating complex layered effects. This demonstrates that "black and white" in Photoshop can sometimes refer to the effect of a filter rather than a strict monochrome output.
Diagnostic Steps for Troubleshooting
When encountering a filter issue, a systematic approach is crucial:
- Identify the Specific Filter: Is the problem with all filters, or just specific ones (e.g., grayscale filters)?
- Check Image Mode: Ensure the image is in a compatible mode (e.g., RGB or Grayscale before Bitmap).
- Verify Foreground/Background Colors: Reset them to default black and white.
- Examine Selections: Deselect if no selection is intended.
- Inspect Layer Status: Check for locked layers or hidden effects.
- Consider Resolution: Adjust filter parameters for high-res images.
- Test with a New Document: Create a new document with a simple shape or image and try applying the filter. This helps determine if the issue is with the specific file or Photoshop itself.
- Gather Information: If seeking help online, provide screenshots of the relevant panels (Layers, Channels, Options Bar) and the Filter dialog box.
By understanding these potential pitfalls and employing these diagnostic steps, users can effectively troubleshoot and resolve issues with Photoshop's black and white filters, ensuring they can achieve the desired monochrome or stylized effects with confidence.