Digital noise is an unfortunate reality for many photographers, often appearing as unwelcome specks and grain that can degrade image quality. Whether you're shooting in low light, pushing your ISO settings to their limits, or even dealing with the artifacts of JPEG compression, understanding how to combat noise is a crucial post-processing skill. Fortunately, Photoshop offers powerful tools to tackle this issue, allowing you to significantly reduce the appearance of noise without sacrificing essential image detail. This tutorial will guide you through the process, from identifying different types of noise to applying advanced techniques for pristine results.
Understanding Digital Noise: The Culprits Behind Grainy Images
Before diving into Photoshop's tools, it's essential to understand the types of noise that can afflict your images. These imperfections arise from various factors, primarily the sensor's performance in challenging shooting conditions.
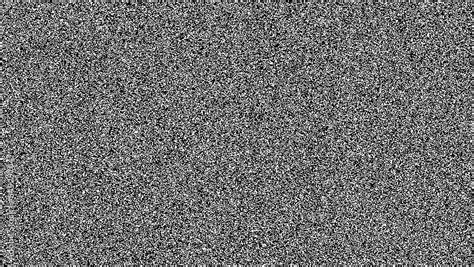
Luminance Noise: The Grainy Texture
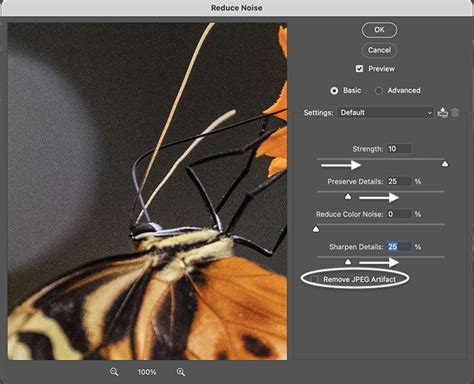
Luminance noise manifests as variations in brightness, appearing as light and dark specks or a general grainy texture across the image. This type of noise is particularly noticeable in areas with smooth gradients, such as skies or walls, and is often a consequence of shooting at high ISO settings or in low-light situations where the camera's sensor struggles to capture sufficient light. It's characterized by random black, white, and gray dots that disrupt the smooth tones of an image.
Color Noise: Unwanted Hues
Color noise, also known as chromatic noise, introduces distracting colored pixels into your image, typically appearing as red, green, or blue dots. This is more visible in underexposed areas of your photos and is a direct result of the sensor's color data being inconsistently recorded. While luminance noise affects the brightness, color noise directly impacts the color fidelity of your image, creating a mottled or speckled appearance with unwanted hues.
JPEG Artifacts: The Compression Compromise
When images are saved in the JPEG format, a degree of compression is applied to reduce file size. This compression process, especially when applied multiple times or at high levels, can lead to visible artifacts. These artifacts often appear as blocky patterns, particularly noticeable as 8x8 pixel squares, that can make an image look like it's been divided into a grid. The visibility of these artifacts depends on the compression level used and how many times the image has been re-saved as a JPEG.
Photoshop's Reduce Noise Filter: Your First Line of Defense
Photoshop's "Reduce Noise" filter, introduced in CS2, is a powerful tool designed to address both luminance and color noise, as well as JPEG artifacts. While it's important to remember that the filter's name is "Reduce Noise" and not "Remove Noise," it does an excellent job of mitigating these imperfections.
Navigating the Reduce Noise Dialog Box
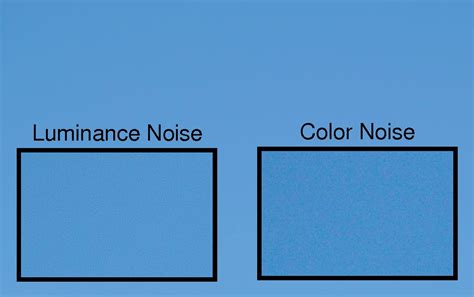
Upon accessing the "Reduce Noise" filter (Filter > Noise > Reduce Noise), you'll be presented with a dialog box containing a large preview area on the left and a series of sliders and options on the right. The preview area is crucial for visualizing the impact of your adjustments in real-time. Ensure the "Preview" option is checked by default, allowing you to see changes directly in your document window as well.
The options on the right are helpfully divided into sections, each targeting a specific type of noise or artifact.
- Strength and Preserve Details (Green): These sliders are primarily used to reduce luminance noise. "Strength" controls the overall reduction of luminance noise, while "Preserve Details" aims to bring back image clarity that might be lost during the noise reduction process.
- Reduce Color Noise (Yellow): As the name suggests, this slider specifically targets and reduces color noise.
- Sharpen Details (Uncolored): This slider is for sharpening, not noise reduction. It's generally recommended to set this to 0% and handle sharpening with dedicated sharpening filters like Unsharp Mask or Smart Sharpen for better control and results.
To get the most out of the filter, it's often beneficial to start with all sliders at their minimum (0%), effectively turning the filter off, and then gradually introduce adjustments. You can zoom in and out of the preview area using the "+" and "-" icons at the bottom.
Tackling Color Noise First
It's often best to begin by addressing color noise. Zoom into an area of your image that exhibits these red, green, or blue dots. Start with the "Reduce Color Noise" slider at 0% and slowly drag it to the right. Observe the preview area as you adjust. The goal is to blend the color noise into the image as much as possible without introducing new artifacts. A "before and after" view can be obtained by clicking and holding within the preview area. For many images, a value around 60% for "Reduce Color Noise" can effectively eliminate these colored specks.
Addressing Luminance Noise
Once color noise is managed, turn your attention to luminance noise. This type of noise is characterized by variations in brightness rather than color. For luminance noise reduction, you'll primarily use the "Strength" and "Preserve Details" sliders.
- Set Strength to 0%: Begin by setting the "Strength" slider to 0%.
- Increase Strength Gradually: Slowly drag the "Strength" slider to the right, monitoring the preview area. Continue until as much of the luminance noise as possible is removed.
- Use Before/After View: Click and hold in the preview area to compare the noise-reduced image with the original.
- Restore Detail with Preserve Details: After reducing the noise, use the "Preserve Details" slider. Drag it to the right to bring back lost image detail without reintroducing excessive noise. Finding the right balance between noise reduction and detail preservation is key.
Learn How to Reduce Noise in Photoshop Like a PRO (Easy Tutorial)
Advanced Noise Reduction Techniques in Photoshop
While the basic "Reduce Noise" filter is effective, Photoshop offers more advanced options for finer control, especially when dealing with challenging noise scenarios.
Leveraging Advanced Options for Channel-Specific Control
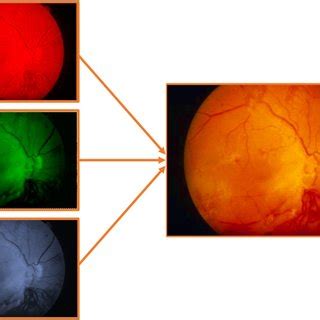
If you find that reducing noise without losing significant detail is proving difficult, the "Advanced Options" within the "Reduce Noise" filter can be invaluable. This mode allows you to adjust noise reduction on a channel-by-channel basis. Most images are composed of Red, Green, and Blue color channels, and it's common for one channel to have more noise than the others, with the Blue channel often being the most problematic.
- Access Advanced Mode: In the "Reduce Noise" dialog box, select "Advanced" in the top right.
- Cycle Through Channels: Use the "Channel" dropdown menu (located below the smaller, black and white preview area) to select Red, Green, or Blue.
- Adjust Strength and Preserve Details Per Channel: Below the channel selection, you'll find the "Strength" and "Preserve Details" sliders again, but now they affect only the selected channel.
- Reduce Noise per Channel: Set both sliders to 0% and then gradually increase "Strength" to remove noise from the specific channel. Use the click-and-hold preview to compare the original and adjusted states.
- Restore Detail per Channel: Once noise is reduced, use "Preserve Details" to bring back detail within that channel.
- Repeat for Other Channels: Apply this process to each color channel, paying close attention to the channel that exhibits the most noise.
- Return to Overall Control: After adjusting individual channels, switch back to the "Overall" tab to see the combined effect.
This channel-by-channel approach provides a much more nuanced way to control noise, allowing you to target problematic areas without affecting the overall image quality disproportionately.
Working with Lab Color for Luminance Noise
Another powerful technique for tackling luminance noise involves working in the Lab Color mode. This mode separates an image into Lightness (L) and color (a and b) channels, allowing for more targeted adjustments.
- Switch to Lab Color: Go to Image > Mode > Lab Color.
- Isolate the Lightness Channel: The "Lightness" channel contains the luminance information of your image. You can select this channel in the Channels palette.
- Duplicate the Lightness Channel: To work non-destructively, drag the "Lightness" channel to the "Create New Channel" icon at the bottom of the Channels palette.
- Apply Blur or Smart Blur: On this new Lightness channel, you can apply blur filters. A common method is to use "Filter > Stylize > Glowing Edges" to highlight edges, then "Filter > Blur > Smart Blur" with a low radius and high quality to smooth out the luminance noise while preserving edges. Adjusting "Edge Width," "Edge Brightness," and "Smoothness" in the "Glowing Edges" filter can help define the areas to be blurred. The "Smart Blur" filter's "Radius" and "Threshold" settings are critical for controlling the extent of the blur.
- Invert and Select: After applying the blur, you'll often invert the channel (Image > Adjustments > Invert) and then Command/Control-click on the channel thumbnail to create a selection based on the blurred areas.
- Return to RGB and Adjust Opacity: Switch back to RGB Color mode (Image > Mode > RGB Color). With the selection active, you can then adjust the opacity of a duplicated layer or a layer mask to control the intensity of the blur and thus the noise reduction. This allows for fine-tuning the blend between the blurred (noise-reduced) and original detail.
This method is particularly effective for reducing luminance noise in shadows or smooth areas without affecting the sharpness of edges and fine details.
Exposure Bracketing and Image Stacking for Extreme Noise
For situations where noise is exceptionally severe, or when you want to achieve the cleanest possible results, techniques like exposure bracketing and image stacking can be employed.
- Exposure Bracketing: This involves taking multiple shots of the same scene with different exposure settings. By merging these bracketed images in Photoshop, you can create an HDR (High Dynamic Range) image or use them for noise reduction. The idea is that noise, being random, will differ across the exposures, allowing Photoshop to identify and reduce it more effectively during the merging process.
- Image Stacking: Similar to exposure bracketing, image stacking involves capturing several identical shots. When these images are stacked, Photoshop can average out the random noise, resulting in a much cleaner final image. This is particularly effective for astrophotography or other low-light scenarios where long exposures are necessary. You can achieve this by using "File > Automate > Photomerge" or by converting images into Smart Objects and using blending modes.
Alternatives and Workflow Considerations
While Photoshop's built-in tools are powerful, it's worth noting that other software and plugins offer advanced noise reduction capabilities.
Lightroom and Adobe Camera Raw (ACR)
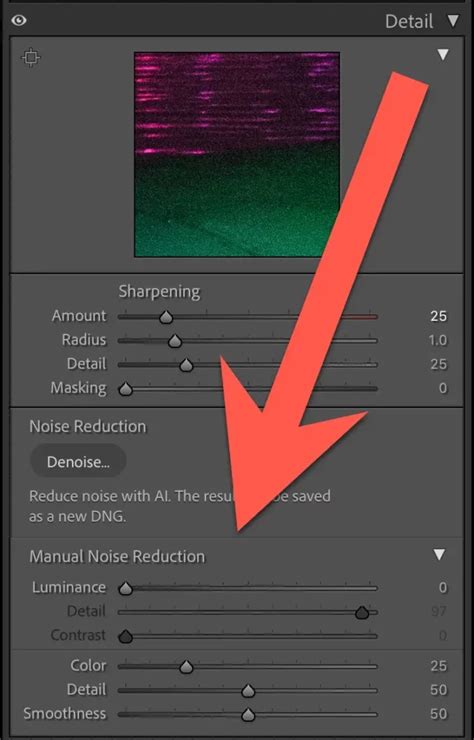
Adobe Lightroom and Adobe Camera Raw (ACR) within Photoshop offer robust noise reduction tools, often considered simpler and more intuitive for many users. These tools are located in the "Detail" tab and provide sliders for Luminance Noise Reduction, Color Noise Reduction, and Sharpening. The advantage here is that these adjustments are typically applied non-destructively to RAW files, preserving maximum image data. Many photographers prefer to perform initial noise reduction in Lightroom or ACR before moving to Photoshop for further retouching.
Third-Party Plugins
A variety of third-party plugins are available that specialize in noise reduction, often employing sophisticated AI-driven algorithms. Some popular options include:
- Topaz DeNoise AI: Known for its AI-powered approach that aims to preserve detail exceptionally well.
- DxO PureRAW / Nik Collection (Dfine 2): DxO's tools are highly regarded for their advanced noise reduction algorithms.
- Noiseware: A long-standing and effective plugin that offers good results and ease of use.
- Luminar Neo: Offers a suite of AI-powered editing tools, including noise reduction.
- Neat Image: Another well-regarded plugin that analyzes noisy areas for targeted reduction.
These plugins can sometimes achieve results that are difficult to match with Photoshop's native filters, especially in very challenging noise situations.
Workflow Best Practices
- Shoot in RAW: Whenever possible, shoot in RAW format. RAW files contain much more image data than JPEGs, providing greater flexibility for noise reduction and other adjustments without introducing as many artifacts.
- Minimize Noise at Capture: While post-processing is essential, try to minimize noise during capture. Use the lowest ISO setting that allows for proper exposure, use a tripod to enable longer shutter speeds in low light, and ensure your camera's sensor is clean.
- Apply Noise Reduction Early: It's generally recommended to apply noise reduction early in your workflow, ideally on the RAW file in Lightroom or ACR. This prevents noise from being amplified by subsequent adjustments like sharpening.
- Be Mindful of Detail: Always remember the trade-off between noise reduction and detail preservation. Over-reducing noise can lead to a plastic, artificial look. Zoom in to 100% or more to assess the results critically.
- Sharpening After Noise Reduction: Sharpening can introduce or exacerbate noise. Therefore, it's best to apply sharpening after noise reduction has been performed. Use selective sharpening techniques, such as using layer masks or dedicated sharpening filters like Smart Sharpen with masking, to apply sharpness only where it's needed.
By understanding the nature of digital noise and mastering the tools available in Photoshop and other software, you can effectively clean up your images, revealing the true detail and beauty hidden beneath the grain.