Ready to sprinkle some extra magic on your Photoshop projects and really make your creative projects “pop”? If that’s the case, let’s dive into the world of fonts and learn how to add them to Adobe Photoshop. While Photoshop comes with a vast library of built-in fonts, some projects may call for unique typefaces that Adobe doesn’t have readily available. Learning how to add new fonts to Photoshop is a necessity for designers, allowing you to search beyond the confines of built-in Adobe Fonts. Whether you're adding your own custom font design or working with specific brand fonts for a client, it's important to know how to insert them quickly to bring your creative vision to life. Thankfully, it's typically a painless process, allowing you to add your custom font choice in a matter of minutes. Once you know how it's done, it's just a matter of searching for your perfect match.
Sourcing Your Perfect Typeface: Where to Find Fonts

The first step in expanding your typographic arsenal is to find the font you wish to use. The internet offers a vast landscape of font libraries, both free and paid, where you can discover an endless array of styles. Many of these platforms provide filtering options, allowing you to narrow your search by parameters such as font type, weight, or even stylistic characteristics. When you find a font that catches your eye, simply click the download button.
Navigating Font Licensing: A Crucial Consideration
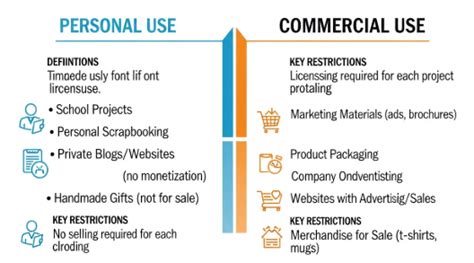
With a wide variety of fonts available on the web, it might seem easy to download many fonts at once and use them freely as you wish. However, it's crucial to understand that most fonts have licenses, and oftentimes, fonts don't allow you to use them for commercial purposes without paying an additional fee. Since every font is regarded as its own piece of software, it's bound by licensing agreements when you install it onto your computer. Each font comes with some type of license, which you can check on the End-User License Agreement that accompanies any font you download.
A desktop license will allow you to install a font onto your computer and use it in any application, which makes it fine to use for personal projects. However, problems may arise when you want to add a font to Photoshop for use in commercial work. Even if a font is advertised as a free download, it may still have restrictions regarding commercial use. In the same respect, it’s possible that someone may upload a font and describe it as ‘free’ without the original designer’s permission. When working for clients, it's imperative that you check the font license and purchase any necessary licenses; your client is unlikely to be happy if they receive a strongly worded letter from the owner of the font.
Austin James Jackson, a landscape photographer and outdoor enthusiast based out of Portland, Oregon, highlights the importance of this. He loves teaching others how to photograph landscapes and leads workshops in the western USA. While not directly about fonts, his emphasis on understanding the nuances of his craft mirrors the need for diligence in understanding font licensing.
Open-Source and Adobe Fonts: Reliable Sources
The easiest way around licensing complexities is to use open-source licensing. Open-source fonts are free to download and use, so long as you don’t resell and occasionally give credit for use. Google Fonts provides an excellent open-source collection of fonts that can be used privately or commercially.
Another highly recommended resource for Adobe Creative Cloud subscribers is Adobe Fonts. This service offers a vast selection of typefaces, all cleared for personal and commercial use, with seamless integration into your Adobe applications. If you are online and logged into Creative Cloud, you can access Adobe Fonts from inside Photoshop or via the Adobe Creative Cloud desktop app. When you find a font you like, you can simply click to activate either individual fonts or entire font families. These activated fonts will become available in all Adobe applications.
Preparing Your Font for Installation
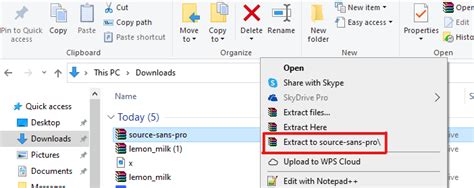
Once you've identified and downloaded your desired font, the next step involves preparing it for installation. Font files typically come in compressed formats, often as a .zip extension. You will need to unzip this file to access the actual font files. Double-click on the .zip file, and your operating system should offer an option to extract its contents. If you downloaded multiple fonts, they will each have their own separate folders within the extracted archive.
It's important to ensure that the font files you've downloaded are in a compatible format. The industry standard for fonts, and the formats most compatible with modern systems and software like Photoshop, are OpenType fonts, usually identified by a .otf or .ttf suffix. Photoshop and other Adobe applications no longer support older PostScript Type 1 fonts, so always look for .otf or .ttf files.
Installing Fonts on Windows
Adding new fonts to Photoshop on a Windows operating system is a straightforward process. After downloading and unzipping your font file, locate the font file itself, ensuring it has a .ttf or .otf extension.
There are a few methods to install your font in Photoshop on Windows:
Method 1: Direct Installation
The most common and easiest method is to right-click on the font file (.ttf or .otf). From the context menu that appears, select "Install." This action makes the font available not only in Photoshop but also across all other applications on your computer.
Method 2: Using the Control Panel
For more granular control or if the direct install option isn't readily available, you can use the Windows Control Panel.
- Navigate to the Start Menu.
- Open the "Control Panel."
- Go to "Appearance and Personalisation."
- Select the "Fonts" folder.
- You can then drag and drop your unzipped font files directly into this Fonts folder.
Once your chosen font is installed, it should now be available on your computer.
Installing Fonts on macOS
For Mac users, the process of adding fonts to Photoshop is equally user-friendly. After downloading and unzipping your font file, locate the .ttf or .otf font file.
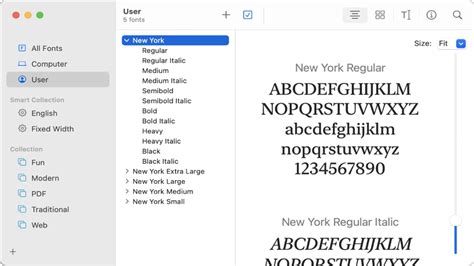
- Double-click the font file: This action will typically open the font in macOS's built-in "Font Book" application, presenting you with a preview window.
- Install the font: Within the Font Book preview window, you will find an "Install Font" button, usually located in the lower-left corner. Click this button to install the font onto your system.
Your new .ttf or .otf file will now be installed and accessible within your Mac's font library.
Activating Fonts via Adobe Creative Cloud
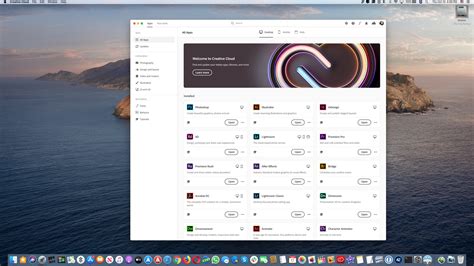
If you are an Adobe Creative Cloud subscriber, you have a streamlined way to manage and activate fonts through the Creative Cloud desktop app. This method ensures that fonts are readily available across all your Adobe applications.
- Open the Creative Cloud desktop app: Launch the application on your computer.
- Navigate to the Fonts section: Look for a "Fonts" button, often located in the top-right corner of the interface, or accessible through the main navigation menu.
- Browse and activate: Browse the extensive library of Adobe Fonts. You can use tags or filters to refine your search. When you find a font you like, click "Add Family" or a similar activation button. This syncs the font to your computer and makes it immediately available to your Adobe apps.
If you've previously activated fonts from Adobe Fonts and they are no longer appearing in non-Adobe apps, you may need to reinstall them. You can do this by going to the "Added Fonts" list in the Creative Cloud desktop app and clicking the "Install" button next to the font name.
Using Your New Font in Photoshop
Once you've successfully installed your font, it's time to put it to use in Photoshop. If you had Photoshop open during the font installation process, you might need to restart the program for the new font to appear in its font list. Close Photoshop and then reopen it.
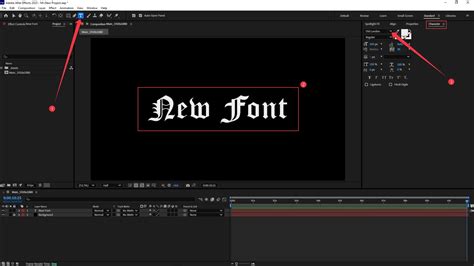
- Select the Type Tool: Choose the Type Tool (T) from the Photoshop toolbar.
- Create a text box: Click and drag on your canvas to create a text box.
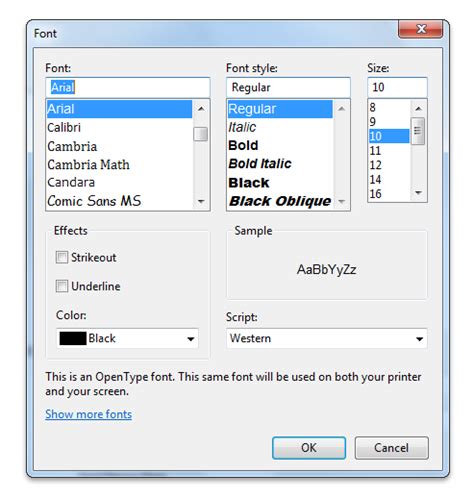
- Access the font menu: In the top menu bar, you will find the font selection dropdown. Scroll through the list of available fonts or start typing the name of your newly installed font.
- Apply your font: Select your desired font from the list, and begin typing.
And there you have it! Adding a new font to Adobe Photoshop is as easy as pie. Just remember to explore, experiment, and most importantly, have fun with your designs.
Fonts on the Go: Installing Fonts on an iPad
Adding fonts to Photoshop on an iPad requires an extra step as they need to be installed via an iOS configuration profile. While it's possible to create one on a Mac, there are apps available in the App Store that can help you download fonts to your iPad and package them into a configuration profile for installation.
If you've created a document using fonts added from Adobe Fonts on your computer or laptop, you might find that these fonts aren't available by default when you open the document on your iPad. In such cases, you'll be presented with a message that reads 'Replace Missing Fonts' or 'Transform With Missing Fonts'.
To resolve this:
- Ensure you have the latest iPadOS version installed.
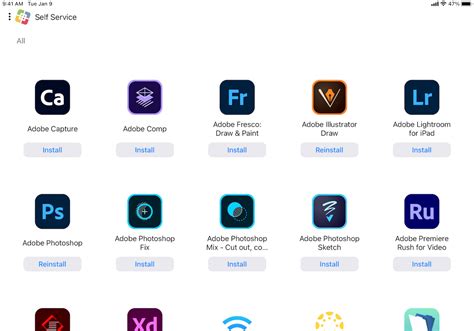
- Download the Adobe Creative Cloud app from the App Store.
- Open the app, sign in to your account, and then tap 'Fonts' at the bottom of the screen.
- Activate the desired fonts from your Adobe Fonts library.
These steps will help ensure that your fonts are accessible on your iPad for use in Photoshop and other compatible applications.
Beyond Traditional Fonts: Exploring Adobe Firefly Text Effects

While you can't generate traditional fonts with Adobe's Firefly AI model, you can create text effects that can resemble custom fonts up to a point. These effects aren't fonts in the traditional sense - you can't write with them and reuse them like a standard font file. However, they can be incredibly useful if you need a one-off word or short phrase in a unique text style for a particular design piece.
The Firefly Text Effects tool isn't available with a Photoshop plan alone; you'll need an Adobe Express Premium Plan. Here's how to use it:
- Go to the Text Effects section in Adobe Express.
- Enter the text you want to display.
- Add prompts to describe the visual style you desire. You can also upload images as a reference for the style.
- Adjust the settings to change the strength and visual intensity of the effect.
- Once you're satisfied, generate and download your stylized text as a PNG file.
- You can then drag this PNG file into Photoshop as a layer.
Remember, this is a graphic element, not a font, but it offers a powerful way to achieve unique typographic treatments.
Font Pairing with Purpose | Photoshop Typography Challenge
Troubleshooting Common Font Installation Issues

While adding fonts is generally a smooth process, you might occasionally encounter minor hiccups. Here are a few common issues and their solutions:
Photoshop Not Recognizing Installed Fonts
If you've installed a font and it's not appearing in Photoshop's font list, the most common reason is that Photoshop was open during the installation. Simply close and reopen Photoshop. If the font still doesn't appear, ensure you've restarted your computer, as some system-wide font caches might need a refresh.
Font Files Not Installing Correctly
Ensure you are downloading .otf or .ttf files. Older font formats like PostScript Type 1 are no longer supported by Photoshop. If you downloaded a font in a different compressed format (like .7zip or .rar), you'll need compatible software to extract those files before installation.
Admin Privileges Required
Some system-level font installations might require administrator privileges. If you encounter a prompt asking for elevated permissions, provide them to proceed with the installation.
Not All Fonts Are Compatible
While most .otf and .ttf fonts will work, there might be rare instances where a specific font isn't fully compatible with Photoshop or your operating system. In such cases, you may need to try a different font or seek support from the font designer or distributor.
By understanding these steps and potential troubleshooting tips, you can confidently expand your font library and elevate your designs in Adobe Photoshop.