Sound plays a crucial role in the quality of visual content. Even if you’re not a professional content creator, understanding basic video editing techniques, such as adding music, can significantly elevate your personal projects and family videos. DaVinci Resolve, an all-in-one solution for video editing, visual effects, color correction, and audio post-production, offers a powerful platform for both beginners and seasoned professionals to enhance their content. This guide will walk you through the process of adding music, specifically MP3 files, to your DaVinci Resolve projects, addressing common import issues and providing effective solutions.
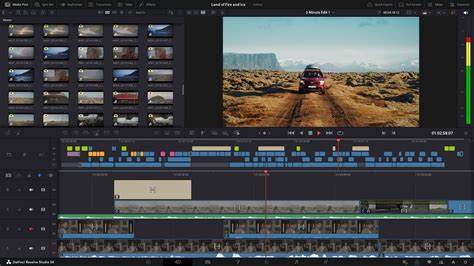
Importing Media into DaVinci Resolve
The foundational step in any video editing project is importing your media. This includes your video clips, sound effects, and, of course, your music files.
- Open Your Project: Launch DaVinci Resolve and open either a new project or an existing one.
- Navigate to the Edit Page: Ensure you are on the "Edit" page by clicking the Edit tab located at the bottom of your screen.
- Import Media: Go to
File > Import File > Import Media. Alternatively, you can use the keyboard shortcutCTRL+I(orCMD+Ion Mac). - Locate Your Files: In the import media window, navigate to the folder on your computer that contains your music files. Select the MP3 clips you wish to use and click "Open."
Once imported, all your media files will appear in the "Media Pool," typically found in the top-left corner of the screen.
Adding Music to the Timeline
With your media imported, you can now bring your music into your project's timeline.
- Select and Drag: In the Media Pool, locate the audio clip you want to use. Simply click and drag this audio clip directly onto the project timeline.
- Positioning: You can align the audio clip with the video track at the exact point where you want the music to begin. If you intend for the music to play throughout the entire video, drag the clip to the very beginning of the audio track.
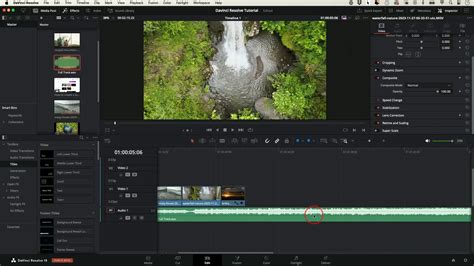
Adjusting Music Volume and Fades
Music files are often recorded at a higher volume than is suitable for background use. It's essential to adjust the audio levels so that it complements, rather than overpowers, any original audio from your video clips, such as dialogue or sound effects.
Lowering the Volume
The most straightforward way to adjust the volume of your music track is by using the horizontal line present on the audio clip within the timeline.
- Locate the Volume Line: On the audio track in your timeline, you will see a horizontal line.
- Adjust Volume: Click and drag this line upwards to increase the volume or downwards to decrease it. Lowering this line is crucial if you want the music to serve as background audio.
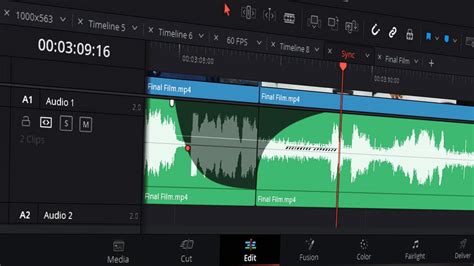
Creating Fades
To avoid an abrupt end to your music, especially if you've trimmed the clip, you can implement fade-out effects.
- Trim Music Clip (if necessary): If you need to shorten the music track, select the razor blade icon (or press
B) from the toolbar at the top of the timeline. Click on the audio clip where you want to create a cut, dividing it into two separate clips. - Apply Fade Out: To create a smooth fade-out, locate the small white handles on the top corners of the audio track. Click and drag these handles to the left or right to control the duration and intensity of the fade-out effect. This creates a more natural and satisfying conclusion to your audio.
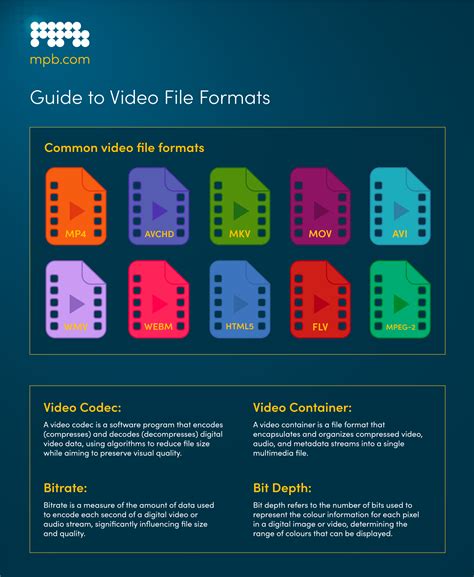
Addressing MP3 Import Issues in DaVinci Resolve
While DaVinci Resolve generally supports MP3 files, users sometimes encounter difficulties importing them. This can be due to various factors, including codec compatibility, file integrity, and specific software requirements.
Does DaVinci Resolve Support MP3?
Yes, DaVinci Resolve does support the MP3 file format. Similar to WAV files, you can typically import an MP3 audio file directly into the software and use it in your video projects by dragging and dropping it onto the timeline.
Why Won’t DaVinci Resolve Import MP3?
Several reasons can contribute to MP3 import problems:
- Constant Bit Rate (CBR) Requirement: DaVinci Resolve often performs best with MP3 files encoded using a Constant Bit Rate (CBR). Variable Bit Rate (VBR) MP3s, where the bit rate fluctuates throughout the audio file, can sometimes cause import or playback issues due to their inconsistent data encoding.
- Unsupported Sample Rates: DaVinci Resolve has specific requirements for audio sample rates. If your MP3 file uses a sample rate that is not supported by the software, it may lead to import errors. Standard sample rates like 44.1kHz and 48kHz are usually compatible, but higher or non-standard rates might pose problems.
- Corrupted or Damaged Files: An MP3 file that has been corrupted during download, transfer, or improper saving may be unreadable by DaVinci Resolve.
- DRM Protection: MP3 files that are protected by Digital Rights Management (DRM) may not be compatible with DaVinci Resolve or other editing software.
- File Path Issues: Complex file paths, especially those containing special characters, symbols, or excessively long names, can sometimes interfere with DaVinci Resolve's ability to locate and import files.
- Outdated Software Version: Using an older version of DaVinci Resolve might lead to compatibility issues with certain file formats, including newer or specific types of MP3 encodings.
Troubleshooting MP3 Import Issues: Effective Solutions
When you encounter difficulties importing MP3 files, several reliable methods can help you overcome these hurdles.
Fix 1: Insert the Correct MP3 File into a Desired Audio Track
A common oversight is placing the audio file on an incorrect track type. DaVinci Resolve has dedicated tracks for audio.
- Drag to Timeline: From the "Media Pool," drag your MP3 file to the project timeline.
- Correct Placement: Ensure you are dropping the file onto a dedicated audio track, typically labeled "Audio 1" or similar, located in the lower section of the timeline. Before releasing the mouse button, you should see the track name appear, confirming correct placement.
Fix 2: Convert the MP3 to an MP4 File (Audio Only)
While an MP4 is typically a video container, converting an MP3 to an MP4 can sometimes resolve codec compatibility issues, as the resulting MP4 will contain only audio and be treated as an audio file by Resolve.
- Use a Converter: Employ a reliable online converter tool like FreeConvert.
- Upload and Convert: Locate your MP3 file, drag it into the converter tool, and ensure the "Output" format is set to MP4.
- Download: Once the conversion is complete, download the resulting MP4 file. It will usually be found in your computer's "Downloads" folder.
- Import to DaVinci Resolve: Drag the newly converted MP4 file into the "Media Pool" of DaVinci Resolve. You should now be able to add it to your timeline.
- Codec Check: Upon importing, you might notice the codec has changed from "MP3" to "AAC." AAC is a widely compatible audio codec that generally offers good quality.
How To Convert MP3 To MP4 [Easy 2023]
Fix 3: Converting Variable Bit Rate (VBR) to Constant Bit Rate (CBR)
If your MP3 file is encoded with a Variable Bit Rate (VBR), DaVinci Resolve might struggle with it. Converting to a Constant Bit Rate (CBR) can ensure smoother import and playback.
- Check Bit Rate Mode: To determine if your MP3 is VBR, you'll need a tool like MediaInfo (a free software).
- Analyze File: Install and open MediaInfo. Navigate to your audio file, and in the "General" tab, under "Audio," you should find the "Bit rate mode" information.
- Convert to CBR: If the file is VBR, use an audio converter that allows you to specify CBR as the output setting. Many online tools and audio editing software (like Audacity) offer this functionality. Set the desired bit rate (e.g., 192kbps or 320kbps) and convert the file.
- Import to Resolve: Once converted to CBR, import the new MP3 file into DaVinci Resolve.
Fix 4: Convert MP3 File to WAV
The WAV format is a lossless audio format that is universally supported by video editing software, including DaVinci Resolve. If MP3 conversion methods fail, converting to WAV is a highly effective next step.
- Use a Converter: Utilize an online tool like FreeConvert.
- Upload and Select WAV: Drag your MP3 file into the converter. Specify "WAV" as the output format.
- Advanced Options (Optional): For further customization, you can often access "Advanced Options" by clicking a gear icon. Here, you can adjust settings like sample rate and bit depth if necessary, though default settings are usually sufficient.
- Apply Settings and Convert: Confirm your chosen settings and initiate the conversion process.
- Download: Download the converted WAV file.
- Import to Resolve: Import the WAV file into DaVinci Resolve.
Alternatively, if you are recording new audio, consider using a microphone that directly supports WAV output, such as the Hollyland Lark Max, which can record up to 14 hours in 48kHz WAV format directly to its internal memory.
Fix 5: Convert MP3 to Multiple Formats Using FFMPEG
For advanced users or persistent issues, FFMPEG is a powerful command-line tool that can convert audio files into a wide array of formats. This can help you generate different versions of your audio to test compatibility.
- Open Command Prompt: Press
Windows key + R, typecmd, and press Enter to open the Command Prompt. - Navigate to FFMPEG Directory: Use the
cdcommand to navigate to the directory where FFMPEG is installed. - Execute Conversion Command: To convert your MP3 file (e.g.,
your_audio.mp3) to several common formats like AAC, MP4, and MOV, you can use a command similar to this (adjust file names and paths as needed):bashffmpeg -i your_audio.mp3 output_aac.aac output_mp4.mp4 output_mov.movThis command will create multiple output files. - Import into Resolve: Import these newly generated files into DaVinci Resolve and see which format plays back correctly.
Additional Troubleshooting Tips
- Check for File Corruption: Before attempting any conversions, try playing your MP3 file in a different media player (like VLC Media Player) to ensure it isn't corrupted. If it doesn't play elsewhere, the file itself is the problem.
- File Naming Conventions: Ensure your MP3 file names are simple and do not contain special characters, emojis, or excessively long strings. Renaming the file to something straightforward like
music_track_01.mp3can sometimes resolve import issues. - Unsupported Sample Rates (96kHz): DaVinci Resolve has a strong preference for standard audio sample rates, typically 48kHz for video production. If you are working with 96kHz audio files (often found in high-end studio recordings), you may encounter import problems. In such cases, using a tool like Wave Agent to batch-resample your files to 48kHz before importing into Resolve is recommended. For complex audio workflows involving high sample rates, consider exporting an XML or OMF from DaVinci Resolve and completing the sound editing and mixing in dedicated audio post-production software like Pro Tools.
- Missing Files: If you see files in your system's finder but they don't appear in DaVinci Resolve's Media Pool, it could be due to subtle file naming discrepancies or, as noted above, specific character encoding issues within the path or filename that Resolve cannot interpret.
- Software Updates: Always ensure you are using the latest stable version of DaVinci Resolve, as updates frequently include improved codec support and bug fixes.
By understanding these common issues and employing the provided solutions, you can confidently add MP3s and other audio files to your DaVinci Resolve projects, significantly enhancing the overall quality and professionalism of your visual content. Remember that while DaVinci Resolve is a powerful all-in-one tool, complex audio workflows might benefit from specialized audio software for optimal results.