Adding subtitles and captions to your video projects in DaVinci Resolve is a crucial step in making your content accessible to a wider audience. This is particularly important for viewers who are deaf or hard of hearing, but it also significantly enhances the viewing experience for a large portion of the online population. In fact, with a substantial percentage of online viewers preferring subtitles, understanding how to implement them effectively in your DaVinci Resolve projects is an investment of time that yields significant returns in reach and engagement. This guide will walk you through the various methods of adding subtitles in DaVinci Resolve, covering both the free and Studio versions, as well as exploring third-party solutions.
The Importance of Subtitles and Captions
Subtitles and captions are more than just text on a screen; they are bridges that connect your content to a broader audience. For individuals with hearing impairments, they are essential for comprehension. Beyond accessibility, subtitles cater to a growing preference among viewers who watch videos in noisy environments, at work, or simply prefer to read along. The statistic that 41% of Americans prefer subtitles when watching content online underscores this trend, highlighting that well-implemented subtitles can dramatically increase viewer retention and overall satisfaction with your video.
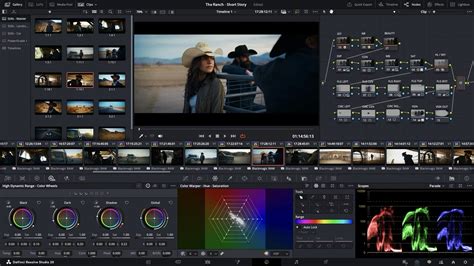
How to Add Subtitles in DaVinci Resolve
DaVinci Resolve offers multiple pathways to incorporate subtitles into your videos, catering to different needs and versions of the software.
Manual Subtitle Creation in DaVinci Resolve (Free Version)
For users of the free version of DaVinci Resolve, the primary method for adding subtitles involves manual creation using subtitle tracks. While the text tool can be used, it is generally less efficient and more cumbersome than dedicated subtitle tracks. Utilizing subtitle tracks streamlines the process, making it more manageable and ultimately more enjoyable.
Here’s a step-by-step breakdown of how to manually add subtitles in DaVinci Resolve:
Navigate to the Edit Workspace: Begin by opening your project and ensuring you are in the "Edit" workspace. This is where most of your timeline editing will take place.
Add a Subtitle Track:
- In the "Edit" workspace, locate and select the "Effects" tab.
- Within the "Effects" window, navigate to "Titles" and scroll down to the bottom of the list. You will find the "Subtitle" option.
- Click and drag the "Subtitle" element onto the timeline, positioning it in the dedicated subtitle track area, which is typically located just above your main video and audio tracks. If you scroll further down in the "Titles" list, you might find pre-designed subtitle templates (e.g., white text with a shadow) that can expedite the editing process.
- An alternative method is to right-click directly above your Timeline and select "Add Subtitle Track." To place the first subtitle precisely, move your playhead to the desired starting point on the timeline, then right-click within the newly created subtitle track and select "Add Track."

Add Your Subtitle Text:
- Once the subtitle track is in place, select the subtitle clip on your timeline.
- Navigate to the "Inspector" tab, which is usually located in the top-right corner of the workspace.
- Under the "Caption" section within the Inspector, you can type the dialogue or text that corresponds to the current frame of your video. Ensure the text accurately reflects the audio at that specific moment.
Adjust the Length of Your Subtitle Track:
- Precise timing is crucial for effective subtitles. To synchronize your subtitle with the audio, you need to adjust its duration.
- Click and drag the right-hand edge of the subtitle clip on your timeline. Extend or shorten it until its start and end points precisely align with the beginning and end of the spoken audio or the relevant visual cue.
Repeat for the Rest of Your Subtitles:
- To add subsequent subtitles, select the current subtitle clip in the Inspector window and click the "Add New" button. This will create a new subtitle element immediately following the previous one.
- Continue this process, repeating steps 3 and 4 for each piece of dialogue or text, until you have manually added subtitles to your entire video project.
Stylize Your Subtitles:
- After inputting all your subtitle text, you can customize their appearance for optimal legibility and aesthetic appeal.
- With the subtitle track selected, go to the "Inspector" window and choose the "Track" tab.
- Here, you have a range of options to modify the subtitles. You can change the font family, add an outline (stroke) for better contrast, and adjust their position on the screen.
- Further enhancements can be made by adding effects such as a background color to the subtitle box or a drop shadow, which helps them stand out against busy video backgrounds.
Keyboard Shortcut Note: As of DaVinci Resolve 20, there are no default keyboard shortcuts specifically for editing subtitles. The process of adding and navigating between subtitles typically requires mouse interaction. However, you can create a custom keyboard shortcut for adding subtitles. To do this, press Ctrl + Alt + K (or the equivalent on your operating system), find the "Add Subtitle" option in the keyboard customization menu, and assign your preferred keystroke.
Automatic Subtitle Generation (DaVinci Resolve Studio Exclusive)
For users who have invested in the paid DaVinci Resolve Studio version, a powerful feature for automatic subtitle generation is available. This capability leverages advanced voice recognition technology to transcribe your audio directly into subtitles, saving a significant amount of time and effort compared to manual methods.
Here’s how to utilize this feature:
- Create Your Subtitles Automatically:
- When you are ready to generate subtitles, navigate to the "Timeline" drop-down menu at the top of the DaVinci Resolve interface.
- Select "AI Tools" and then choose "Create Subtitles from Audio."
- A pop-up window will appear, offering several customization options:
- Language: Select the primary language spoken in your audio track.
- Caption Preset: Choose a preset that defines the general style and formatting of your captions.
- Maximum characters per line: This setting controls the line length of your subtitles. The default of 18 characters is often a good starting point, but you may need to adjust it based on your video's aspect ratio and desired readability.
- Once you have configured these settings, click "Create." DaVinci Resolve will then process your audio, and the subtitle generation will commence.
- The time required for this process can vary considerably, depending on the length of your video and the processing power of your system. It can range from a few seconds to several minutes.

Stylize Your Automatically Generated Subtitles:
- After the AI has created the subtitle track, select it on your timeline.
- In the "Inspector" panel, you can now fine-tune the appearance of these auto-generated captions.
- Customize the font, add outlines for better visibility, and apply various effects to achieve your desired look.
- This is also the stage where you can review the timing. If the AI generator has made any errors in synchronization, you can adjust the start and end points of individual subtitle clips.
Animate Your Subtitles for Enhanced Engagement:
- To make your subtitles more dynamic and engaging, consider adding subtle animations. This can help to keep your audience focused on the dialogue as it's being spoken.
- Navigate to the "Effects" tab.
- Search for and drag the "Word Highlight" effect onto your subtitle track.
- This effect visually highlights the word that is currently being spoken on screen, providing a clear visual cue to the viewer.
- Experiment with the "background color" option within the effect's settings to find a highlight color that complements your video's aesthetic and ensures excellent contrast.
How to Make Word by Word Subtitles in DaVinci Resolve
Third-Party Options for Auto-Captions and Subtitles
Beyond the built-in capabilities of DaVinci Resolve, several third-party solutions can assist in creating automatic captions and subtitles, offering flexibility and additional features.
Simon Says Plugin
As of the time of this article, the Simon Says plugin is a highly regarded option for generating automatic subtitles within DaVinci Resolve. This extension is capable of transcribing your video clips automatically and can even color-code the captions by speaker, which is invaluable for interviews or multi-person dialogues.
- Availability: This plugin is available for both Mac and Windows operating systems. However, it's important to note that while the extension itself is free, its full functionality within DaVinci Resolve might require the Studio version on Windows.
- Workflow: The typical workflow involves using the Simon Says platform to upload your media, transcribe it, and then export the transcript. This transcript can then be imported into DaVinci Resolve.
- Importing Transcripts: Once you have your transcript file (often in SRT format), you can simply drag and drop it into the DaVinci Resolve timeline panel. DaVinci Resolve will automatically recognize it and convert it into a subtitle track.
External SRT File Generation
Another robust method involves using third-party software or online services to generate a standard SRT (SubRip Text) subtitle file. Many professional transcription services and specialized software tools can produce these files from your audio or video.
- Process: You would upload your video or audio file to the chosen third-party service or software. The service then transcribes the audio, and you receive an SRT file.
- Importing into DaVinci Resolve: Similar to the Simon Says export, you can then import this SRT file directly into your DaVinci Resolve project. Dragging and dropping the SRT file into the timeline will automatically create a synchronized subtitle track, ready for any necessary adjustments or styling within Resolve.
Conclusion: Optimizing Your Subtitling Workflow
Manually adding subtitles in DaVinci Resolve, while offering complete control, can indeed be a laborious and time-consuming undertaking, especially for longer videos. For creators looking to streamline this process without compromising on quality, exploring third-party transcription services or considering an upgrade to the DaVinci Resolve Studio version for its AI-powered features is a worthwhile consideration. Each method offers distinct advantages, and the best choice will depend on your budget, technical proficiency, and the specific demands of your project.
To further enhance your DaVinci Resolve skills, a wealth of in-depth tutorials are available, covering everything from fundamental usage to advanced color grading techniques.
For those seeking to accelerate their video production workflow even further, the Storyblocks library offers a vast collection of pre-made, customizable templates. A subscription to Storyblocks provides unlimited access to royalty-free templates, footage, music, sound effects, and much more, empowering you to create content faster and more efficiently within DaVinci Resolve.