Procreate has revolutionized the way we create art, especially when it comes to deliciously illustrated sweet treats. The digital canvas now offers an accessible and versatile platform for artists to bring their sweetest imaginings to life, from the rich, inviting layers of a vibrant strawberry cake to the whimsical swirls of frosting atop a cupcake that appear almost too good to eat. This guide will walk you through the process of creating mouthwatering sweet treat illustrations in Procreate, focusing on techniques that build confidence for beginners while offering depth for more experienced digital artists.
Laying the Foundation: Sketching Your Sweet Treats
For those new to digital painting, starting with simple shapes can help build confidence. Begin by sketching out basic forms-circles for cakes and ovals for cookies. These foundational shapes are the building blocks of any delicious illustration. Think of a perfectly round cake, or the slightly irregular, inviting curve of a freshly baked cookie. Even something as complex as a multi-layered cake can be broken down into these fundamental geometric shapes. A tiered cake, for instance, can be visualized as a series of stacked cylinders, while a Bundt cake is essentially a torus. Cookies can range from simple circles to more elaborate shapes like stars or gingerbread people, but the principle remains the same: start with a recognizable silhouette.
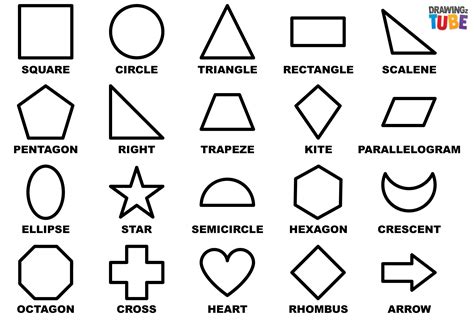
Once you have a basic understanding of form, you can begin to refine these sketches. Don't aim for perfection in the initial sketch; think of it as a blueprint. You can always refine lines and add details later. Consider the perspective of your treat. Is it viewed from directly above, a slight angle, or straight on? These decisions will impact the shapes you draw. For a cake slice, you might start with a trapezoid to represent the side profile, then add curved lines for the frosting and filling. For a donut, a circle with a smaller circle removed from the center is your starting point. The key is to simplify complex forms into manageable components.
Embracing Digital Tools: Brushes for Food Illustrations
There’s an array of options available online-from watercolor effects that mimic icing drips to textured brushes that give depth to cookie surfaces. Selecting the right brushes is crucial for achieving realistic or stylized food illustrations. Many artists find success using brushes specifically designed for food art, which often emulate traditional media like watercolors, oils, or pastels. For instance, a brush with a slightly irregular edge can perfectly mimic the texture of a crumbly cookie or a rough buttercream frosting.
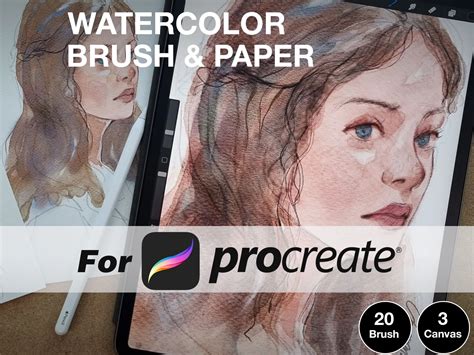
Consider brushes that offer varying levels of opacity and flow. These allow for subtle layering and blending, essential for creating soft frosting or the gradual darkening of a baked good's edges. Watercolor brushes can be particularly effective for creating realistic icing drips or a glossy sheen on fruits. For textured elements like sprinkles, nuts, or the surface of a cake, a stipple or speckle brush can add a convincing granular detail. Experimentation is key. Download a variety of brush packs and test them out on different surfaces. You might discover that a specific charcoal brush works wonders for creating the subtle browning on a pie crust, or that a chalk brush can achieve a powdery dusting of powdered sugar. Don't underestimate the power of default Procreate brushes either; many of them can be tweaked to create unique food-related textures.
Building Depth and Realism: Layering, Highlights, and Shadows
As you dive into creating your sweet masterpieces, don’t shy away from experimenting with layering techniques. Start with a base color and gradually add highlights and shadows-this will bring your treats off the screen! Digital art thrives on layers. Each element of your illustration-the cake base, the frosting, any fillings, toppings, and even the background-should ideally exist on its own layer. This allows for independent editing and manipulation without affecting other parts of the artwork.
Begin with a base color for your primary element, such as the cake itself. This layer provides the foundational hue. Then, create a new layer above it for the frosting. You can set this frosting layer to "Clipping Mask" to the cake layer. This ensures that any paint you apply to the frosting layer will only appear within the boundaries of the cake layer below, preventing messy edges.
The magic of bringing your illustrations to life happens with the addition of highlights and shadows. Shadows are typically rendered in darker, cooler tones, while highlights are lighter and often warmer. When creating shadows, think about where the light source is coming from. Areas that are obscured by other elements or are further from the light will be darker. Conversely, areas that are directly hit by light will be brighter. You can use blend modes like "Multiply" for shadows and "Screen" or "Add" for highlights to achieve natural-looking lighting effects.
For instance, on a cake with rounded frosting, the shadows would typically fall on the lower curves and underneath any overhangs, while highlights would catch the top curves and edges facing the light. Pay attention to the subtle reflections that can occur, especially on glossy surfaces like ganache or certain types of frosting. These small details contribute significantly to the illusion of three-dimensionality. Even the subtle cast shadow of a sprinkle onto the frosting can add a surprising amount of realism.
The Art of Detail: Sprinkles, Fruit, and Finishing Touches
Another tip? Pay attention to details like sprinkles or fruit toppings-they can transform an ordinary dessert illustration into something extraordinary! These small additions are what elevate a good illustration to a great one. Sprinkles, for example, are not just dots; they have form and texture. They can be rendered with slight variations in size, color, and even orientation.
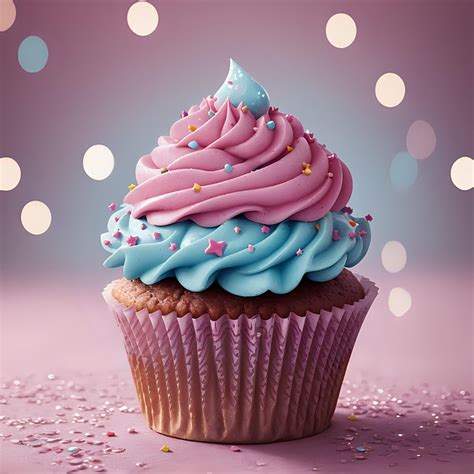
When adding fruit, consider its natural sheen and translucency. A strawberry, for instance, has tiny seeds that create a subtle texture, and its surface might have a slight gloss. For berries, you can use soft brushes to create a translucent effect, allowing a hint of the underlying frosting to show through. Don't forget the subtle imperfections that make food look appealing - a slightly melted edge on chocolate, a small crack in a cookie, or a drip of sauce. These imperfections add character and believability.
The placement of these details is also important. A scattering of sprinkles should feel natural, not perfectly uniform. A dollop of whipped cream should have soft, organic edges. Even the way a cherry sits atop a cake can be adjusted to enhance the overall composition. These finishing touches are the artist's signature, imbuing the digital treat with personality and making it truly irresistible.
The Joy of Sharing: Sweet Treats as Expressions of Happiness
The joy of illustrating sweet treats isn’t just about aesthetics; it's about sharing happiness through art. Food, especially desserts, is often associated with celebration, comfort, and joy. By illustrating these confections, artists can evoke those same positive emotions in their audience. Whether it's a birthday cake, a comforting cookie, or a decadent pastry, these illustrations can serve as a visual representation of happy moments.
Feeling hungry for a scrumptious slice of cake? This process, from initial sketch to final detail, allows artists to share their passion for both art and delicious food. The ability to create these vibrant, tempting images digitally means they can be shared instantly with a global audience, spreading a little bit of sweetness and visual delight. The act of creation itself can be incredibly rewarding, offering a therapeutic outlet and a way to explore creativity.
A Better Option for Gouache Painting in Procreate
In this video you’ll learn how to draw a piece of cake in a painterly, illustrated style using digital gouache. Learn how to draw in Procreate, starting with a sketch, and progressing through color blocking, digital painting, adding texture, shading, and much more. You’ll also get familiar with Procreate features such as Quick Line, Alpha Lock, Clipping Masks, using blend modes to create shadows and highlights, and others. Looking for tutorials about Procreate for beginners? I got you: I’ll talk you through each step. A word of caution: this video may compel you to consume copious amounts calorific confections. NOTE: This video uses brushes from a previous version of Gouache Paintbox. The techniques explored in these tutorials can be adapted to a wide range of sweet treats, encouraging artists to experiment and develop their unique digital style. The fundamental principles of shape, form, color, light, and shadow apply universally, allowing for endless creative possibilities within the realm of digital dessert illustration.