Adding text to your images and designs is a fundamental aspect of graphic editing, allowing you to convey messages, add titles, captions, or creative elements. Photopea, a powerful and free online photo editor, offers a robust set of tools for text manipulation, making it accessible for beginners and versatile enough for advanced users. This guide will walk you through the various methods and options for incorporating and styling text within your Photopea projects, from simple additions to intricate formatting.
The Basics of Text Creation
Photopea provides two primary methods for creating text layers, each suited for different design needs: Point Text and Paragraph Text. Understanding the distinction between these two is the first step to effectively using the Type tool.
Point Text
Point text is defined by a single origin point. This means that when you start typing, the text will flow from that initial click. It's ideal for short phrases, single words, or titles where you don't need the text to wrap automatically within a defined area.
To create point text, select the Type tool from the toolbar (its icon typically looks like a 'T'). Then, simply click once on your canvas where you want the text to begin. This click establishes the origin point. As you type, the text will extend from this point.
Paragraph Text
Paragraph text, on the other hand, is defined by a rectangular bounding box. This method is more akin to a traditional word processor. When you create a paragraph text box, the text will automatically wrap within the boundaries of that rectangle. This is perfect for longer blocks of text, descriptions, or any content that needs to be contained within a specific area.
To create paragraph text, select the Type tool. Instead of a single click, you will click and drag on your canvas to draw a rectangle. This rectangle defines the area where your text will reside. Once you release the mouse button, the bounding box is set, and any text you type will flow within it, wrapping to new lines as needed.
Entering and Editing Text Layers
Once you've created a text layer, you'll need to know how to interact with it for editing.
Entering a Type Layer
To enter a type layer and begin editing its content, you have a couple of straightforward methods:
- Using the Type Tool: Select the Type tool again. Then, simply click on the text within the type layer on your canvas. Newly created text layers are often entered automatically, allowing you to start typing immediately.
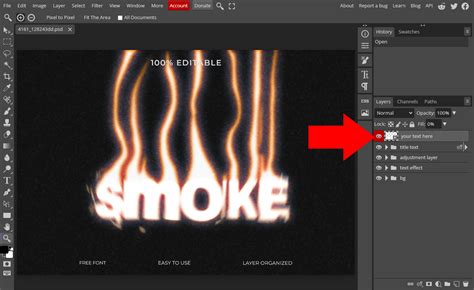
- Double-Clicking: You can also double-click directly on the text layer in the Layers panel. This action ensures that you are focused solely on editing the text content.
When you are in a type layer, you can edit the layer's content and nothing else. This focused mode prevents accidental modifications to other elements of your design.
Editing Text Content
Once you've entered a type layer, you can perform standard text editing operations:
- Selecting Text: You can select any part of the text using your mouse, just as you would in any other text editor. Click and drag over the characters you wish to select.
- Modifying Text: Once text is highlighted, you can delete it, add new characters, or replace it entirely.
- Copy and Paste: Standard copy and paste functions work within Photopea's text layers. You can copy text from other sources and paste it into your Photopea project, or move text between different text layers.
Confirming or Canceling Changes
When you are finished editing a text layer, you must explicitly confirm or cancel your changes. This is done via buttons located in the top menu bar. Look for options like a checkmark to confirm your edits or an 'X' to cancel them. Escaping the type layer without confirming or canceling will result in your changes being lost or reverted.
Text Formatting and Styling
Photopea offers a comprehensive suite of tools to customize the appearance of your text, allowing for precise control over its look and feel.
Font Selection and Size
Photopea boasts a vast database of royalty-free fonts, providing a wide variety of styles to choose from.
- Accessing Fonts: When a type layer is selected, you can change the font by accessing the font dropdown menu, typically found in the top options bar when the Type tool is active.
- Using External Fonts: For fonts not included in Photopea's library, you can upload your own TrueType (TTF) or OpenType (OTF) font files. This is done by opening them directly within Photopea using
File > Openor by dragging and dropping the font files onto the Photopea canvas.
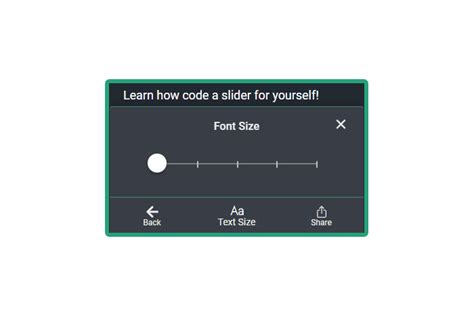
The Size of your text is a crucial element of its visual impact. You'll find a "Size" input field located directly under the main menu bar.
- Manual Input: You can type a specific font size numerically into this field.
- Slider and Arrow: For a more visual approach, you can click the arrow next to the Size input field to reveal a slider. This slider allows you to adjust the font size interactively. This is a great way to visually understand how big your text will be compared to other page elements. This slider tops out at 150px, but you can input larger values manually.
Text Color
Changing the color of your text is a fundamental styling option.
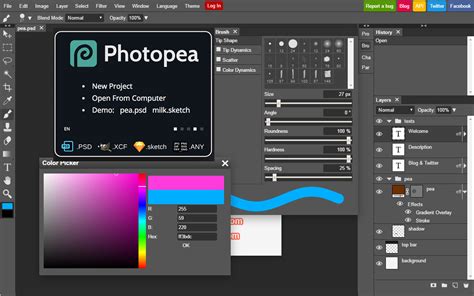
- Color Picker: When your text layer is selected and you are in edit mode, you will see a color swatch (often a black box) next to the vertical three dots in the options bar. Clicking this swatch opens the color picker, allowing you to select any color for your text.
Advanced Text Styling: Strokes and More
Beyond basic color changes, Photopea provides options for more elaborate text effects.
- Adding a Stroke: To add an outline or stroke to your text, click on the three dots next to the color swatch. In the submenu that appears, you will find the option to add a stroke color along with its width. This allows you to create emphasis or add a stylistic border to your text.
Character and Paragraph Styles
Photopea supports the concept of Character Styles and Paragraph Styles, similar to professional desktop publishing software. These styles allow you to define and apply sets of formatting attributes consistently across your text.
- Character Style: Applies formatting to selected characters within a text layer (e.g., bolding a single word).
- Paragraph Style: Applies formatting to an entire paragraph or block of text (e.g., setting justification for a whole paragraph).
When the type layer is selected in the Layers panel, you can change these styles through dedicated panels or options that appear in the top menu bar. You can also enter a type layer and select a specific part of the text to apply character-level styling.
Typography Text Manipulation - Photopea Tutorial
Text Alignment and Spacing
Proper alignment and spacing are critical for readability and visual harmony in your designs. Photopea offers tools to manage these aspects effectively.
Aligning Point Text
The alignment of a Point text layer is computed according to its point of origin. This means that the text will align relative to the initial click point you made when creating the text. You can choose from standard text alignment options like left, center, and right alignment, which will affect how the text flows away from its origin.
Aligning Paragraph Text
For Paragraph text, alignment refers to how the text is positioned within its bounding box. Photopea provides standard alignment options:
- Left Align: Text aligns to the left edge of the bounding box.
- Center Align: Text is centered within the bounding box.
- Right Align: Text aligns to the right edge of the bounding box.
- Justify: Text fills the entire width of the bounding box, with spacing adjusted between words and sometimes letters to achieve this.
Spacing Between Text Elements
When you have multiple pieces of text, controlling the space between them is essential for a clean layout.
- Aligning Spacing: If you have three or more pieces of text, Photopea allows you to align the space between them either horizontally or vertically. This feature is particularly useful for creating consistent gaps between elements like bullet points, list items, or sequential text blocks.
Text Transformation and Manipulation
Beyond basic editing and styling, Photopea allows you to transform and manipulate text layers in various ways.
Resizing Text with the Move Tool
A quick and intuitive way to resize text is by using the Move tool.
- Switch to Move Tool: Select the Move tool (keyboard shortcut
V). - Select Text: Click on the text layer you wish to resize.
- Bounding Box: This action will bring up a bounding box around your text, complete with nine square nodes.
- Resizing: Click and drag these nodes to resize the text. Holding down the
Shiftkey while dragging will maintain the text's aspect ratio, preventing distortion.
Understanding Text Layer Behavior
It's important to understand how Photopea treats text layers. When you create a text layer, it is stored as vector data. This means that you can scale it up or down multiple times without losing quality, a significant advantage over rasterized text. However, once you rasterize a text layer (convert it to pixels), it will behave like any other pixel-based layer and will lose its scalability.
Working with Bidirectional Text and Punctuation
For users working with languages that read from right to left, such as Arabic or Hebrew, Photopea offers support for bidirectional text and punctuation handling. This ensures that the text is displayed and edited correctly, maintaining the proper flow and character order. When typing such languages, Photopea's engine will interpret the input and render it according to the linguistic conventions.
Advanced Text Concepts
Photopea's text capabilities extend to more nuanced features, offering flexibility for complex designs.
Text on a Curve
While not explicitly detailed in the provided information, many advanced image editors allow text to follow a path or curve. This is often achieved by drawing a vector path with the Pen tool and then applying text to that path. This allows for highly creative text layouts, such as text arranged in a circle or along a custom shape. In Photopea, when you create a path and then use the Type tool on it, you might see specific symbols, like an 'X' and an 'O' on the path, indicating the start and end points of the text flow along the curve.
Layer Styles for Text
Beyond basic strokes, Photopea, like other advanced editors, typically offers a range of layer styles that can be applied to text. These can include:
- Drop Shadow: Adds a shadow behind the text for a sense of depth.
- Inner Shadow: Adds a shadow inside the text, creating a beveled or inset effect.
- Bevel and Emboss: Creates a raised or indented appearance.
- Gradient Overlay: Fills the text with a gradient of colors.
- Color Overlay: Fills the text with a solid color.
These layer styles can be accessed by double-clicking on the text layer in the Layers panel (but not directly on the text content itself, which enters edit mode) and selecting the "Layer Styles" option.
By mastering these various tools and techniques, you can effectively integrate text into your Photopea projects, enhancing your designs and communicating your message with clarity and style.