Adobe Photoshop, a staple in the creative toolkit of countless artists, offers a surprisingly robust platform for animation, even though it wasn't its primary design focus. Its strength lies in the granular control it provides over aesthetics, lending a hands-on feel to the animation process and unlocking endless creative possibilities. This guide aims to bridge the gap between design and animation, catering to both beginners and seasoned professionals looking to animate within Photoshop.
To embark on your animation journey in Photoshop, a basic to intermediate understanding of the software is essential. Furthermore, you'll need a copy of Photoshop CS6 Extended or a Creative Cloud subscription.
Part 1: Laying the Foundation - Key Animation Features
Before diving into complex sequences, it's crucial to familiarize yourself with the core features that enable animation in Photoshop. This includes understanding the Animation Timeline and the steps involved in exporting your animated creations.
The Animation Timeline: Your Animation Canvas
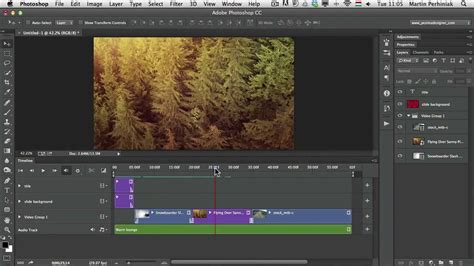
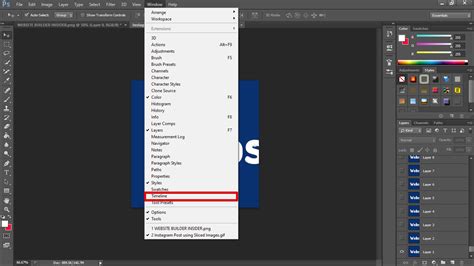
The Animation panel, accessible via Window > Animation, is the heart of Photoshop's animation capabilities. In earlier versions of Photoshop (prior to CC), this panel might appear in "frame mode," displaying thumbnails of each frame. Modern versions, particularly with the Creative Cloud, utilize a more advanced "Timeline mode."
In Timeline mode, the panel synchronizes with the Layers panel, presenting each layer as a track. This mode allows for precise control over frame duration and animation properties. You can navigate through frames using playback controls, zoom in or out of the time display, toggle onion skinning, delete keyframes, and preview your animation.
When you open a video file or an image sequence in Photoshop, the frames are housed within a "video layer," identifiable by a filmstrip icon in the Layers panel. These video layers allow you to paint, clone, and apply filters, masks, transformations, layer styles, and blending modes directly onto individual frames, much like working with regular layers. You can also create selections or masks to confine edits to specific areas of a frame. For non-destructive editing, you can create a blank video layer to reference the original file, ensuring your edits don't alter the source material. It's important to maintain the original file's location relative to your PSD file for this link to persist.
For those using earlier versions of Photoshop (pre-CC) that might only offer the "frame mode" in the Animation panel, it's important to note that this mode displays each separate frame, allowing for unique duration and layer properties to be set for each. While it's best to decide on your animation mode before you begin, Photoshop does offer the ability to convert between frame and timeline animations. The "Convert To Frame Animation" icon allows you to transform a timeline animation into a frame-based one, and conversely, the "Convert To Timeline Animation" icon facilitates the reverse conversion.
Understanding Frame Rates and Exposure
A fundamental concept in animation is the frame rate, measured in frames per second (fps). While Photoshop often defaults to 30 fps, animation, particularly traditional cel animation, commonly uses 24 fps. This means that for every second of animation, you will have 24 distinct images, or frames.
To set your desired frame rate, navigate to the dropdown menu within the Timeline panel and select "Set Timeline Frame Rate." For example, if you're aiming for a standard film look, you'll set it to 24 fps. For web content or simpler animations, a frame rate of 10 to 15 fps might suffice. When you create a new document in Photoshop for animation, the default timeline duration is typically 10 seconds, with the frame rate dependent on your chosen document preset.
Creating Frames: The Building Blocks of Motion
Frame-based animations in Photoshop are constructed by creating a sequence of frames, where each frame represents a unique configuration of your layers. This technique is particularly well-suited for generating animated GIFs for web use, social media, or straightforward motion graphics.
The core principle is simple: display a series of frames in succession to create the illusion of movement. Unlike timeline animations that rely on keyframes and automatic interpolation, frame animations offer direct control over every single frame.
To add content to your animation, select a new frame in the Timeline panel and then modify the layers in the Layers panel to reflect the desired state for that specific frame. Continue this process, adding frames and adjusting layers as needed, until your animation sequence is complete.
Part 2: Streamlining Your Workflow - Cleanup, Color, and Actions
Once you grasp the basics of frame creation, you can begin to refine your animation process. This involves techniques for cleaning up your artwork, efficiently applying color, and leveraging Photoshop's "Actions" feature to automate repetitive tasks.
Frame-by-Frame Animation: The Art of Drawing Each Moment
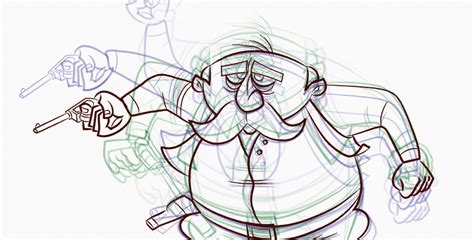
Frame-by-frame animation, often referred to as cel animation, involves drawing each individual frame of your animation. This method provides the highest level of control and allows for the most fluid and nuanced motion.
To begin a frame-by-frame animation, you'll typically start with a new document. The AnimDessin2 extension, available from the Adobe Exchange, can significantly streamline this process. After installing the extension (which requires closing Photoshop during installation and can be found by browsing extensions online via Window > Browse Extensions Online and searching for "AnimDessin2"), you can launch it from Window > Extensions > AnimDessin2. This extension can help set up your timeline frame rate and create initial video layers and exposures automatically.
When creating a new document with AnimDessin2, it often pre-populates a video layer with a one-frame exposure. If you intend to work with "twos" (where each drawing is held for two frames), you can simply increase this frame exposure by one.
For example, if you're creating a simple bouncing ball animation, you would start by drawing the ball in its initial position on frame one. Then, you'd create a new frame (or a "two-frame exposure" if working on twos) and draw the ball in its next position. This process continues for every frame of your animation.
Onion Skins: Visualizing Your Motion
A crucial tool for frame-by-frame animation is "onion skinning." This feature allows you to see faint outlines of the frames before and after your current frame. This is invaluable for maintaining consistency and ensuring smooth transitions between drawings. You can access and configure onion skin settings within the AnimDessin2 panel or Photoshop's Timeline panel. The blend mode for onion skins is typically set to "Multiply," allowing you to see previous and subsequent frames overlaid on your current drawing.
"Ones" vs. "Twos": Optimizing Your Animation
In animation, "ones" refers to drawing each frame of animation on every single frame of the timeline. This results in the most fluid motion but requires the most drawing. "Twos," on the other hand, means drawing each frame on every second frame of the timeline. This effectively halves the number of drawings required, significantly speeding up the animation process while still producing a visually appealing result for many types of motion. Most professional animation, like that seen in classic Looney Tunes cartoons, is done on twos because it offers a good balance between fluidity and efficiency.
- Ones: Ideal for fast, fluid motion like flowing capes, splashing liquids, or rapid movements.
- Twos: A highly efficient method suitable for the majority of animation, providing a good balance of motion and effort.
The choice between ones and twos depends on the desired level of fluidity and the time available for production.
Creating Actions: Automating Repetitive Tasks
For tasks that you find yourself repeating frequently, Photoshop's "Actions" feature is a lifesaver. Actions allow you to record a series of commands and then play them back with a single click. This can include steps like setting up color layers, performing effective bucket fills, or even creating the next frame in a sequence.
To create an action:
- Open the Actions panel (
Window > Actions). - Click the "Create New Action" button.
- Name your action descriptively (e.g., "Fill Background Layer").
- Click "Record."
- Perform the steps you want to automate.
- Click the "Stop Playing/Recording" button when finished.
Now, whenever you need to perform that sequence of steps, simply select the action and click "Play."
Part 3: Advanced Techniques and Creative Exploration
With the foundational knowledge in place, you can start exploring more advanced techniques and creative applications of animation in Photoshop.
Achieving "Squiggle Vision" Style Animation
The "Squiggle Vision" style, exemplified by the flickering flame of a candle, demonstrates how subtle variations in line work can create a dramatic visual effect when animated. This technique relies on slight, organic shifts between frames.
To create a candle with a flickering flame:
- Create the Candle Base: Start with a new document. Use the AnimDessin2 extension to set up your timeline and frame rate (e.g., 24 fps). Create a new layer for the candle base below your animation layer. Choose a color and draw a loose, stylized candle shape.
- Animate the Flame: Select your animation layer and choose an orange color. Draw the first frame of the flame. Then, create a new two-frame exposure and turn on onion skins. Draw the next frame of the flame, ensuring it's slightly different from the previous one, creating a subtle flicker. Continue this process, making small, organic changes to the flame's shape in each subsequent frame. The goal is to achieve a natural, almost organic "wiggle."
Fire flame animation in Photoshop cs6
The Importance of Line Quality
When drawing for animation, especially in a style like "Squiggle Vision," line quality plays a significant role. Line quality refers to the variation in the thickness and weight of your lines. A uniform stroke can appear flat and uninteresting, while varying line weight adds dynamism and life to your illustrations.
To achieve varied line quality in Photoshop:
- Use a Pressure-Sensitive Tablet: A graphics tablet (like a Wacom) is essential for controlling line weight with pen pressure.
- Configure Brush Settings: In the Brush Options panel, ensure "Shape Dynamics" is turned on. Set the "Control" for "Size Jitter" to "Pen Pressure." Also, make sure the global toggle switch for pen pressure is activated.
- Practice: Experiment with varying the pressure applied to your stylus as you draw. Consistent practice will help you master this technique.
Integrating Photoshop with Adobe Animate
For more complex animations and interactive web content, Photoshop can be used in conjunction with Adobe Animate (formerly Flash). Photoshop excels at creating high-quality still images and artwork, offering unparalleled creative control over visual elements. Animate, on the other hand, is built for animation and interactivity.
When importing PSD files into Animate, many Photoshop attributes are preserved, maintaining visual fidelity and allowing for further modification. You can exchange QuickTime video files between the two applications. When you edit video footage in Photoshop, you can paint non-destructively on its frames. Importing a QuickTime video from Photoshop into Animate uses the "Import Video" dialog box. Conversely, Animate documents can be exported as QuickTime video and then imported into Photoshop for frame-by-frame editing.
Key considerations when working between Photoshop and Animate:
- Color Space: Animate works internally with RGB or HSB color spaces. Always create your Photoshop artwork in RGB for optimal compatibility. Animate can convert CMYK to RGB, but it's best to start in the correct color mode.
- Layer Preservation: Animate can import PSD files and preserve most artwork data. However, certain visual attributes might not be imported accurately or may lose their editability in Animate.
- Smart Objects: Animate cannot import Photoshop Smart Objects as editable objects.
- PNGs: PNG objects with transparency in Photoshop are converted to JPG files when imported into Animate, potentially losing transparency.
- Import Options: The PSD Importer in Animate offers various options to maintain visual appearance and editability, such as importing as a "Bitmap Image With Editable Layer Styles," which encapsulates imported objects as a movie clip with transparency.
- Text Handling: Text layers in Photoshop can be imported as editable text objects, vector paths, or flattened bitmap images, depending on your chosen import settings.
By leveraging Photoshop's powerful drawing and selection tools alongside its animation features, and by understanding how to integrate it with specialized animation software, you can unlock a vast spectrum of creative possibilities for bringing your ideas to life. The key, as with all forms of animation, lies in patience, practice, and a willingness to experiment.