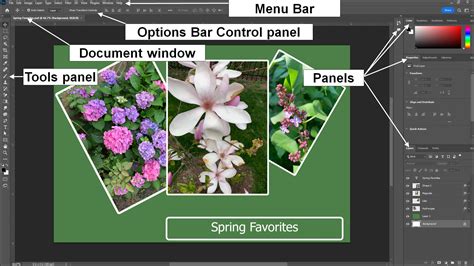
Digital image manipulation is the process of using software such as Photoshop to edit or modify your photograph after it’s been taken. Adjusting your photo’s lighting effects is a quick and simple way to enhance your image, call attention to a particular product within your image, create consistency across images, and convey a specific mood within your photograph. This tutorial will guide you through several simple manipulation techniques using Photoshop's lighting effects, suitable even for those relatively new to the software.
Understanding the Lighting Effects Filter
Photoshop's Lighting Effects filter, though recently retired in some versions, remains a powerful tool for simulating real lighting scenarios. This filter boasts numerous features that can dramatically alter the mood and focus of your images. We will explore two primary projects: adding colored gels and relighting an entire scene, including adding texture. This is the first part of a series, and for more in-depth explanations and extra tips, it is recommended to watch the accompanying video. Ensure your image is in RGB mode and 8-bit color for optimal results.
New Feature, Lighting in Photoshop 2.0
Project 1: Adding Colored Gels and Simulating Lighting
For our first project, we'll use a photograph sourced from Adobe Stock. The Lighting Effects filter allows us to introduce multiple light sources, each with adjustable properties. We can add a "Triple Spotlight" preset, for instance, and then manipulate the color and intensity of each individual light.
To begin, ensure your image layer is a smart object. This is a crucial step for non-destructive editing, allowing you to mask or alter the lighting effects later without permanently altering the original pixels. Duplicate your background layer, name it something descriptive like "Colored Lights," and then convert it to a Smart Object (Layer > Smart Objects > Convert to Smart Object).
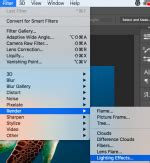
Next, navigate to Filter > Render > Lighting Effects… (ensure you select it from the Render submenu, not directly under Filter if it appears there). In the Preview Window, you'll see a default spotlight. You can drag within the square swatch to choose a color for this light. The "Ambience" slider allows you to brighten or darken the rest of the photo, controlling the overall illumination.
To simulate colored gels, we can add additional light sources. Click the "Spot" icon next to "Lights" at the top of the Preview Window to add a new light. Choose a different light type, such as a "Point Light" or an "Infinite" light, and then select a complementary color from the color swatch. For example, if your primary light is a cool blue, you might choose a warm orange for a secondary light. Adjust the intensity of each light source to achieve the desired balance. You can also control the intensity and direction of each light by dragging the ellipses on the image. The inner ellipse defines the "Hotspot" (the brightest part of the light), and the outer ellipse controls the falloff. Lowering the intensity of a secondary light can help maintain visibility of details in the image, such as the chalk texture in the middle of our example image.
The result can convincingly simulate lighting the sides of a scene with colored spotlights, much like using colored gels on stage lights.
Project 2: Relighting a Scene and Adding Texture
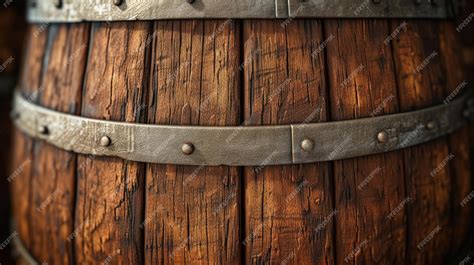
Let's step up the complexity with another image, this time a barrel, also from Adobe Stock. Here, we'll focus on relighting the scene and incorporating texture to enhance its appearance.
Again, start by duplicating your background layer and converting it to a Smart Object. Apply the Lighting Effects filter (Filter > Render > Lighting Effects…). This time, under the "Texture" option, choose "Red." Observe how this option can dramatically pop the texture on the barrel, making its surface details more pronounced.
You can combine texture effects with various light sources. Experiment with different light types, colors, and intensities to sculpt the form of the barrel and draw attention to specific areas. For instance, a strong directional light could highlight the wood grain, while a softer ambient light ensures the shadows aren't too deep.
Advanced Techniques and Considerations
Making a Spotlight Effect:
To create a spotlight effect that calls attention to a particular area, follow these steps:
- Convert to Smart Object: Duplicate your image layer and convert it to a Smart Object. This ensures non-destructive editing and allows for masking.
- Apply Spotlight: Go to Filter > Render > Lighting Effects…. The "Spotlight" option is usually selected by default.
- Adjust Light Properties: In the Preview Window, use the ellipses to control the light's intensity, direction, hotspot size, and falloff. The "Ambience" slider controls the overall light in the scene. Gloss and Metallic sliders can be used to reduce unwanted reflections.
- Add Multiple Lights: Click the "Spot" icon to add more spotlights to the same layer, toggling their visibility as needed.
- Masking: After applying the effect, use the Smart Filters layer mask. Select the Eraser tool with white as the foreground color and gently paint over areas where you want to bring back the original lighting. Adjust the opacity of the Eraser tool for subtler results.
- Layering: Repeat the process on additional layers, adjusting blend modes (e.g., "Lighter Color") to combine effects harmoniously.
Changing Light Color:
Manipulating light color can drastically alter the mood of a photograph and ensure consistency in product photography.
- Create Spotlight: Duplicate your layer, convert to a Smart Object, and apply the Lighting Effects filter.
- Adjust Color: In the Lighting Effects window, you can change the "Color" of the spotlight itself and use the "Colorize" option to tint the overall image, including the background. Double-click the color boxes to access the Color Picker. Experiment with warm colors like yellow, orange, and pink for vintage effects, or cool blues and purples for edgy moods.
- Save Presets: Once you achieve a desired look, save your settings as a preset. Click "Custom" next to Presets and choose "Save." This allows you to easily apply the same lighting to multiple images, ensuring brand consistency.
- Gradient Map: For added depth, add a Gradient Map adjustment layer on top of your lighting layer. Change the layer's blend mode to "Soft Light" and adjust the gradient colors in the Gradient Editor to complement your lighting.
Creating a Lens Flare:
Lens flares can add sparkle to shiny products but should be used judiciously.
- Apply Flares: Duplicate your background layer, convert it to a Smart Object, and go to Filter > Render > Lens Flare…. Position the brightest point of the flare on a bright area of your image. Experiment with different flare types (e.g., "50-300mm Zoom," "Movie Prime"). Apply the effect multiple times with different settings if needed.
- Masking: Use the Smart Filters layer mask and the Eraser tool to mask out washed-out areas caused by the flare, restoring detail.
- Layer Blending: Bring your original Background layer above the Lens Flare layer and set its blend mode to "Hard Light." Adjust opacity as needed. You can add further depth by duplicating the Background layer again and setting its blend mode to "Overlay."
Fixing Existing Lighting:
If your original image has problematic shadows or highlights, you can correct them.
- Adjust Shadows/Highlights: Duplicate your background layer and convert it to a Smart Object. Go to Image > Adjustments > Shadows/Highlights. Use the "Amount," "Tone," and "Radius" sliders to balance shadows and highlights. The "Color" slider adjusts saturation.
- Add New Lighting: After correcting the existing light, you might find the image looks flat. Reintroduce dimension by applying a subtle spotlight effect. Ensure the new light source isn't too harsh, so as not to negate your previous corrections. For example, a low-intensity white spotlight can highlight a specific region without overpowering the corrected shadows and highlights.
By mastering these techniques, you can transform ordinary photographs into visually compelling images with precisely controlled lighting.