In the realm of digital art and photography, the ability to seamlessly replace a photo's background is a fundamental skill. Whether you aim to transport your subject to an exotic locale, eliminate distracting elements, or simply imbue your images with a fresh aesthetic, Adobe Photoshop offers a powerful suite of tools to achieve these transformative effects. This guide will delve into various techniques for background replacement, from quick, automated solutions to more nuanced manual adjustments, drawing upon the extensive capabilities of Photoshop and user-shared experiences.
Mastering the Art of Selection: Isolating Your Subject
The crucial first step in any background replacement is accurately isolating the subject from its original environment. Photoshop provides several tools to facilitate this process, each with its own strengths.
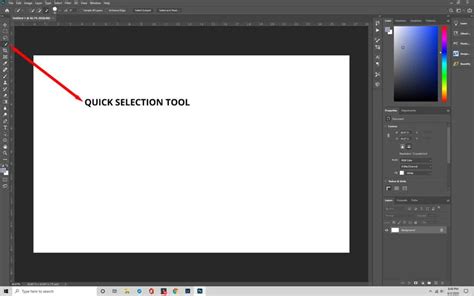
The Quick Selection Tool: A Swift Approach
For many scenarios, the Quick Selection tool is an efficient starting point. This intelligent brush allows you to "paint" over areas you wish to select. Photoshop analyzes the pixels you brush over and attempts to intelligently identify and select contiguous areas of similar color and texture. As Erica Larson, an Associate Creative Director on the Adobe Studio team, notes, "Larson’s first step is hiding the plain gray wall." This highlights how the Quick Selection tool can be instrumental in quickly defining the boundaries of your subject. Once a preliminary selection is made, refining its edges is paramount. Within the Select And Mask workspace, the "Shift Edge" slider can be manipulated to either expand or contract the selection, helping to achieve cleaner transitions, especially around intricate details like hair. The output setting for this selection is often set to "Selection," allowing for further manipulation before committing to a mask.
Layer Masks: Non-Destructive Editing for Precision
Once your subject is selected, applying a layer mask is the standard practice for non-destructive editing. With the subject layer active, clicking the "Add Layer Mask" icon at the bottom of the Layers panel will create a mask. This mask essentially "hides" parts of the layer without permanently deleting them. White areas on the mask reveal the layer's content, while black areas conceal it. This allows for easy adjustments and corrections without damaging the original image data.
Seamless Integration: Matching Lighting and Color
A truly convincing background replacement hinges on harmonizing the subject with its new environment. This involves careful attention to lighting and color.
Harmonizing Light: The Average Blur Technique
To ensure the subject appears to belong in the new background, matching the lighting conditions is essential. A clever technique, as demonstrated by Larson, involves duplicating the background layer and applying the "Average" blur filter (Filter > Blur > Average). This process creates a solid color layer that represents the average color of the original background. By setting this averaged layer's blend mode to "Soft Light" and adjusting its opacity, you can subtly tint the subject to match the general illumination of the new background. Larson further refines this by applying a "Solid Color" adjustment layer, often a dark blue, above all other layers. Setting this adjustment layer's blend mode to "Soft Light" and reducing its opacity allows it to cast a unifying color cast across the entire composition, further enhancing realism.

Color Grading for Cohesion
Beyond simply matching lighting, a cohesive color palette can elevate the believability of the composite image. Adjustment layers such as "Hue/Saturation," "Color Balance," or "Selective Color" can be employed to fine-tune the colors of both the subject and the background, ensuring they complement each other. Experimenting with different blend modes for adjustment layers can yield unique and artistic effects, further integrating the elements.
Photoshop's AI-Powered Tools: Automating Background Replacement
Photoshop's continuous evolution has introduced powerful artificial intelligence-driven tools that significantly streamline the background replacement process, making professional-looking results accessible with minimal effort.
The "Remove Background" Tool: Instant Isolation
The "Remove Background" tool, often found within the contextual task bar that appears when a layer is selected, offers an almost instantaneous solution for isolating subjects. With a single click, Photoshop's AI analyzes the image and attempts to intelligently identify and remove the background. This tool is particularly effective for subjects with well-defined edges and relatively simple backgrounds.
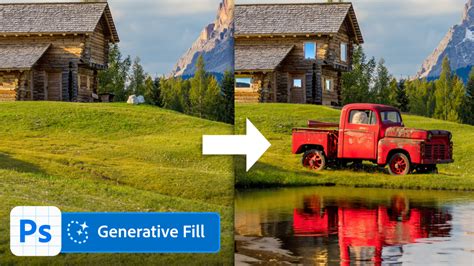
The "Generate Background" Tool: Creative Exploration
For those seeking to completely replace the background, the "Generate" option, often associated with the "Remove Background" tool, leverages generative AI. After removing the original background, this feature allows you to prompt Photoshop with text descriptions of the desired new background. The AI will then generate multiple background options based on your input. This opens up a world of creative possibilities, allowing you to place your subject anywhere imaginable, from "blank walls to lush gardens" or even "out of this world."
Preserving Original Background Elements
In situations where you wish to retain specific parts of the original background while replacing the rest, a combination of selection tools and layer masks is effective. Using the rectangular marquee tool (Keyboard Shortcut "M") or other selection tools, you can define the area of the original background you want to keep. By adding a layer mask to this selection and filling the masked area with white, you effectively "paint back" that portion of the original background, allowing it to show through while the rest of the layer remains masked.
Advanced Techniques for Custom Backgrounds
Beyond the automated tools, Photoshop offers advanced methods for creating and manipulating backgrounds to achieve highly specific artistic visions.
Creating Seamless Repeating Backgrounds
For applications like web design or textured surfaces, creating a seamless repeating background is a valuable skill. A user shared their experience with an image of a tablecloth, aiming to transform its colors. They discovered that by starting a new layer and filling it with the desired color, then experimenting with blending modes like "Lighten," "Screen," or "Linear Dodge," the image could take on that color. This method allows for subtle color shifts and the preservation of underlying textures. The user's goal was to achieve a "washed-out effect, making the differences subtle," with black turning to pale yellow, white becoming paler, and brown remaining brown. This indicates a desire for a nuanced color transformation rather than a flat overlay. Experimenting with the opacity and the specific blending mode is key to achieving such subtle, layered effects.
How to Create Seamless Textures with Photoshop
Color Transformation with Blending Modes
The user's struggle to change the color of their scanned tablecloth highlights a common challenge: how to adjust colors without affecting only the lighter or darker parts of an image. The discovered solution-filling a new layer with the desired color and using blending modes like "Lighten," "Screen," or "Linear Dodge"-is a powerful way to achieve a color tint that interacts with the luminosity of the underlying layer.
- Lighten: This mode compares pixels in the base layer and the blend layer and displays the lighter of the two. When used with a colored layer over a textured image, it will lighten the darker areas of the base image with the color from the blend layer.
- Screen: Similar to Lighten, but it works by multiplying the inverse of the blend color. This results in a brighter, more luminous effect than Lighten and is excellent for adding a light color cast.
- Linear Dodge (Add): This mode increases the brightness of the base layer by the amount of color in the blend layer. It can create very intense color effects and is often used for simulating light sources or adding vibrant color overlays.
By understanding how these blending modes interact with the underlying image's tonal values, users can achieve sophisticated color transformations. The goal of making the black a pale yellow and the white a bit paler, while keeping the brown intact and introducing a subtle, washed-out effect, requires careful adjustment of both the fill color and the opacity of the blending layer.
Beyond the Basics: Advanced Compositing and Refinement
The pursuit of photorealistic composites often involves going beyond simple background swaps and delving into more intricate techniques.
Dodging and Burning for Depth
The traditional darkroom techniques of dodging (lightening) and burning (darkening) can be replicated in Photoshop using adjustment layers or dedicated brushes. By selectively lightening or darkening areas of the subject or background, you can enhance the sense of form, depth, and dimension, making the composite appear more natural and three-dimensional. This is particularly useful for sculpting light on the subject to match the lighting direction of the new background.
Advanced Masking Techniques
For complex subjects with fine details like wispy hair, fur, or translucent elements, more advanced masking techniques may be necessary. Tools like the "Refine Edge" brush within the Select and Mask workspace, or the use of color range selections and channels, can help to create highly detailed and accurate masks that preserve intricate details.
Color Matching with Curves and Levels
For precise color and tonal matching, the "Curves" and "Levels" adjustment layers are indispensable. By analyzing the histogram of both the subject and the background, you can use these tools to adjust the brightness, contrast, and color balance of the subject to precisely match the characteristics of the new environment. This granular control ensures that the integration is as seamless as possible.
Conclusion
Replacing backgrounds in Photoshop is a versatile skill that can dramatically alter the narrative and aesthetic of an image. From leveraging the speed of AI-powered tools like "Remove Background" and "Generate Background" to employing meticulous manual selection and adjustment techniques, Photoshop offers a comprehensive toolkit for every level of user. By understanding the interplay of selection, masking, lighting, and color, you can take your photos on a journey, transporting your subjects anywhere in the world or even beyond. The ability to "take your photos on a journey" is not merely about changing the scenery, but about crafting a new reality, one pixel at a time.