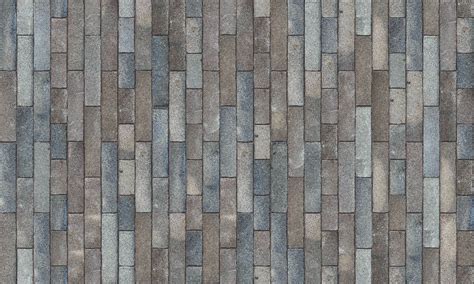
Creating seamless textures in Photoshop is a fundamental skill for digital artists, architects, and designers. Whether you're developing realistic architectural visualizations, designing game assets, or crafting intricate backgrounds for graphic design projects, the ability to make a texture tile infinitely without visible seams is crucial. This process transforms a static image into a versatile building block, allowing for on-the-fly UV mapping solutions and eliminating the need for extensive post-processing work. While the core concept is straightforward, achieving a truly flawless result often requires a nuanced approach, adapting techniques to the specific characteristics of each image.

The Foundation: Understanding Tileability and Initial Assessment
Before diving into complex editing, the first critical step is to determine if a texture is already tileable or if it possesses the potential to become so. This initial assessment can save a significant amount of time and effort. The most effective way to test for tileability is by utilizing Photoshop's Offset filter.
To access this tool, navigate to Filter > Other > Offset. This filter effectively "wraps" the edges of your image around the canvas, simulating how the image would appear when stacked both vertically and horizontally. By applying an offset of half the image's width and height, you can instantly reveal any "seams" or sharp lines that would become apparent when tiling. If these lines are stark and obvious, it indicates that the texture is not yet seamless and requires further manipulation. The goal here is to transform these jarring lines into a smooth, continuous flow that blends imperceptibly with the rest of the texture.
PHOTOSHOP Repeats: Offset Filter for Textures
Refining the Edges: The Art of Seam Removal
Once the initial offset reveals the problematic seams, the next phase involves meticulously removing them. This is often the most time-consuming, yet rewarding, part of the process. The primary tool for this task is the Clone Stamp Tool. Located in the Photoshop toolbar with the shortcut "S", this powerful tool allows you to "borrow" pixels from one area of an image and paint them onto another.
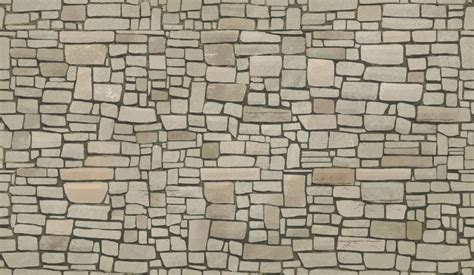
The objective with the Clone Stamp Tool is to strategically sample areas of the texture that are adjacent to the seams and paint over these lines, effectively making them disappear. This requires a keen eye for detail and an understanding of the texture's natural flow. For instance, when working with a stone texture, you would sample the edges of surrounding stones and carefully clone them over the visible seams to create a natural transition. This process can be quite tricky, and it’s often necessary to perform multiple passes.
After an initial pass with the Clone Stamp Tool, it’s highly recommended to repeat the Offset filter process. This second pass will highlight any remaining imperfections or newly created seams that may have emerged during the cloning process. This iterative approach, combining offsetting and cloning, is essential for achieving a truly seamless result. Some artists even perform a third offset to ensure absolute perfection, cleaning up any lingering harsh lines or abrupt transitions.
Leveraging Modern Tools: Generative Fill for Seamless Blending
In recent versions of Photoshop, Generative Fill has emerged as a revolutionary tool for simplifying and accelerating the process of creating seamless textures, particularly for smoothing over visible seams. This AI-powered feature can intelligently blend areas of an image, making the task of seam removal significantly more efficient.
To utilize Generative Fill for seamlessness, first activate Pattern Preview under the View menu. This feature offers a real-time preview of how your texture will repeat beyond the confines of your canvas, allowing you to immediately spot any visible seams. Once a seam is identified, use the Rectangular Marquee Tool to select the problematic area, including any adjacent sections that might benefit from blending. With the selection active, apply Generative Fill without any specific text prompt. Photoshop's AI will analyze the surrounding pixels and automatically generate content that seamlessly blends the selected area. You can then cycle through the generated variations to find the one that best integrates with the texture.
After applying Generative Fill, it's wise to perform another Offset adjustment to confirm that no residual seams remain. This combination of Pattern Preview, selection tools, and Generative Fill offers a powerful and intuitive workflow for achieving flawless tileable textures.
Enhancing Realism: Layering and Adjustment Techniques
Beyond simply removing seams, several techniques can elevate a seamless texture from functional to exceptionally realistic and visually compelling. One such technique involves layering duplicate pattern fills.
After defining your seamless texture as a pattern, you can apply it using a Pattern Fill layer. To introduce depth and complexity, duplicate this Pattern Fill layer and change its blending mode to Multiply. This blending mode retains only the shadow information from the duplicated layer, effectively adding subtle shadows and enhancing the three-dimensional appearance of the texture.
To further mask the visible repetition and make the pattern feel more organic, experiment with the scale of the duplicated pattern layer. Increasing its scale, perhaps to around 150%, can introduce variations in the texture, making it harder to discern the repeating units. A quick before-and-after comparison of layered textures with varied scales will demonstrate how this technique can transform a simple repeating pattern into something that feels much more natural and less mechanical.
Balancing Brightness and Color Uniformity
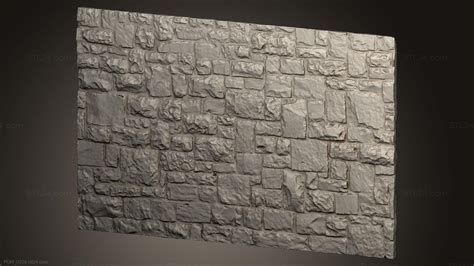
For complex textures like stone walls, achieving uniform brightness and color is paramount. Dark areas around the edges of an image can disrupt seamlessness, and variations in stone hues can make the repetition obvious.
To address brightness imbalances, particularly those appearing as dark edges when Pattern Preview is active, you can employ a combination of adjustment layers. A Levels or Curves Adjustment Layer can be used to balance the overall brightness. For instance, a Curves layer set to Multiply blending mode can effectively darken overly bright regions. Similarly, a Hue and Saturation Adjustment Layer can be used to desaturate the image or to harmonize specific color tones. For example, if certain stones have a distinct green hue that clashes with the overall palette, you can select the "Greens" channel in the Hue/Saturation layer and shift it towards "Oranges" to blend more naturally. You can also directly click on specific colors within the image to adjust their hue and saturation, minimizing high contrasts that could betray the pattern's repeating nature.
By selectively applying these adjustments and toggling their visibility, you gain precise control over the final look. Once satisfied, grouping these adjustment layers and merging them with the background layer integrates these corrections.
Defining and Applying Your Seamless Pattern
With your texture perfected and all seams eliminated, the next step is to define it as a reusable pattern. Navigate to Edit > Define Pattern. This action will prompt you to name your pattern. Choose a descriptive name that will help you locate it easily later.
To apply your newly created seamless texture, you can use a Pattern Fill layer. Simply go to Layer > New Fill Layer > Pattern. In the Pattern Fill dialog box, your saved pattern will be available in the dropdown menu. Select it, and you can then adjust its scale and position as needed. For fine-tuning alignment, the arrow keys can be used to nudge the pattern into the perfect spot.
Expanding and Extending Textures: The Perspective Crop Tool and Beyond
A common challenge in professional design work, especially in fields like film and architectural visualization, is the need to expand a small portion of an image to seamlessly cover an entire canvas. This is particularly useful when you need to recreate or extend parts of an image while maintaining visual cohesion.
For such tasks, the Perspective Crop Tool is invaluable. Located under the regular Crop Tool, this tool allows you to draw a grid over an image and adjust its corner handles to align with the perspective of the elements within the image, such as the lines of a fence or the angles of a building. This ensures that when you crop, any distortions are removed, creating a more accurate base for a seamless pattern.
After cropping with the Perspective Crop Tool, activating Pattern Preview is again crucial to see how the modified image tiles. If unevenness is observed, such as darker or thicker railings on one side of a fence, you can disable Pattern Preview and make targeted adjustments. Tools like the Eyedropper Tool, combined with new layers filled with sampled colors and refined with Layer Styles (including Drop Shadow and Bevel & Emboss), can help smooth out these inconsistencies. Using Pattern Overlay within Layer Styles can add subtle texture, and adjusting its opacity can ensure it blends seamlessly.
Further refinement can be achieved by using the Offset filter to check for misaligned edges, and the Clone Stamp Tool to paint over any mismatches. For standout details like scratches or marks that might become obvious repetitions, the Remove Tool can be used to erase them. Once the pattern flows well and appears seamless, it can be defined using Edit > Define Pattern.
To add subtle variations to your repeating pattern, you can create a new document, render clouds using Filter > Render > Clouds, and define this as another pattern. When applied to your project, this cloud pattern can be scaled and blended to introduce a layer of organic variation that further masks the inherent repetition of the base texture. For the fence example, using a Grass Brush to blend the bottom of the fence into its base can add a final touch of realism.
Smart Objects: A Powerful Ally in Pattern Design
When designing textures or patterns, leveraging Smart Objects can significantly streamline the workflow and enhance flexibility. By converting a tile into a Smart Object, you can then duplicate and align it to create a pattern. When you double-click the Smart Object, it opens in a new window, allowing you to make edits. Any changes you save within this Smart Object window will automatically update across all instances of that Smart Object within your pattern, saving considerable time and effort, especially during the polishing phase of a seamless pattern. This non-destructive editing capability is a cornerstone of efficient digital art creation.
The Enduring Value of Seamless Textures
Seamless textures are not merely a technical requirement; they are a fundamental asset that makes life significantly easier for digital artists and designers. They enable on-the-fly UV mapping solutions, can be used in a vastly wider range of projects, and dramatically reduce the amount of post-processing work required. The real world, however, doesn't often present perfect tiling opportunities, especially when working with photographs. This is where Photoshop's powerful tools and techniques come into play.
The process of creating seamless textures in Photoshop is, in essence, about taking an image that doesn't tile and meticulously editing it until it does. It requires patience, attention to detail, and an understanding of how the Offset filter and tools like the Clone Stamp and Generative Fill interact with an image. While every image presents its own unique challenges, the fundamental steps of assessing tileability, removing seams, and defining the pattern remain consistent.
Moreover, the quality of seamless textures can directly impact the success of marketplace assets and the reviews they receive. High-resolution, well-executed seamless textures are highly sought after. Photoshop, with its extensive array of tools, can achieve almost any imaginable modification to a 2D image, provided the user is willing to invest the effort.
Considerations for Image Selection and Preparation
When selecting an image for a seamless texture, it's important to consider its inherent properties. Textures with very distinctive features or repeating structural patterns that don't align well can be challenging to make tileable. For instance, a jute rug texture with prominent horizontal and vertical woven lines might require significant straightening and blending to achieve seamlessness.
It's also beneficial to perform certain edits on lower-resolution images before scaling them up. Filters like Remove Noise are more efficient on smaller images, and image transformations are generally easier to manage with less data. This is why many artists prefer to work with images at their original dimensions or slightly reduced before scaling them to their final desired resolution, often aiming for high resolutions like 4K (4096 x 4096 pixels) or higher for textures intended for repeated use.
Sharpening is another crucial step, especially for enlarged textures. While the specific sharpening method can vary, the goal is to ensure the texture has an appearance suitable for its intended use. Filters like Unsharp Mask are often effective and convenient as they are built into Photoshop, avoiding reliance on third-party tools that may not always be available.
Ultimately, creating seamless textures is an iterative process. It involves understanding the tools, practicing different techniques, and developing an intuitive sense for identifying and rectifying tiling issues. Not all images are good candidates for seamless textures, and it’s often wise to recognize when an image is simply too problematic and to seek out a better source. The more textures one edits, the easier it becomes to spot those that will tile well before the first pixel is changed. This experience, combined with the powerful features of Photoshop, allows for the creation of truly professional and versatile seamless textures.