Photoshop's power lies in its ability to manage and combine multiple visual elements, and at the heart of this capability are layers. Understanding how to effectively move, arrange, and group these layers is fundamental for creating complex compositions, from simple photo edits to intricate digital art. This tutorial will guide you through the essential techniques for manipulating layers, enabling you to build sophisticated visual narratives with ease.
Navigating the Layers Panel
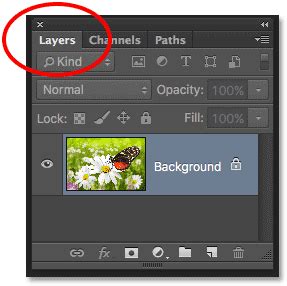
The Layers panel is your command center for all layer-related operations in Photoshop. It displays all the layers in your document, allowing you to select, organize, and modify them.
Selecting Layers
There are several intuitive ways to select layers:
Direct Selection in the Layers Panel: The most straightforward method is to simply click on a layer's name in the Layers panel. This makes that layer active and ready for editing.
Selecting Layers Directly in the Document Window: For a more dynamic approach, you can select layers directly on your canvas. To enable this, select the Move tool (shortcut:
V). In the Options bar at the top of the screen, ensure that Auto-Select is checked and set to Layer from the menu options. With Auto-Select enabled, clicking on an object in your image will automatically select its corresponding layer in the Layers panel. This is particularly useful when dealing with densely layered documents where finding the correct layer in the panel can be time-consuming.- Understanding Auto-Select: It's worth noting that in recent versions of Photoshop, Auto-Select is often enabled by default, which can sometimes catch users by surprise, especially those accustomed to older versions where it defaulted to off. If you find yourself inadvertently selecting layers when you intend to move an existing one, unchecking Auto-Select in the Move tool's Options bar will restore the previous behavior. However, many users find Auto-Select incredibly efficient for quickly activating layers when rearranging multiple elements. Experiment with both settings to see which workflow best suits your needs. The Options bar has a sticky state, meaning it remembers your last setting.
Selecting Multiple Layers: To select multiple layers for simultaneous operations, you can use the following methods:
- Shift-Click: Click on the first layer you want to select in the Layers panel, then hold down the Shift key and click on the last layer in the contiguous range. This will select all layers between the first and last clicked layers.
- Ctrl/Cmd-Click: To select non-contiguous layers (layers that are not next to each other in the panel), hold down the Ctrl key (Windows) or Cmd key (Mac) and click on each individual layer you wish to select.
- Shift-Click in the Document Window: When using the Move tool with Auto-Select enabled, you can Shift-click directly onto objects in the document window to add them to your current selection of layers.
Moving Layers
Once a layer is selected, you can move it around your canvas using the Move tool.
- Using the Move Tool: With the Move tool selected and a layer active, simply click and drag on the canvas. The layer will move with your cursor.
- Nudging Layers: For precise adjustments, you can nudge layers by single pixels or by larger increments:
- 1 Pixel Nudge: Select the layer you want to move, then use the arrow keys on your keyboard to move the layer's contents by 1 pixel in the desired direction.
- 10 Pixel Nudge: To move objects by 10 pixels, hold down the Shift key while pressing the arrow keys. This is incredibly useful for aligning elements with grids or making more significant positional changes quickly.
Arranging Layers: Controlling the Stacking Order
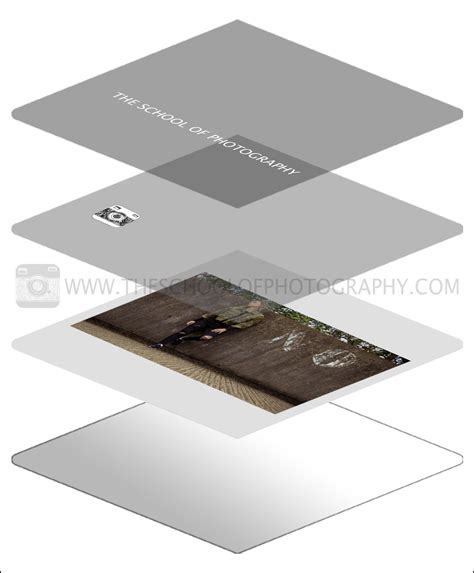
The order of layers in the Layers panel determines how they overlap on your canvas. Layers at the top of the panel appear in front of layers lower down.
Dragging Layers to Rearrange
The most intuitive way to change the stacking order is by dragging layers directly within the Layers panel:
- Select the layer you wish to move.
- Click and hold on the selected layer.
- Drag the layer up or down in the Layers panel to its desired position. A blue line will indicate where the layer will be placed as you drag.
- Release the mouse button when the layer is in the correct position.
This method allows you to create complex composites that are multiple layers deep by easily stacking and unstacking elements.
Using the Arrange Menu
Photoshop also provides a dedicated menu for arranging layers, offering commands for more specific reordering:
Select the layer(s) you want to arrange.
Navigate to Layer > Arrange.
Choose a command from the submenu:
Bring to Front: Moves the selected layer(s) to the very top of the stacking order.
Bring Forward: Moves the selected layer(s) up one position in the stacking order.
Send Backward: Moves the selected layer(s) down one position in the stacking order.
Send to Back: Moves the selected layer(s) to the very bottom of the stacking order.
Important Note: If your selected item is within a group, these commands will apply to the stacking order within that group, not the overall document stacking order.
Reversing Layer Order
A handy command for quickly reordering a selection of layers is Reverse:
- Select the layers whose order you wish to reverse.
- Go to Layer > Arrange > Reverse. This will flip the stacking order of all selected layers. For example, if you had layers A, B, and C selected in that order from top to bottom, after reversing, they would become C, B, and A.
Grouping Layers for Organization
As your projects grow in complexity, managing numerous individual layers can become cumbersome. Photoshop's grouping feature allows you to organize related layers into collapsible folders, streamlining your workflow and making your document easier to navigate.
Creating and Managing Groups
- Grouping Selected Layers:
- Select the layers you want to group.
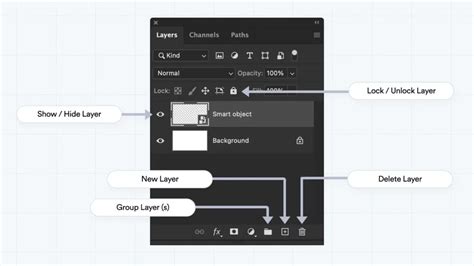
- Click the Create a new group icon (which looks like a folder) at the bottom of the Layers panel, or press Ctrl+G (Windows) / Cmd+G (Mac). The selected layers will be placed inside a new group folder.
- Moving Layers into an Existing Group:
- Select the layer you want to move.
- Drag the layer down into the desired group folder in the Layers panel.
- Creating Empty Groups: You can also create an empty group folder by clicking the folder icon at the bottom of the Layers panel, and then drag layers into it later.
- Collapsing and Expanding Groups: Click the small arrow next to a group folder to collapse or expand it, hiding or revealing the layers within. This is a powerful way to declutter your Layers panel.
Advanced Layer Manipulation Techniques
Beyond basic movement and arrangement, Photoshop offers tools for more nuanced control over your layers.
Transforming Layers
Transformations allow you to resize, rotate, skew, and distort layer content.
Select the layer you want to transform.
Go to Edit > Transform.
Choose the desired transformation command:
Scale: Resizes the layer. Drag the corner or edge handles. Hold Shift to maintain aspect ratio.
Rotate: Rotates the layer. Position your cursor just outside a corner handle until it becomes a curved, two-sided arrow, and then drag.
Skew: Tilts the layer horizontally or vertically. Drag a side handle.
Distort: Freely warps the layer. Drag the corner handles to change perspective.
Perspective: Creates a vanishing point effect. Drag a corner handle.
Warp: Allows for complex, freeform distortion using a grid. Choose Warp and then select a style from the Warp dropdown in the Options bar, or drag the control points of the grid.
Commiting Transformations: After applying a transformation, press Enter or Return, or click the checkmark icon in the Options bar to commit the changes. Press Esc to cancel.
Scale, Rotate & Align with Transform in Photoshop | Day 8
Locking Layers
Locking layers is a crucial step in protecting your work from accidental modifications, especially when you've achieved a desired look or composition.
Locking Options: A lock icon appears to the right of a layer name in the Layers panel when it is locked. You can lock layers fully or partially to protect their contents.
- Lock Transparent Pixels: This option (represented by an icon of a checkered square) confines editing to the opaque portions of the layer. Pixels in transparent areas cannot be painted on or erased. This is useful for preserving transparency while making edits to existing content.
- Lock Image Pixels: Prevents any pixel-based editing (painting, erasing, filling) on the layer.
- Lock Position: Prevents the layer from being moved using the Move tool. This is ideal when you've precisely positioned an element and want to ensure it doesn't shift accidentally.
- Lock All: This option locks all aspects of the layer, preventing any modification or movement.
Applying Locks: Click on the lock icons in the Layers panel to toggle them on or off. For example, you may want to lock a layer fully when you finish with it. You can lock a layer partially if it has the correct transparency and styles but you are still deciding on positioning.
Best Practices for Layer Management
Effective layer management is key to efficient and error-free Photoshop work.
Strategic Grouping
As mentioned, grouping is essential for organization. Develop a consistent naming convention for your layers and groups. This will save you immense time when revisiting projects or collaborating with others.
Utilizing Layer Comps
For projects with multiple variations or states (e.g., different ad sizes, different color schemes), consider using Layer Comps. This feature allows you to save different combinations of layer visibility, position, and appearance, enabling you to quickly switch between them.
Consistent Naming
Always name your layers and groups descriptively. Instead of "Layer 1," use "Background Image," "Product Mockup," or "Text Overlay." This habit significantly improves clarity and reduces the likelihood of errors.
Regular Saving
While not directly a layer manipulation technique, saving your work frequently, especially before undertaking complex layer operations, is a vital safeguard against data loss.
By mastering these techniques for moving, arranging, grouping, and locking layers, you'll gain a significant advantage in your Photoshop workflow, allowing you to build more complex and polished images with greater control and efficiency. You can create complex composites that are multiple layers deep, and learn how to easily rearrange and stack layers in an image.