Photoshop, a powerhouse in the realm of digital imaging, offers a multitude of ways to manipulate and combine image elements. Among the most fundamental yet versatile of these operations are copying and pasting. Whether you're a seasoned professional or just beginning your journey into pixel manipulation, understanding these techniques is crucial. This article will delve into various methods for copying and pasting selections within Photoshop, exploring both straightforward approaches and more nuanced techniques for layered documents, all while aiming for clarity and precision.
The Foundation: Basic Selection and Copy-Paste
The most intuitive method for copying a portion of an image in Photoshop begins with making a selection. This process isolates the desired area, allowing it to be manipulated independently.
To initiate this, one can employ selection tools such as the Rectangular Marquee tool. This tool is ideal for selecting rectangular or square areas. Once the Rectangular Marquee tool is active, you simply click and drag across the image to define the boundaries of your selection. As soon as you release the mouse button, the selected area will be clearly delineated by "marching ants"-a blinking, dashed line.
After making a selection, the standard copy command comes into play. Navigating to the Edit menu and selecting Copy, or using the universal keyboard shortcut Ctrl + C (or Cmd + C on a Mac), will place a copy of the selected pixels onto Photoshop's clipboard.
Subsequently, to paste this copied content, you can go to the Edit menu and choose Paste, or use the shortcut Ctrl + V (or Cmd + V on a Mac). A key characteristic of this standard copy-paste operation in Photoshop is that the pasted content often appears on a new layer, positioned directly above the area from which it was copied. This new layer is initially invisible unless you actively look for it in the Layers panel. This behavior is designed to maintain the integrity of the original image while providing a separate canvas for the pasted element.
The Expedited Approach: One-Step Copy and Paste
For those who appreciate efficiency and prefer to minimize the number of steps in their workflow, Photoshop offers a more streamlined method for copying and pasting selections. This technique, often favored by those who aim to "use one step instead of two whenever they can," consolidates the copy and paste actions into a single command.
Instead of performing a separate copy and then a paste, the shortcut Ctrl + J (or Cmd + J on a Mac) achieves both in one swift action. This powerful shortcut is particularly valuable because it is not explicitly listed within Photoshop's dropdown menus, making it a hidden gem for many users. When you select an area of your image and press Ctrl + J, Photoshop automatically duplicates the selected pixels and places them onto a new layer directly above the active layer, effectively copying and pasting in a single step. This is the preferred method for users like "Deb," who value such time-saving shortcuts.
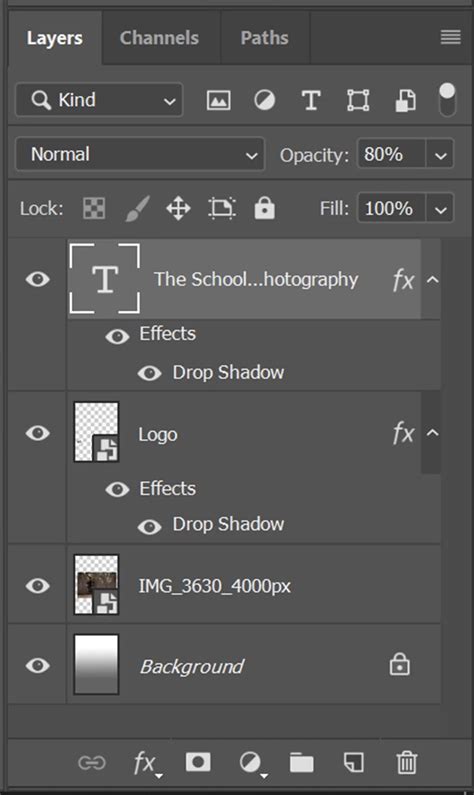
Navigating Layers: The Nuances of Multi-Layered Documents
The straightforward copy-paste methods, including the Ctrl + J shortcut, function seamlessly when working with a single-layered image. However, the complexity escalates when dealing with files that contain multiple layers. In such scenarios, the behavior of copying and pasting can become more intricate.
When you have a document with more than one layer, regardless of the method you use to copy and paste (standard copy-paste or Ctrl + J), you will primarily be copying the content of the active layer. This means that only the pixels visible and editable on the currently selected layer are copied. This can lead to unexpected results if you intend to capture the combined appearance of multiple layers.
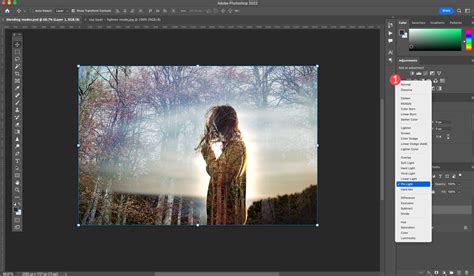
Furthermore, the situation becomes even more complicated when blend modes have been applied to layers. Blend modes alter how layers interact with each other, affecting their visual appearance. If a selection is made on a layer with a blend mode applied (such as "Overlay," "Multiply," or "Screen"), copying and pasting that selection will not just capture the pixel data but will also carry over the effect of that blend mode.
For instance, if you make a selection on "Layer 1" which has an "Overlay" blend mode applied, and then use Ctrl + J, the pasted selection will not be a simple copy of the pixels. Instead, it will be that part of "Layer 1" with the "Overlay" blend mode applied. This means that when you isolate this new layer by turning off the original layers, the pasted section will retain the visual characteristics imparted by the blend mode. This can be a source of confusion if the user expects a straightforward pixel transfer.
Capturing the Composite View: Copy Merged
When working with multi-layered documents and needing to copy the combined visual appearance of all visible layers, Photoshop provides a specific command for this purpose: Copy Merged. This is distinct from simply copying the active layer.
To utilize "Copy Merged," you first need to ensure that all the layers you wish to include in the copy are visible (their eye icons are enabled in the Layers panel). Then, you make your desired selection on the canvas. After the selection is active, you navigate to Edit > Copy Merged. This command copies a flattened representation of all visible layers within the selected area to the clipboard.
When you then paste this "merged" content (Ctrl + V or Cmd + V), it will appear on a new layer. Crucially, this new layer will contain the combined visual information as it appeared on the monitor before the "Copy Merged" command was issued, accurately reflecting the interaction of all visible layers and their respective blend modes. This method is invaluable for capturing a specific visual outcome from a complex composition.
Advanced Cutout Techniques: Beyond Simple Copy-Paste
While copying and pasting selections is fundamental, the broader concept of isolating and transferring image elements often involves more sophisticated "cutout" techniques. These are particularly relevant when dealing with complex subjects like those with fine details, intricate edges, or against challenging backgrounds.
One such advanced technique involves using the Pen Tool. The Pen Tool offers precise control for creating paths, which can then be converted into selections. This is especially useful for defining clean, sharp edges around objects. The process typically involves meticulously tracing the outline of the subject. For areas with very fine details, such as individual hairs or wispy feathers, the Pen Tool alone might not suffice, as it struggles to capture such delicate elements without significant effort and potential loss of detail.
Photoshop Layer Masks Explained in 2 Minutes
When using the Pen Tool for cutouts, it's often recommended to create a work path. This path can then be loaded as a selection. The crucial step that follows is to apply this selection as a layer mask rather than directly erasing pixels. Using layer masks is a non-destructive editing technique. This means the original image data is preserved, and the "cutout" is achieved by hiding parts of the layer rather than permanently deleting them. Painting on the mask with black conceals parts of the layer, while painting with white reveals them. Grays create semi-transparency.
This non-destructive approach allows for easy adjustments later. If you realize you've masked too much or too little, you can simply edit the layer mask without affecting the original pixels.
Dealing with Tricky Edges: Hair and Transparency
Cutting out subjects with fine details like hair or translucent elements presents a significant challenge. The Pen Tool, while precise for hard edges, is often inadequate for these areas. In such cases, specialized selection tools and techniques come into play.
One strategy involves using selection tools that can better interpret soft or fuzzy edges. Tools like the Select and Mask workspace (previously known as Refine Edge) offer advanced controls for improving selections, particularly around hair and fur. Within this workspace, options like "Radius," "Smooth," "Feather," and "Contrast" can be adjusted to refine the selection boundary. The "Refine Edge Brush Tool" is particularly effective for painting over areas of hair or fur to intelligently select those fine strands.
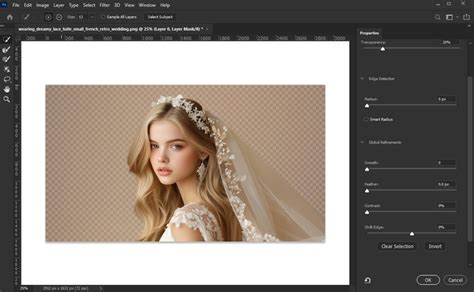
Another advanced method, often employed for complex cutouts, involves leveraging color information and blend modes. Techniques like using color range selections or calculating selections based on channel information can be effective when there's sufficient contrast between the subject and the background in specific color channels. For subjects with semi-transparent edges, such as wispy feathers or smoke, creating a matte (a black and white mask) that accurately represents the varying levels of transparency is key. This matte can be generated through careful masking and refinement.
The "old dog" learning a new trick mentioned in the initial context refers to a realization that after making a selection and using Ctrl + J, the pasted part inherits the blend mode of the original layer. The "new trick" likely refers to understanding how to capture the visual result of blend modes, possibly through "Copy Merged" or by carefully managing layer visibility and blend modes when creating the selection. The goal is that "when you paste, the pasted part will look just like what you saw on the monitor."
Choosing the Right Method
Ultimately, the "better" way to copy and paste in Photoshop is subjective and depends heavily on the specific task, the complexity of the image, and the user's familiarity with the tools.
For simple, single-layered images, the Ctrl + J shortcut offers unparalleled speed and convenience. When working with multi-layered documents and needing to capture the combined appearance, Copy Merged is the indispensable tool. For intricate cutouts, especially those involving fine details or semi-transparency, a combination of the Pen Tool for base shapes, followed by refinement using Select and Mask or other advanced masking techniques, is often necessary.
Regardless of the method chosen, the principle of non-destructive editing through layer masks should always be prioritized when possible. This ensures flexibility and allows for easy revisions without compromising the original image data. The journey through Photoshop's copy and paste functionalities is one of continuous learning, with each technique offering a unique advantage in the quest for precise image manipulation.