In the realm of graphic design, particularly when preparing files for professional printing, understanding how to manipulate text elements is paramount. One such crucial technique is outlining text, a process that transforms editable characters into vector shapes. This transformation ensures that your typography appears exactly as intended, regardless of font availability on different systems. While often discussed in the context of print preparation, outlining text in Photoshop also offers creative possibilities for enhancing visual impact. This guide will delve into the various methods of adding outlines to text within Adobe Photoshop, exploring its benefits, limitations, and practical applications.
The Rationale Behind Outlining Text
The primary motivation for outlining fonts, especially before sending a design to a professional printer, is to guarantee visual fidelity. Simply put, a specific font installed on your computer might not be present on the printer's system. When this occurs, the software substitutes the missing font with a different one, potentially altering the entire aesthetic and layout of your design. Outlining fonts circumvents this issue by converting the text into vectorized shapes. This ensures that the font prints as you designed it, irrespective of whether the printer has the original font installed. This process is akin to creating a blueprint of your text, which can be reproduced accurately anywhere.
However, it's crucial to acknowledge that outlining is not a universally perfect solution. While it locks in the visual appearance of the font, it comes with certain trade-offs. Not all formatting may be preserved when text is outlined. Features like strikethroughs, underlines, bullets, and numbering can sometimes disappear during the conversion process. This makes outlining less ideal for lengthy documents with extensive formatting. Furthermore, once text is outlined, it becomes uneditable as text. This means that neither you nor the printer can make straightforward text modifications. For this reason, it is strongly recommended to create a copy of your original file before outlining fonts, preserving the editable version for any potential last-minute adjustments.
Outlining vs. Embedding Fonts: A Comparative Perspective
The decision to outline or embed fonts depends heavily on the specific workflow and requirements. While outlining converts text to vector shapes, embedding fonts embeds the font file data within the document. Professional printers often prefer embedded fonts. This preference stems from the fact that embedded fonts allow their preflight teams to make adjustments to the artwork even without owning the font. This is incredibly beneficial for minor corrections needed before printing. If a printer needs to open and work with the original file format to make corrections, they can edit text if it is embedded.
On the other hand, if the designer intends to handle all edits themselves and wants to ensure absolute visual consistency, outlining can be a suitable choice. It provides a final, unalterable representation of the text. However, the loss of editable text and potential loss of formatting are significant drawbacks. The choice between outlining and embedding is a strategic one, weighing the need for absolute visual lockdown against the flexibility for future edits and the printer's preferred workflow.
Should I Embed Fonts When Exporting Art For Print?
Implementing Text Outlines in Photoshop
Adobe Photoshop offers several straightforward methods for adding outlines to text, catering to different creative needs.
Method 1: Using the Stroke Layer Style
This is perhaps the most common and accessible method for adding a visible outline to text in Photoshop.
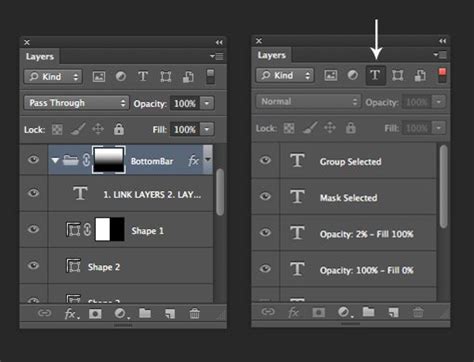
Select Your Text Layer: In the Layers panel, ensure that the layer containing the text you wish to outline is selected. If you haven't created the text yet, use the Text Tool (T) to create a new text layer.
Access Layer Styles: You can access the Layer Style menu in a couple of ways:
- Click the "fx" icon at the bottom of the Layers panel and select "Stroke."
- Double-click on the right side of your text layer in the Layers panel.
Configure the Stroke: Within the Layer Style window, locate and check the "Stroke" option on the left-hand side. This will apply a default stroke to your text. Now you can customize its appearance:
- Size: Adjust the slider or input a numerical value to control the thickness of the outline.
- Position: Choose whether the stroke should be placed "Inside," "Outside," or "Center" of the text's edge. "Inside" is often preferred for maintaining the original text's dimensions, while "Outside" will expand the overall bounding box.
- Blend Mode: Typically, "Normal" is used, but you can experiment with other blend modes for unique effects.
- Opacity: Control the transparency of the stroke.
- Color: Click the color swatch to open the color picker and select your desired outline color.
Reducing Fill for a Lighter Look: If you want your outlined text to appear lighter, with the outline being more prominent than the fill, you can reduce the "Fill Opacity" of the text layer itself. This scales down the opacity of the letters while preserving the outline's visibility.
Method 2: Creating Multiple Strokes for Enhanced Effects
For more complex or layered outlines, Photoshop allows you to add multiple stroke effects to a single layer.
Apply the First Stroke: Follow the steps above to add and configure your first stroke.
Add a Second Stroke: In the Layer Style window, with the "Stroke" option still selected, click the plus sign (+) next to the "Stroke" entry on the left-hand side. This will add a second stroke layer above the first one.
Customize the Second Stroke: You can now configure this new stroke independently, applying a different size, color, or position to create effects like a double outline, a gradient outline, or a shadow-like border. This technique is excellent for creating a more dynamic and visually engaging text appearance, such as mimicking a neon glow or a layered metallic effect.
Method 3: Converting Text to a Vector Shape
This method fundamentally changes the text into a shape, offering maximum control but making subsequent text editing impossible.
Create Your Text: Use the Text Tool to add your desired text to the canvas.
Convert to Shape: With the text layer selected, navigate to the top menu:
Type > Convert to Shape. Alternatively, you can right-click on the text layer in the Layers panel and select "Convert to Shape."Apply a Stroke to the Shape: Once converted, the text is now a vector shape. You can apply a stroke to this shape using the same Layer Style method described above (Layer > Layer Style > Stroke). The advantage here is that the stroke is applied directly to the vector path, offering precise control.
- Note: Converting text to a shape is a destructive process. Ensure you have a backup of your editable text layer if you anticipate needing to make changes to the wording or font later. This method offers more customization options compared to the basic stroke, but at the cost of editability.
Outlining Text for Print Production: Considerations and Best Practices
When preparing files for professional printing, the decision to outline or embed fonts is critical. As mentioned, Thomas Group Printing, for instance, prefers embedded fonts as it allows for easier edits if needed. However, if you are confident that no further edits will be required, or if you need to ensure absolute font fidelity, outlining is a viable option.
Key Considerations for Print:
- Loss of Formatting: Be aware that outlining can strip away formatting like strikethroughs, underlines, bullets, and numbering. If your design relies heavily on these, consider alternatives or ensure they are re-applied after outlining if necessary.
- Editability: Once outlined, text cannot be edited as text. Always save a copy of your original, editable file.
- Printer Preferences: Always check with your print provider about their preferred method for handling fonts. Some may have specific requirements or recommendations.
- PDF Workaround: For programs like Adobe Acrobat Pro, a workaround exists to outline fonts within a PDF file. This is often done as a final step after the design is complete in other software. By opening the PDF in Acrobat Pro, you can access the Print Production panel, which offers options for preflighting and fixing potential font issues, including outlining.
Creative Applications of Text Outlines in Photoshop
Beyond print preparation, text outlines in Photoshop can be a powerful tool for enhancing visual design and achieving specific aesthetic effects.
- Enhanced Readability: In designs with busy backgrounds or complex imagery, a stroke around text can make it stand out and improve legibility. This is particularly useful for headlines or call-to-action elements that need to grab attention.
- Thematic Effects: Outlines can be used creatively to evoke specific themes. For example, a vibrant colored stroke can mimic the glow of neon lights in a sign-inspired design. Different stroke colors and thicknesses can create a vintage poster look, a futuristic metallic sheen, or a simple, clean border.
- Layered Text Effects: Combining multiple strokes with varying colors and sizes can create sophisticated, multi-dimensional text effects. This allows for a level of depth and complexity that a single outline cannot achieve.
- Text as Shapes: Converting text to shapes and then applying strokes opens up possibilities for manipulating the text as vector paths. You can then use other Photoshop tools to further alter the shape of the outlined text, creating unique typographic art.
Limitations and Alternatives
It's important to note that Photoshop on the iPad currently has limitations regarding text outlining. While you can change fonts and opacity, the full range of layer styles, including strokes, is not available. In such cases, designers may need to revert to a desktop version of Photoshop for these operations.
For outlining shapes, Photoshop offers similar Layer Style options. Alternative methods for creating outlines around shapes include using the Eraser tool to create white space around the edge or the Pen tool to manually create paths around the shape's perimeter.
Streamlining Your Workflow
For designers who frequently work with tools like Photoshop and find traditional keyboard and mouse operations cumbersome, specialized devices can significantly enhance productivity. Devices like TourBox are designed for creative professionals, allowing for intuitive control over brush sizes, zooming, layer navigation, and other common operations, which can streamline the process of applying and adjusting text outlines.
The journey of mastering text manipulation in Photoshop is ongoing. Experimenting with different techniques, understanding the underlying principles, and staying aware of the specific requirements for your intended output â whether it's print or digital â will empower you to create impactful and visually appealing designs.