Post-processing is an integral part of modern photography, allowing photographers to refine their images and achieve a desired aesthetic. While individual preferences in editing are vast and varied, understanding the foundational tools within Adobe Lightroom is crucial for anyone looking to enhance their portraiture. This guide explores key techniques, from initial global adjustments to advanced AI-driven solutions, offering a comprehensive approach to achieving compelling portrait edits.
The Art of Initial Global Adjustments
The journey of editing a portrait in Lightroom often begins with broad adjustments that set the stage for more nuanced refinements. A common starting point involves managing the overall contrast of the image. Reducing the overall contrast can prevent blown-out highlights or overly crushed shadows, providing a more neutral base to work from.

One effective method is to utilize the Highlights, Shadows, Whites, and Blacks sliders. For instance, if an image is contrasty but leans towards darker tones, moving the Highlights and Whites sliders to the left can help recover detail in the bright areas of the background. This initial step often results in a "flat" or less contrasty look, which serves as a blank canvas. While contrast is reduced at the extremities, it can then be strategically reintroduced into the midtones. Pushing up the Clarity slider, for example, accentuates facial features by focusing on mid-tone contrast, typically leaving the brighter and darker areas of the image largely unaffected. A setting like +60 for Clarity can significantly impact the perceived detail and dimension of a subject's features.
Following contrast adjustments, a global reduction in Saturation and Vibrance is often beneficial for portraits. This initial desaturation, perhaps to -10 for Saturation and -5 for Vibrance, helps to temper overly intense colors and provides more control when adding color back in later stages.
Harnessing Luminosity and Color for Impact
The human eye naturally gravitates towards the brightest areas of an image. Therefore, managing luminosity is key to guiding the viewer's attention. This can be achieved through local adjustments using brushes. By brushing over brighter areas that compete with the subject's face and subtly darkening them with local Exposure and Highlights sliders, you can direct focus. Conversely, brushing over darker areas that lack detail and slightly increasing the local Shadows slider can reveal lost information.
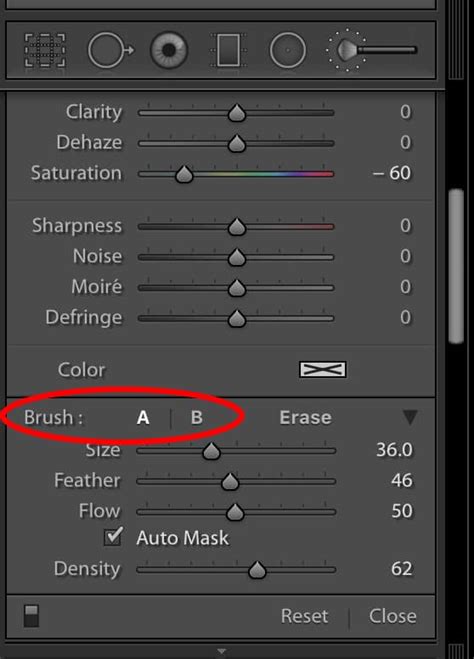
Color adjustments also play a critical role. Beyond global saturation and vibrance, specific areas can be targeted. For instance, the Adjustment Brush can be used with the local Saturation slider to desaturate specific elements, such as a subject's t-shirt, preventing it from distracting from the main subject.
A well-executed vignette can also enhance a portrait by subtly darkening the outer areas of the image relative to the center, further drawing attention to the subject. Instead of a uniform darkening, the Gradient Tool in Lightroom allows for more controlled application. Creating a gradient from the edge towards the center, and then adjusting the local Exposure slider, can produce a subtle edge vignette. Applying similar gradients from other sides, or from the bottom, can further refine this effect.
Differentiating Subject and Background for Depth
To add more dimension and visual interest, a different processing treatment can be applied to the subject versus the background. This can be achieved by creating a virtual copy of the image in Lightroom. Renaming this copy to "Background" allows for distinct adjustments. For this background copy, the Clarity slider can be reset to zero, and the global Sharpness slider can be reduced.
Opening both file copies into a program like Photoshop as layers, with the sharper rendition as the top layer, enables precise masking. By carefully selecting the subject and creating a mask, the less sharp bottom layer becomes visible in the background areas, creating a pleasing separation. For those without Photoshop, Lightroom's Adjustment Brush can be used to paint in areas of reduced Clarity and Sharpness on the background.
The Role and Limitations of Lightroom Presets
Lightroom presets offer a seemingly straightforward solution for achieving consistent and aesthetically pleasing edits, especially when faced with hundreds or thousands of images from a single session. A preset is essentially a "recipe" of saved slider settings within Lightroom. They promise a one-click solution, offering speed, consistency across a gallery, and a foundation for a photographer's signature style. For beginners, presets can also be valuable learning tools, allowing them to examine the applied settings and understand how specific looks are achieved.
However, presets have significant limitations, particularly when it comes to portraiture. The primary challenge lies in their global application. Presets apply settings to the entire image without understanding its content. This can lead to undesirable results, especially with skin tones. A preset designed to enhance foliage by shifting green and yellow hues might inadvertently affect skin tones, making a subject appear sick, green, or magenta. The preset has no awareness that it's processing a human face.
Furthermore, presets are created from a specific, often ideal, photograph. Applying a preset to an image with a different exposure, white balance, or lighting condition can result in more work than it saves. Photographers often find themselves in a cycle of "fixing the fix," where they apply a preset only to spend considerable time re-adjusting exposure, white balance, and HSL sliders to make the skin tones look natural again. The market is also flooded with low-quality presets that may look good on casual snapshots but fall apart when applied to professional RAW files.
Professional Preset Workflow: Navigating the Challenges
When using presets professionally, a structured approach is essential to mitigate their inherent weaknesses. The workflow typically involves several critical steps after applying a preset:
- Fix White Balance (WB): This is almost always the first step. Presets rarely have the correct white balance for every photo.
- Adjust Exposure: The preset's exposure settings are likely based on a different image and will need adjustment.
- Check and Correct Skin Tones: This is paramount. Navigate to the HSL/Color panel. The Orange slider controls a significant portion of skin tones; adjust its Luminance. The Red and Yellow channels also influence skin and should be checked.
- Apply Local Adjustments: Once global edits are satisfactory, use Lightroom's masking tools. Create a Subject Mask to subtly boost exposure or add clarity, and a Background Mask to drop exposure, enhancing subject-background separation.
When creating your own presets, it's advisable to exclude settings that are highly dependent on the specific image, such as White Balance, Exposure, Transform (Crop/Straighten), and Masks. Saving presets for HSL, Tone Curve, Color Grading, Calibration, and Presence (Clarity, Texture, etc.) generally yields more reusable results.
The Future of Editing: AI-Powered Solutions
The limitations of static presets have paved the way for more dynamic and intelligent editing solutions. AI-powered editing tools analyze each photo individually before applying any adjustments, offering a personalized approach.

Platforms like Imagen represent a significant advancement. They offer features such as "Personal AI Profiles," which are not presets but rather learned editing styles. By feeding the AI thousands of your already edited photos from Lightroom catalogs, it learns your unique approach to editing, particularly how you handle skin tones across various lighting conditions. This creates a "one-size-fits-one" solution that is dynamic and evolves with your style.
The benefits of AI profiles include:
- Solving the Skin Tone Problem: The AI learns precisely how you edit skin, ensuring natural and consistent results.
- Uniqueness: It's the opposite of one-size-fits-all; each edit is tailored to the individual photo.
- Adaptability: As your editing style evolves, you can continue feeding new edits into the AI, allowing the profile to adapt.
- Talent AI Profiles: Access to AI profiles created by world-class photographers, which are also adaptive.
- Lite Personal AI Profile: This allows you to input one of your favorite presets, and the AI will create a profile that intelligently applies the preset's style while adapting basic settings like Exposure and White Balance on a per-photo basis.
Imagen is not a replacement for Lightroom but a desktop application that integrates with Lightroom Classic, Lightroom, Photoshop, and Bridge. It can automate the editing of thousands of photos, delivering them back to Lightroom with a high degree of completion.
Comparing Workflows: Presets vs. AI Profiles
| Feature | Standard Lightroom Preset Workflow | Imagen AI Profile Workflow |
|---|---|---|
| Application | Manual, one-by-one or batch apply. | Automatic batch upload. |
| Logic | Static. Applies the same set of slider values to every photo. | Dynamic. AI analyzes each photo and applies a unique set of slider values based on learned style. |
| Accuracy | Highly variable. Often requires heavy manual correction. | Highly consistent. Edits are based on learning from your own photos. |
| Skin Tones | A common problem. Global HSL changes often create unnatural skin. | A key strength. AI learns how you treat skin tones in varied lighting with precision. |
| Adaptability | None. A preset is "frozen" in time. | High. Can be fine-tuned with new edits to evolve with your style. |
| Speed | Speeds up initial application but adds significant time for tweaking. | Extremely fast. Edits thousands of photos in minutes. |
| Creation | Simple to create. | Personal AI Profile requires initial "training" with 3,000+ photos. Lite Profile is fast. |
| Integration | Stays entirely within Lightroom. | Imagen desktop app integrates deeply with Lightroom Classic. |
Beyond color and tone, AI platforms can also offer advanced tools for other aspects of portrait editing, such as automatic cropping and straightening, subject masking, and even AI-driven skin smoothing. These tools can be used standalone or integrated into the AI profile for a comprehensive editing solution.
Essential Lightroom Tools for Portrait Enhancement
While AI offers advanced capabilities, mastering Lightroom's core tools remains fundamental. Calibration is crucial for professional work, ensuring accurate color representation for viewing and printing. While auto adjustments can handle Vibrance and Saturation, sliders like Texture, Clarity, and Dehaze often require manual tweaking, as they can significantly impact the final look of a portrait.
Applying lens corrections is also a standard practice. Subtle vignetting, whether applied globally or locally using the graduated or radial filter, can add a refined touch. These filters are also highly effective for black and white conversions.
For noise reduction, Lightroom's built-in tools (LrC) are often sufficient and faster than third-party software, which may be reserved for particularly challenging files.
A Step-by-Step Approach to Portrait Editing
A structured, step-by-step process can demystify portrait editing. While specific adjustments will vary based on the image, the general sequence often includes:
- Sharpening Preset on Import: Applying a subtle sharpening preset upon import can give RAW images immediate impact and reduce post-import editing time.
- Color Correction: Adjusting White Balance is critical. Use the White Balance Eyedropper tool and sample a neutral surface (white or gray) to correct tint and temperature issues. For instance, if an image appears too cool (blue), warm it up.
- Basic Tone Adjustments: Carefully examine skin tones, hair, and the background. Adjust the Highlights and Shadows sliders to achieve a pleasing result, often boosting shadows and dropping highlights. If the overall exposure is decent but the subject's skin is too light and the background too dark, these sliders are key.
- Enhancing Color: Liven up the portrait with color adjustments. Increase the Vibrance and Saturation sliders, and potentially the Whites slider, if the image still appears dull or lacks vibrancy. Toggling the before and after view (using the "\" key) is recommended to assess the impact of these changes.
- Cropping and Straightening: This can be done at any stage, but many photographers prefer to do it early or late in the workflow.
- Skin Retouching: Using the Brush mask, selectively soften skin tones to create an even, glowing appearance. Be precise and use the "Subtract" option to avoid over-editing areas like eyes, eyebrows, mouth, or nostrils.
- Eye Enhancement: Zoom in closely and use a brush to add sparkle to the eyes. Boosting Clarity slightly can enhance detail. For added effect, increase the saturation of the iris and slightly lift it with an increased Whites adjustment, always maintaining subtlety.
- Mouth Adjustments: Examine the subject's mouth. If necessary, use a brush to lighten teeth by dropping saturation and increasing exposure.
- Subject-Background Separation: The final optional step is to review the image and ensure the subject "pops" off the background. If the separation is sufficient, the edit is complete.
This systematic approach, combined with an understanding of both traditional Lightroom tools and emerging AI technologies, empowers photographers to achieve professional-quality portrait edits efficiently and effectively. The goal is to spend less time editing and more time creating.