Halftone screen patterns are a cornerstone of retro design, offering a distinct aesthetic that evokes the charm of old printed materials. While readily available in digital tools, achieving a truly authentic, "grungy" rock poster vibe can be challenging. Standard digital halftone effects often produce perfectly uniform circles that lack the character of historical printing methods. This article delves into the graphic technique of halftoning, exploring its historical roots, the science behind its visual illusion, its applications in various printing processes, and the modern advancements that continue to shape its use.
The Illusion of Continuous Tone: How Halftones Work

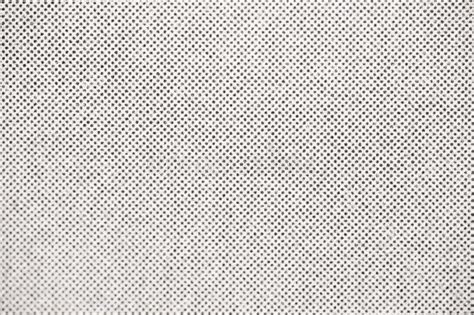
At its core, halftoning is a clever optical illusion. Where continuous-tone imagery contains an infinite range of colors or greys, the halftone process reduces visual reproductions to an image that is printed with only one color of ink. This is achieved by breaking down the image into dots of differing size or spacing. When these halftone dots are small enough, the human eye interprets the patterned areas as if they were smooth, continuous tones. This principle is fundamental to how we perceive images in print. At a microscopic level, even developed black-and-white photographic film consists of only two colors - ink or no ink - not an infinite range of tones.
The effectiveness of this illusion hinges on the interplay between dot size, density, and the viewer's perception. In essence, halftoning is a method of simulating shades and gradients using a binary system of ink coverage. The perceived darkness or lightness of an area is determined by the ratio of the inked area to the non-inked area within a defined "halftone cell." Darker areas are represented by larger or more densely packed dots, while lighter areas use smaller or more spaced-out dots.
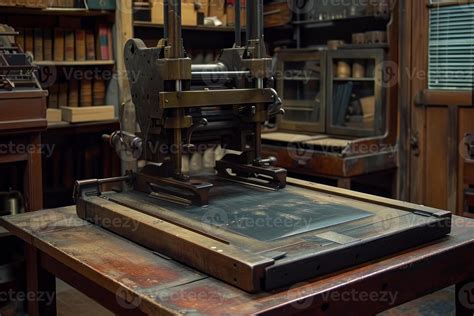
A Historical Perspective: The Evolution of Halftone Printing
Before the widespread adoption of halftone printing, pictures in newspapers and books often relied on techniques like woodcuts or wood-engravings. These methods, while capable of reproducing images, often resulted in a hand-drawn sketch-like appearance, even when copied from photographs. Commercial printers yearned for a practical way to realistically reproduce photographs directly onto the printed page. However, most common mechanical printing processes were limited to printing solid areas of ink or leaving blank spaces, unable to capture the subtle gradations of tone found in photographs.
The concept of halftone printing is credited to William Fox Talbot in the mid-19th century. Over the following decades, various individuals and innovations contributed to its development. William Leggo, working for the Canadian Illustrated News, produced an early version known as the leggotype. A significant breakthrough came in 1881 when Frederic Ives of Philadelphia patented a commercially successful method. Although Ives found a way to break images into dots of varying sizes, his initial method did not directly involve a screen. The following year, in 1882, the German Georg Meisenbach patented the "autotype" halftone process in Germany, known as Autotypie. His invention, building upon earlier ideas, utilized single-lined screens that were rotated during exposure to create cross-lined effects. The relief halftone process, as it became known, proved to be an almost immediate success. The development of halftone printing methods for lithography, meanwhile, appears to have followed a largely independent path, with contributions from companies like A. Hoen & Co. in the 1860s.
Prior to the advent of digitized images, special photographic techniques were essential for breaking down grayscale images into discrete points. "Screening" was one of the earliest methods, where a coarse-woven fabric screen was placed before the camera plate. This screen would interrupt and diffract the incoming light, breaking it into a pattern of dots. Other techniques involved using a "screen" of parallel bars (a Ronchi ruling), which would be combined with a second exposure at a different angle. Another approach used a screen-plate with etched crossing lines.
Technical Aspects: Screens, Resolution, and Color
The resolution of a halftone screen is a critical factor, measured in lines per inch (lpi). This indicates the number of lines of dots within one inch, measured parallel to the screen's angle. A higher pixel resolution in the source file generally allows for greater detail to be reproduced. However, this increase in detail necessitates a corresponding increase in screen ruling. If the file resolution is not matched to the output resolution, the result can suffer from posterization - a harsh, stepped appearance of tones.
When combining different screens, especially in color printing, several distracting visual effects can arise, such as overly emphasized edges and the undesirable moiré pattern. These can be mitigated by rotating the screens in relation to each other. The "screen angle," measured in degrees, is another important measurement in printing, defining the orientation of the screen.
Halftoning is also indispensable for printing color pictures. In this scenario, an additional challenge emerges: different printing colors must remain physically close to each other to trick the eye into perceiving them as a single, blended color. This is typically achieved using the CMYK (Cyan, Magenta, Yellow, and Black) color model, where each color is printed as a separate halftone layer, carefully angled to minimize moiré patterns.
While round dots are the most common, various dot types exist, each with its own characteristics:
- Round dots: The most frequent choice, suitable for lighter images, particularly for rendering skin tones smoothly.
- Elliptical dots: Appropriate for images containing numerous objects, offering a different way to fill tonal areas.
- Square dots: Best suited for highly detailed images, though generally not recommended for skin tones due to their sharper edges. The corners of square dots meet at a 50% tonal value, creating a distinct visual effect.
From Analog to Digital: The Halftoning Landscape
The 1980s saw halftoning become more accessible with the development of new generations of imagesetter film and paper recorders, evolving from earlier "laser typesetters." Unlike earlier devices, imagesetters could generate all page elements, including type, photographs, and graphics. Early laser printers from the late 1970s onward could also produce halftones, but their initial 300 dpi resolution limited the screen ruling to approximately 65 lpi.
How Offset Printing Works
All halftoning processes, whether analog or digital, rely on a high-frequency/low-frequency dichotomy. In photographic halftoning, the low-frequency attribute is a local area of the output image designated as a "halftone cell." Each equal-sized cell corresponds to an area in the original continuous-tone image. Within each cell, the high-frequency attribute is a centered, variable-sized halftone dot composed of ink or toner. The ratio of inked to non-inked area within the cell directly reflects the luminance or gray level of the input image.
Digital halftoning, however, operates on a raster image or bitmap where each monochrome picture element, or pixel, is either on or off (ink or no ink). To emulate the photographic halftone cell, digital halftoning requires groups of monochrome pixels within the same-sized cell. The fixed location and size of these pixels can compromise the high-frequency/low-frequency dichotomy of the photographic method. Clustered multi-pixel dots cannot "grow" incrementally but rather in discrete jumps of a whole pixel. To minimize this compromise, digital halftone monochrome pixels must be very small, often numbering from 600 to 2,540 pixels per inch or more. Digital image processing has also led to more sophisticated dithering algorithms that can yield superior results compared to traditional digital halftoning.
The most common method for creating screens is amplitude modulation (AM), which produces a regular grid of dots that vary in size. Frequency modulation (FM), also known as stochastic screening, is another method, where dots are of a fixed size but vary in their spacing.
Inverse Halftoning: Reconstructing the Original Image
Inverse halftoning, or descreening, is the process of reconstructing high-quality continuous-tone images from their halftone versions. This is a challenging task because multiple different source images can produce the same halftone image, making reconstruction an ill-posed problem with many plausible outcomes. Furthermore, information such as subtle tones and fine details is irretrievably lost during the halftoning process.
Despite these challenges, reconstruction is often desired. For artists, editing halftone images can be difficult. Simple modifications like adjusting brightness typically involve altering color tones, which in a halftone image requires preserving the regular dot pattern. Complex tasks like retouching also become more complicated. Many image processing techniques are designed for continuous-tone images, and applying them to halftones can be inefficient or lead to undesirable results. Image compression algorithms, for instance, are more efficient for continuous-tone images.
The visual degradation caused by halftoning is another reason for inverse halftoning. Sudden tone changes from the original image are smoothed out, and distortions like moiré patterns can be introduced. This is particularly noticeable when images are printed on newsprint, where paper properties can enhance the visibility of the halftone pattern. Scanning and reprinting these images can further emphasize moiré.
The primary steps in inverse halftoning involve removing the halftone patterns and reconstructing tone changes. Recovering lost details may also be necessary to improve image quality. Various halftoning algorithms exist, broadly categorized into ordered dithering, error diffusion, and optimization-based methods. Choosing the right descreening strategy is crucial, as different algorithms generate distinct patterns, and most inverse halftoning algorithms are tailored to specific pattern types.
A straightforward approach to removing halftone patterns is applying a low-pass filter, either in the spatial or frequency domain. A Gaussian filter, for example, discards high-frequency information, which blurs the image and simultaneously reduces the halftone pattern. This effect is analogous to the blurring our eyes naturally apply when viewing a halftone image. However, selecting the correct bandwidth is vital; too narrow a bandwidth blurs edges excessively, while too high a bandwidth results in a noisy image that doesn't fully remove the pattern.
Further improvements can be achieved through edge enhancement techniques. Decomposing the halftone image into its wavelet representation allows for selective processing of different frequency bands. Edges typically contain high-pass energy, which can be preserved or enhanced.
Another promising avenue for inverse halftoning involves machine learning algorithms, particularly artificial neural networks. These learning-based approaches can identify the most effective descreening techniques to approximate the original image. The strategy can be varied based on the specific halftone image and even different content within the same image. Convolutional neural networks (CNNs) are well-suited for tasks like object detection, enabling category-based descreening. They can also perform edge detection to enhance details around edges. Generative adversarial networks (GANs) can further refine results by artificially generating content and recovering lost details. However, these methods are constrained by the quality and completeness of the training data, and unseen halftoning patterns can be difficult to remove. The learning process itself can also be time-consuming.
A different approach is the lookup table (LUT) method, which bypasses filtering altogether. It works by analyzing the distribution of a pixel's neighborhood in the halftone image. A lookup table then provides a continuous-tone value based on this distribution. The corresponding lookup table is generated beforehand by analyzing histograms of halftone images and their original counterparts. These histograms reveal the distributions before and after halftoning, allowing for an approximation of the continuous-tone value for a specific distribution in the halftone image. A key requirement for this method is knowing the halftoning strategy in advance to select the correct lookup table, which must be recomputed for every new halftoning pattern encountered.
Practical Applications: Beyond Retro Design
While the vintage aesthetic is a significant draw, halftone patterns have far-reaching applications. In screen printing, they are essential for creating shades and gradients with limited color palettes. The dot pattern allows for complex tonal effects on fabrics and merchandise using fewer ink colors. For designers seeking a retro feel, manually created distressed halftone patterns offer an authentic printed appearance, varying in dot size and density to provide a range of texturing resources. These can be overlaid on designs or illustrations to instantly add retro style shading and screen print effects.
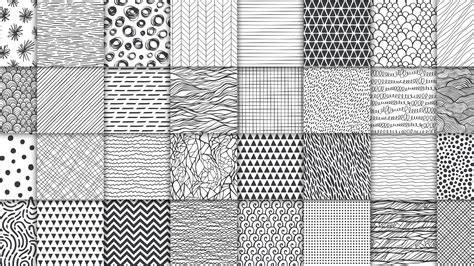
The availability of these patterns as repeating swatches in formats like Photoshop's .pat file makes them easy to apply. Users can load these patterns and use the Fill tool to incorporate them directly into their designs. Individual pattern files, often in PNG format, can also be pasted into design documents and used as typical texture files. Inverting these files allows for a choice between black and white dots, and altering blending modes like Multiply or Screen can render backgrounds transparent, offering significant creative flexibility.
Even in the digital realm, where screens display pixels rather than ink dots, halftone patterns are employed for stylistic purposes, creating a retro or textured effect. While purely visual on digital screens, they contribute to aesthetic diversity in web design and digital art.
Halftone Patterns in Everyday Life
When you look at a picture in a magazine, on a cereal box, or even on some clothing, you're likely seeing a halftone pattern at work. Your printer uses this technique to create the illusion of a full spectrum of colors using just four inks: cyan, magenta, yellow, and black (CMYK). By precisely controlling the size and spacing of dots for each of these colors, printers can simulate countless shades and hues, making full-color images appear detailed and vibrant on paper.
Halftone patterns are also crucial in screen printing, a popular method for printing on textiles and other merchandise. They enable the creation of shading and gradients even when using a limited number of ink colors. The pattern breaks down an image into dots of various sizes, representing darker and lighter areas, thus achieving complex, multi-tonal effects.
The resolution of an image plays a significant role in its halftone pattern. Higher resolution images can accommodate more detailed halftone patterns, leading to smoother gradients and a more faithful reproduction of the original. Lower resolution images might result in coarser patterns and less detail. Graphic design software typically allows for adjustments to the angle of halftone patterns. This is important for avoiding moiré patterns, which are undesirable visual artifacts that can occur when the halftone screen angle interferes with the image's existing pattern. Changing the angle can significantly improve the visual quality of the print.
Modern printers achieve high-quality halftone prints rapidly due to advanced technology that precisely manages ink distribution and placement. Sophisticated algorithms determine the optimal arrangement of halftone dots, while high-speed processors and precise mechanical components ensure swift and accurate output.
Customization of halftone patterns for specific printing materials is also possible. Different materials like paper, fabric, or metal may require adjustments in dot size, spacing, and even shape to ensure the best possible print quality and accurate representation of the design, taking into account the material's unique absorption rates and textures.
Lighting conditions can also impact how halftone printed materials are perceived. Bright light can make the dots more discernible, potentially enhancing perceived sharpness, while lower light might cause dots to blend, smoothing the image and affecting its perceived contrast and depth.
Halftone patterns are adept at simulating depth and texture in monochrome prints. By varying dot size and spacing, they can create illusions of depth and a wide range of textures, from smooth gradients to rough surfaces, allowing artists to convey a sense of realism even with a single ink color.
The digital age has profoundly influenced the use and versatility of halftone patterns. Digital tools provide unprecedented control over pattern characteristics, enabling more complex and precise images. Furthermore, digital platforms have opened up new applications for halftones beyond traditional print, including web design and digital art, where they add aesthetic diversity and visual interest.
Converting photographs to halftone for screen printing presents challenges, particularly in preserving image fidelity. Key issues include ensuring fine details are retained without creating excessively dense or sparse dot areas, which can lead to loss of detail or unwanted artifacts. Balancing dot size with the screen's mesh count is also crucial to avoid overloading the fabric with ink or under-representing the image's nuances, requiring careful calibration and experience.
Ultimately, halftone patterns directly impact the perceived quality of printed merchandise. Well-executed halftone prints can create vibrant, detailed, and visually appealing images that significantly enhance the aesthetic value of a product. The subtle variations in dot size and density are what give printed images their depth and visual richness, making halftoning a technique that continues to be relevant and impactful in the world of design and printing.