Procreate, a powerhouse for digital artists, offers a suite of intuitive tools that empower creativity. Among these, the Eraser Tool stands as a fundamental component for refining and correcting artwork. Far from being a simple deletion mechanism, Procreate's Eraser functions much like a brush, offering a high degree of customization that allows for precise and nuanced manipulation of your digital canvas. Understanding how to effectively wield this tool can significantly elevate the quality and polish of your creations, whether you're a beginner just starting out or a seasoned professional seeking to refine your workflow.
Accessing and Understanding the Eraser Tool
Initiating the use of the Eraser Tool in Procreate is a straightforward process, mirroring the selection of other primary tools. To begin, locate the icons for Paint, Smudge, and Erase situated towards the top right of the Procreate interface. A single tap on the Erase icon will select it, making it ready for use.
Once the Eraser Tool is selected, its functionality can be further tailored by accessing the extensive Brushes library. Tapping again on the selected Erase icon will open this library, presenting a vast array of brush types that can be applied to your erasing actions. This is a crucial aspect of Procreate's design: the Eraser Tool, like the Paint and Smudge tools, shares the same brush library. This means that the same unique characteristics and behaviors found in painting brushes can be leveraged for erasing, offering a versatile approach to image editing.
Experimenting with different brushes from this library is highly encouraged. Each brush possesses its own unique properties that will influence how it erases. Some brushes may create soft, feathered edges, ideal for subtle corrections, while others might offer sharp, defined lines for more precise removal of elements. The choice of brush will fundamentally alter the visual outcome of your erasing, transforming it from a blunt instrument into a refined tool for artistic expression.
Customizing Your Eraser Experience: Size, Opacity, and Brush Settings
The power of Procreate's Eraser Tool lies in its adaptability, largely driven by its adjustable settings. Two primary sliders, readily accessible in the left sidebar, allow for granular control over the eraser's behavior: Size and Opacity.
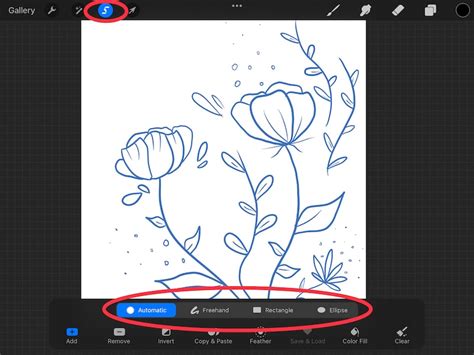
The Size slider dictates the physical dimensions of the eraser's mark. Increasing the size allows for broader strokes, useful for quickly removing larger areas, while decreasing it enables finer, more detailed work. As you adjust this slider, a preview window will appear, offering a clear visual representation of the brush size percentage, ensuring you can precisely dial in the desired width.
The Opacity slider controls the transparency of the eraser's effect. A higher opacity setting means the eraser will remove pigment more completely, acting as a more aggressive removal tool. Conversely, a lower opacity will result in a more subtle erasure, allowing underlying colors or textures to show through. This is particularly useful for creating gradual fades or blending effects by partially removing layers of paint. Similar to the size slider, the opacity adjustment is accompanied by a preview percentage in a dialog menu, providing immediate feedback on your settings.
Beyond these general sliders, Procreate allows for deep customization of brush attributes. When you select a brush from the library for use with the Eraser Tool, its specific characteristics can be modified. This includes not only size and opacity but also other parameters that govern how the brush behaves, much like when using it for painting. These adjustments can profoundly impact the texture, flow, and overall effect of your erasing.
Brush Size and Opacity Memory
A particularly innovative feature is Procreate's ability to save custom brush size and opacity settings for individual brushes. This is achieved by tapping the + symbol that appears when adjusting the sliders. This action "marks" your current setting, creating a small line indicator on the respective slider. This "Brush Size Memory" setting allows you to quickly recall preferred configurations for specific brushes. To return to a saved setting, simply tap the mark on the slider or slide the main slider close to the marked position. These saved settings are specific to the currently selected brush, enabling a highly personalized workflow. To remove a saved setting, tap the mark to reopen the preview window, where the + symbol will have transformed into a - symbol, allowing you to delete the saved preference. This feature ensures that your favorite erasing techniques are readily available without needing to reconfigure settings each time.
Leveraging Apple Pencil for Enhanced Erasure
The full potential of Procreate's tools, including the Eraser, is unlocked when paired with an Apple Pencil or Apple Pencil Pro. The pressure sensitivity of the Apple Pencil allows for dynamic control over brush strokes. Varying the pressure applied can alter the darkness, thickness, and opacity of the erased mark, providing a level of control that mimics traditional art tools. This means that simply by adjusting how firmly you press the Apple Pencil, you can achieve a wide range of erasing effects, from a light dusting to a complete removal of pigment.
For users of the Apple Pencil Pro, the experience is further enhanced with the addition of features like barrel roll. This allows you to rotate the Apple Pencil as you make strokes, which can alter the brush's behavior and the resulting erased mark. This adds another layer of artistic control, enabling more nuanced and varied erasing techniques that can be integrated seamlessly into your creative process.
7 PROCREATE TIPS that will leave you SPEECHLESS!
The Eraser as a Creative Tool, Not Just a Corrector
It's important to view Procreate's Eraser Tool not merely as a means to fix mistakes but as an integral part of the creative process. Just as a painter uses light and shadow to define form, an artist can use the eraser to sculpt and shape their artwork. By strategically applying varying degrees of opacity and using different brush types, you can create sophisticated effects.
For instance, using a textured eraser brush at a low opacity can create subtle worn or distressed effects, adding character and depth to a piece. Alternatively, employing a sharp, hard-edged eraser can be used to define crisp boundaries or create sharp highlights. The ability to switch between Paint, Smudge, and Erase tools while using the exact same brush provides an exceptionally fluid workflow, allowing for rapid iteration and refinement without disrupting your creative flow.
Understanding Layer Interaction
When using the eraser on a particular layer, Procreate's behavior with respect to underlying layers is critical to understand. If you have content on layers positioned beneath the layer you are currently erasing, those underlying layers will show through as pigment is removed from the active layer. This interaction is fundamental to non-destructive editing in digital art. It means that erasing on one layer does not permanently delete the content of layers below it, preserving your ability to make further adjustments or revert changes. This layered approach makes erasing in Procreate both accurate and effective, allowing for complex compositions and detailed refinement.
The process of erasing in Procreate, therefore, becomes an act of careful consideration and artistic intent. By understanding the interplay of brush selection, size, opacity, pressure sensitivity, and layer management, artists can transform the Eraser Tool from a simple corrective measure into a powerful instrument for artistic expression and meticulous detail work. Mastering these functionalities opens up new avenues for creativity, allowing for a more dynamic and controlled digital art creation process.