In the dynamic world of graphic design, achieving pixel-perfect alignment and maintaining visual consistency across your projects is paramount. Adobe Photoshop, a cornerstone of digital art and design, offers a suite of powerful tools to facilitate this precision. Among the most fundamental and versatile of these are guides. Photoshop guides are more than just simple lines; they are an indispensable visual aid, a set of guidelines that appear in your workspace, serving as a critical positioning tool for everything from intricate layouts to simple image adjustments. Whether you are working on print layouts or web designs, mastering the use of guides can significantly enhance your efficiency and the professional polish of your creations.
Understanding the Role of Guides in Design
At their core, guides are non-printing lines that float over your image or canvas, providing reference points for aligning elements with accuracy. They act as an extension of your visual judgment, allowing you to create symmetrical designs, ensure consistent spacing, and meticulously position individual layers or graphical elements. In real projects, a guide serves as a visual guide, helping you to break down your canvas into manageable sections or to align specific objects with absolute certainty. Furthermore, when you crop, rotate, or adjust an image, guides act as a steadfast positioning tool, ensuring that your modifications are precise and intentional.
Guides vs. Grids vs. Smart Guides
Photoshop offers three primary alignment tools: guides, grids, and smart guides. While all aim to achieve precise alignment and positioning, they do so with distinct characteristics and applications.
Guides: These are customizable, movable lines that you place precisely where you need them. Unlike grids, which have a fixed, uniform structure, guides offer ultimate flexibility. You can position them horizontally or vertically at exact coordinates, move them, lock them, or remove them as needed. Their color can also be customized to help organize complex layouts. Elements will "snap" to guides when dragged within a small proximity, typically 8 screen pixels, making alignment effortless. Guides are particularly useful for aligning elements across different layers or for creating custom layouts that don't conform to a regular grid pattern. They are ideal for ensuring consistent spacing and creating symmetrical compositions.
Grids: Grids display as a uniform pattern of non-printing lines or dots across the entire canvas, maintaining consistent spacing between lines. They are excellent for creating symmetrical layouts, maintaining proportions, and applying the same structure to all images. Elements will snap to grid lines when the snap feature is enabled. Grids are particularly valuable when designing interfaces, layouts with repeating elements, or when strict proportional consistency is required. Photoshop's default grid often resembles the graphing paper used in mathematics, with clear horizontal and vertical lines.
Smart Guides: These are dynamic alignment aids that appear automatically when needed. They are incredibly helpful for aligning and determining distances between multiple layers as they are being repositioned. Smart guides offer contextual assistance, appearing to show you when objects are aligned with each other or with other elements on the canvas, eliminating guesswork.
Creating Individual Guides: Precision at Your Fingertips
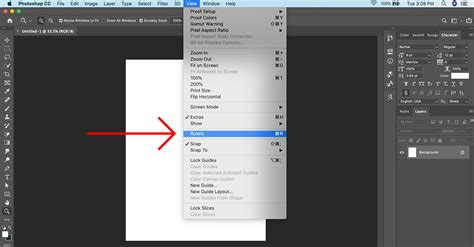
The most direct way to create individual guides is by utilizing Photoshop's rulers. To ensure you can see and interact with rulers, it's essential to have them enabled.
Enabling Rulers
If your rulers are not visible, navigate to the top menu bar and select View > Rulers. Once enabled, you will see a ruler along the top and left edges of your Photoshop workspace.
Dragging Guides from Rulers
To create a guide, simply click on either the horizontal or vertical ruler and drag your cursor towards the center of the screen. As you drag, a colored line will appear, indicating the position of your guide. Release the mouse button, and the guide will remain in place. This method is intuitive and quick for placing guides where you visually estimate they are needed.
Creating Guides with Numerical Precision
For absolute accuracy, especially when working with specific dimensions or percentages, you can enter precise values to create guides.
- Navigate to View > New Guide. A dialog box will appear, allowing you to specify the guide's orientation and position.
- Choose the desired guide direction: Horizontal or Vertical.
- In the Position field, enter the exact value. This value can be in pixels, percentages, inches, centimeters, points, or picas, depending on your ruler settings. For example, if you want a horizontal guide precisely in the vertical center of your image, you would choose "Horizontal" and enter "50%". This method is invaluable for dividing your image or canvas into precise sections, such as for a "rule of thirds" composition or specific column layouts.
Customizing Units
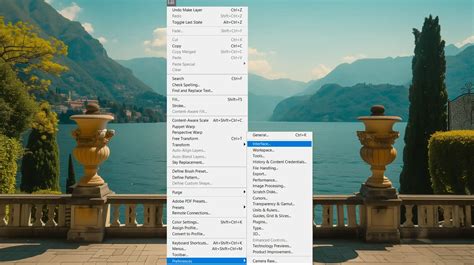
To change your default units in Photoshop, allowing you to input guide positions in your preferred measurement, select Edit > Preferences > Units & Rulers from the menu bar. Here, you can set the units for rulers, text, and other measurement systems.
Managing Your Guides: Moving, Hiding, and Deleting
Once guides are in place, you'll often need to adjust, temporarily remove, or permanently delete them.
Moving Guide Lines
Guides are not static. You can move them at any time.
- To move an existing guide, select the Move Tool (V) from the toolbar. Hover your cursor over the guide until it changes into a double-headed arrow. Click and drag the guide to its new position.
Hiding Guides
Sometimes, guides can obstruct your view of the artwork. To temporarily hide them without deleting them:
- Go to View > Show > Guides. Ensure that the option is unchecked. Alternatively, you can use the keyboard shortcut Command + ; (Mac) or Control + ; (Win).
Deleting Guides
- Deleting a single guide: Select the guide with the Move Tool and press the Delete key. Alternatively, you can drag the guide back to its originating ruler.
- Deleting all guides at once: To clear all guides from your document, go to View > Guides > Clear Guides.
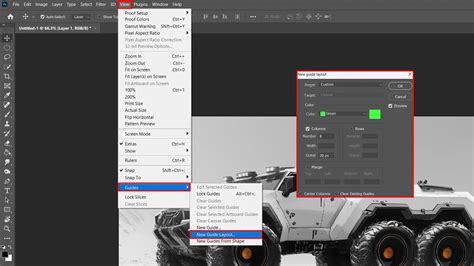
Advanced Guide Layouts: Grids and Guide Layouts
Beyond individual guides, Photoshop allows you to create more complex structures like guide layouts, which can generate multiple guides simultaneously.
Creating a New Guide Layout
For symmetrical or structured layouts, the New Guide Layout feature is incredibly powerful.
- Navigate to View > New Guide Layout.
- A dialog box will appear where you can define the structure of your guides.
- Check the Columns and Rows options to enable their creation.
- Enter the desired number of columns and rows.
- You can also specify the Width of columns, Height of rows, Gutter (the space between columns or rows), and Margin (the space between the guides and the edge of the canvas).
- You can choose to Center the columns and select whether to Clear Existing Guides before applying the new layout.
- The Color option allows you to choose a distinct color for your guides, which can be helpful for differentiating multiple guide sets or for better visibility against your artwork.
- The image below demonstrates an example of dividing the canvas into three equal parts both horizontally and vertically using the New Guide Layout feature.
Saving Guide Layouts
If you frequently use specific guide layouts for your projects, you can save them as presets. After setting up your desired layout, click Save Preset in the New Guide Layout dialog box. This allows you to quickly reapply these layouts in future documents.
Creating Guides from Shapes
Photoshop offers a sophisticated method to create guides directly from existing shapes.
- Select a shape layer, type layer, or even a pixel-based layer.
- Navigate to View > New Guide From Shape. Photoshop will automatically generate guides that precisely outline the boundaries of your selected object. This is an extremely efficient way to align elements based on the dimensions and positions of other objects within your design.
Enhancing Precision with Snapping and Preferences
To maximize the utility of your guides, Photoshop offers features like snapping and customizable preferences.
Enabling Snap to Guides
The "Snap" feature is crucial for aligning elements precisely with your guides. When enabled, objects you move or draw will automatically "snap" to the nearest guide when they come within a certain proximity.
- To enable snapping, go to View > Snap and ensure that Guides is checked. You can also enable snapping to grids, slices, and other elements.
Locking Guides
Accidentally moving a guide can be a frustrating experience, especially when you've meticulously placed it. To prevent this:
- Navigate to View > Lock Guides. Alternatively, use the keyboard shortcut Command + Option + ; (Mac) or Control + Alt + ; (Win). Once locked, guides cannot be moved or deleted accidentally using the Move Tool. To move or delete them, you will need to unlock them first.
Adjusting Guide Appearance
For users working on high-resolution monitors or with specific color preferences, the appearance of guides can be adjusted.
- Making Guides Thicker: Guides can sometimes be difficult to see on high-resolution displays due to anti-aliasing. To make them appear thicker, go to Preferences > Performance. In the Graphics Processor Settings, click Advanced Settings and uncheck Anti-alias Guides and Paths.
- Changing Guide Color: If the default guide color doesn't suit your workflow or contrast well with your artwork, you can change it. Select the guides you wish to modify (you can select multiple guides using Option + Shift -click on Mac or Alt + Shift -click on Windows), then go to View > Edit Selected Guides and use the Color options to choose a new color.
Advanced Techniques and Considerations
While Photoshop excels at creating horizontal and vertical guides, it's worth noting that it doesn't natively support the direct creation of diagonal guides in the same way that Adobe Illustrator does. However, there are workarounds to achieve diagonal guides.
Creating Diagonal Guides (Workaround)
To create a diagonal guide, you can leverage the New Guide functionality with a specific approach:
- Enable rulers (View > Rulers).
- Go to View > New Guide.
- Enter a position value that corresponds to the angle you desire. For instance, to create a guide at a 45-degree angle, you might enter a position that aligns with a diagonal across a square section of your canvas.
- After setting up the initial guide, you can often adjust its angle or use it as a reference.
- A more direct method involves dragging a guide from the ruler while holding down the Shift key. This action will snap the guide to predefined increments, including 45-degree angles. This is particularly useful if you're trying to align elements to a precise diagonal.
The Pixel Grid for Ultra-Fine Control
For extremely detailed work, especially when dealing with digital interfaces or pixel art, the Pixel Grid can be an invaluable tool.
- When you zoom into an image above 500%, a Pixel Grid is displayed on top of the image. This grid shows individual pixels and is exceptionally helpful for aligning shapes and elements to start and end on full pixels, thereby avoiding anti-aliased edges and ensuring crispness.
- You can further enhance pixel-level alignment by enabling Snap Vector Tools and Transforms to Pixel Grid in Edit > Preferences > General. Additionally, the Align Edges option in the Options bar for shape layers can force the fill of a shape to align with the pixel grid after it's drawn.
Grid Systems in Web & UI Design
Conclusion: Elevating Your Design Workflow
Mastering Photoshop's guide systemâfrom simple individual lines to complex guide layoutsâis a fundamental step for any graphic designer. These visual aids are not just for alignment; they are tools that promote consistency, improve efficiency, and ultimately contribute to the professional quality of your work. By understanding how to create, manage, and leverage guides, grids, and snapping features, you can confidently tackle any design challenge, whether it's a print brochure, a complex web banner, or a meticulously crafted digital illustration. The ability to align elements quickly and work more efficiently on both print layouts and web designs is a direct benefit of incorporating these powerful tools into your workflow.