In our increasingly smartphone-centric world, it's more crucial than ever for designers to ensure their work is versatile across various platforms. This extends to print-based projects, where the inclusion of a seemingly simple Quick Response Code-or QR Code for short-can bridge the gap between the physical and digital realms. A QR Code can direct users to a hyperlink, a text message, or even plain text with a single, swift smartphone scan. Adobe InDesign has offered this powerful feature since the initial launch of the Creative Cloud series, providing designers with the ability to generate and manage these codes directly within their layout software.
QR Codes are not limited to print; they can also be effectively utilized in Interactive PDF or Digital Publishing projects created in InDesign. This capability ensures that your designs remain dynamic and engaging, regardless of the medium.
The Genesis of QR Codes: Beyond Simple Barcodes
To the uninitiated, QR codes might appear as merely a more complicated version of a traditional barcode. In essence, they are. However, their utility extends far beyond simple product identification. While numerous online tools exist for QR code creation, they often yield raster-based images. These can result in fuzzy, low-resolution QR codes that may not scan correctly in print, leading to user frustration and a diminished brand experience. Fortunately, Adobe InDesign provides a built-in solution, enabling the creation of high-quality, vector-based QR codes of various types, ensuring scalability and clarity. The ability to generate QR codes directly in InDesign has been a feature for quite some time, yet it remains a lesser-known capability among many users.

Step-by-Step Guide to Generating QR Codes in InDesign
Adding your own custom QR Code in Adobe InDesign is a straightforward process, allowing for seamless integration into your designs. Here's a breakdown of how to achieve this:
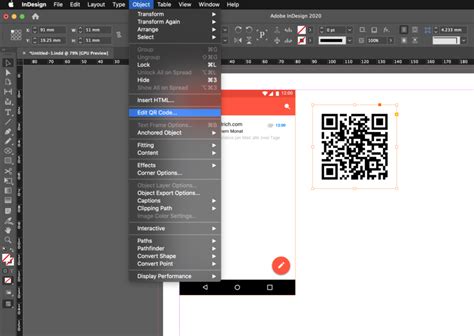
Accessing the QR Code Generation Dialog
Begin by navigating to the Object menu in the top menu bar of your InDesign workspace. From the dropdown menu that appears, select the Generate QR Code option. This action will immediately display the Generate QR Code dialog box on your screen, presenting you with a range of options for customizing your code.
Defining Your QR Code Content
Within the Generate QR Code dialog box, you will notice two primary tabs: Content and Color. The Content tab is where you define the data that your QR code will represent.
Select the Data Type: Under the Type dropdown menu, choose the desired content type for your QR code. The available options typically include:
- Hyperlink: This is the most common type, used to direct users to a specific web address (URL).
- Text Message: This option allows you to pre-configure a text message that will be sent to a specified phone number when the code is scanned. You can customize both the recipient's number and the message content.
- Plain Text: For simple information display, you can opt for plain text, which will reveal the entered text upon scanning.
- Email: Create a QR code that, when scanned, opens the user's email client with a pre-filled recipient, subject, and body.
- SMS: Similar to Text Message, but specifically for sending SMS messages.
- vCard: This allows you to embed contact information that can be directly saved to a user's phone contacts.
- Wi-Fi: Generate a QR code that, when scanned, automatically connects a user's device to a specified Wi-Fi network, including the network name (SSID) and password.
Input Your Data: Depending on the selected type, you will be prompted to enter the relevant information. For a hyperlink, this means copying and pasting or typing the full URL. For a text message, you'll input the phone number and the message.
Confirm and Generate: Once you have entered your data, click OK. Your cursor will then transform into a loaded place cursor, holding the generated QR code.
Placing and Customizing Your QR Code
With the QR code loaded in your cursor, you have several options for placing it within your InDesign layout:
- Clicking into an Existing Frame: If you have a pre-existing frame (e.g., an image frame) where you want to place the QR code, simply click inside that frame. The QR code will be placed within the frame at its default size.
- Click and Drag: To create a new frame and place the QR code simultaneously, click on your InDesign page and drag to draw a new frame. Releasing the mouse button will place the QR code within this newly created frame, maintaining a fixed aspect ratio.
Adjusting the QR Code's Appearance
The QR codes generated in InDesign are high-fidelity graphic objects that behave like native vector art. This means you have extensive control over their appearance:
- Scaling: You can easily scale the QR code object to any desired size without any loss of quality, ensuring it fits perfectly within your design. Use the Selection tool to resize the frame. Holding Shift + Alt (Windows) or Shift + Option (Mac) while resizing the frame will scale it from its center, though this may unpreserve the aspect ratio.
- Coloring: By default, QR codes are black. However, you can customize their color. Navigate to the Color tab within the Generate QR Code dialog box, or after the code has been placed, select the QR code object. You can then apply a color swatch from the Swatch List to the QR code. It's important to note that if you edit a color swatch after creating the QR code, the color of the QR code will not update automatically. You will need to reopen the QR Code dialog box and reapply the color or re-edit the QR code using Object > Edit QR Code.
- Effects and Transparency: You can apply various effects, transparency settings, and printing attributes, such as overprinting, spot inks, and trapping, directly to the QR code object, just as you would with any other vector graphic in InDesign.
- Background: The default background of a QR code frame is transparent.
Efficiently Replacing Multiple Images in InDesign
While generating QR codes is a powerful feature, InDesign also excels at streamlining other design tasks, such as replacing multiple images efficiently. Replacing images individually is a common mistake for beginners, especially when dealing with numerous image updates on a tight deadline. Fortunately, InDesign offers a much more effective method:
Initiate the Place Command: Navigate to File > Place or use the keyboard shortcut Command + D (Mac) or Control + D (Windows).
Select Multiple Images: In the Place dialog box, you can select multiple image files. Click on the first image, then hold down the Command (Mac) or Control (Windows) key while clicking on additional files you wish to use for replacement.
Order Your Images (Optional): Once all desired files are selected, click OK. Your cursor will now be loaded, holding all the selected images. Use the left and right arrow keys on your keyboard to arrange the order in which these images will be placed.
Replace Existing Images: Hover your cursor over an image box you wish to replace. While holding down the Option (Mac) or Alt (Windows) key, click inside the box. This action will replace the existing image with the next image from your loaded cursor.
Repeat the Process: Move to the next image box you want to update and repeat the Option/Alt-click process. This method allows for rapid replacement of multiple images, saving significant time and effort.

Creative Applications for QR Codes in Your Designs
Now that you've mastered the creation and integration of QR codes within InDesign, consider how you can leverage this dynamic tool in innovative ways across various design projects:
Business Cards
Enhance your business cards by adding a QR code that offers potential clients something extra. This could link to your online portfolio, a company overview video, or a special introductory offer. Ensure the information linked is a true representation of your offerings and remains relevant over time.
Promotional Stickers
Stickers serve as an excellent guerrilla marketing tool. When combined with a strategically placed QR code, they can significantly boost brand awareness. Design eye-catching, high-quality stickers that people will want to display on their laptops or water bottles. The intrigue of where the QR code leads can drive engagement.
Product Labels
Product labels often have limited space for essential information. Incorporating a QR code allows you to provide customers with supplementary details, such as detailed usage instructions, ingredient lists, care guides, or even customer testimonials. This enhances the overall customer experience, regardless of the product, from artisanal foods to handcrafted homeware.
Retail Storefronts
Transform your retail storefront into an interactive marketing space. A QR code placed on your window display could offer curious shoppers an exclusive discount, early access to new arrivals, or entry into your loyalty program. Custom stickers or printed elements on your window display can creatively integrate your QR code.
Menus and Information Displays
QR codes have become ubiquitous in the hospitality and cultural sectors. In restaurants and bars, they can link to digital menus that are easily updated. Museums can use QR codes to provide deeper information about exhibits, including multimedia content or historical context, enriching the visitor experience.
The Enduring Relevance of QR Codes
While some may speculate about the declining relevance of QR codes, their continued widespread adoption across various industries suggests they are here to stay. As a dynamic marketing and information-sharing tool, brands are actively exploring new and innovative ways to utilize them. The ability to generate and manage high-quality, vector-based QR codes directly within Adobe InDesign ensures that designers can seamlessly integrate these essential elements into their print and digital workflows, connecting the physical world with the vast resources of the internet.