Photoshop, a cornerstone of digital design, offers a plethora of tools for crafting visually striking graphics. While many tutorials focus on static text effects, a particularly intriguing and often sought-after technique involves creating text that dynamically inverts its background. This means that as the text moves across different tonal areas of an image, it automatically adjusts its color-appearing black against light backgrounds and white against dark backgrounds-to maintain maximum contrast and legibility. This effect, often described as text that "inverts unambiguously," provides a sophisticated and chameleon-like quality to your designs, ensuring your message always stands out, regardless of its placement. This guide will delve into the intricacies of achieving this effect, exploring various methods and their underlying principles, moving from specific techniques to the broader implications for design workflow.
Understanding the Core Concept of Text Inversion
The fundamental idea behind inverting text is to create a visual relationship where the text's color is the direct opposite of the background it occupies. In a purely black and white scenario, this is straightforward: white text on black, and black text on white. However, in a full-color or grayscale image, this requires a more nuanced approach. The goal is to achieve a result that mimics the behavior of a perfect contrast adjustment, where every pixel of the background is evaluated, and the text takes on the complementary color. This dynamic inversion ensures that the text remains readable even when placed over complex or varied backgrounds.
The provided information highlights a key scenario: "You make text that inverts unambiguously. Where the image is white, the text is black; where the image is black, the text is white. And when you’ve created this text, you can actually move it anywhere in your image and get the same effect, with the text adjusting to its surroundings like a gorgeous black-or-white chameleon that can assess shades of gray and make a call which way to go." This description perfectly encapsulates the desired outcome. The ability for the text to "adjust to its surroundings" dynamically is the hallmark of this advanced technique.
Method 1: Leveraging Blend Modes and Adjustments
One of the most powerful methods for achieving dynamic text inversion in Photoshop involves a combination of blend modes and adjustment layers. This approach offers a non-destructive workflow, allowing for easy modifications and adjustments.
Initial Setup and Text Creation
To begin, open Photoshop and create a new document. Select the Text tool (T) and click on your canvas to create a new text layer. Type your desired text. For this method to work effectively, it's often beneficial to have the text already converted to outlines or to be prepared to rasterize it if necessary. The user's example mentions, "In the example that I used for illustration, Deke had already turned the text to outlines (so that anyone could use the file without worrying about his text choice)." While converting to outlines is good practice for sharing, for the dynamic inversion effect itself, working with a standard text layer is often the starting point, with the understanding that certain steps might require rasterization or conversion to a shape later if specific blend modes are not directly applicable to live text.
If you have a legitimate text layer, a simpler, albeit less dynamic, approach for basic inversion would be to "just change your text color to white directly from the options bar." However, this does not provide the dynamic inversion effect as described.
Applying the "Difference" Blend Mode
The core of this method lies in the "Difference" blend mode. This blend mode subtracts the darker color from the lighter color or vice versa. When applied to a layer, it creates an inversion effect based on the pixels beneath it.
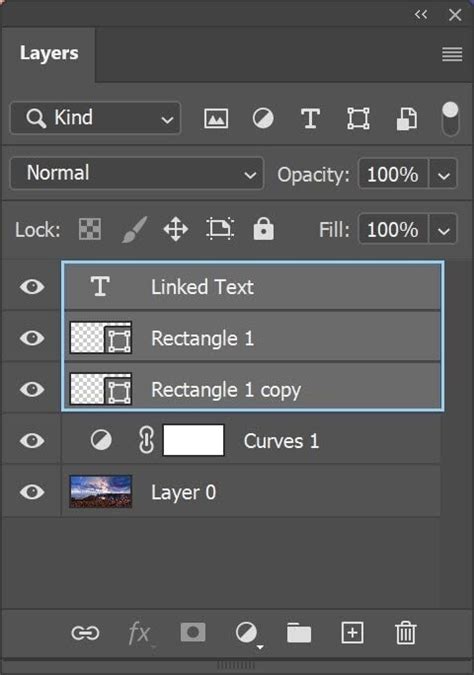
- Select the Text Layer: In the Layers panel, select the layer containing your text.
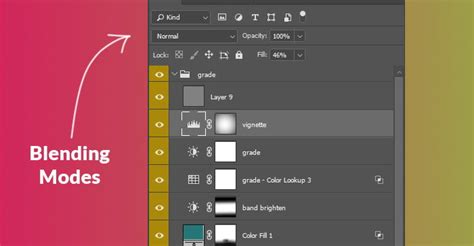
- Set Blend Mode to "Difference": Locate the blend mode dropdown menu at the top of the Layers panel (it usually defaults to "Normal"). Change this to "Difference."
Refining the Effect with Layer Styles and Adjustments
The "Difference" blend mode often produces vibrant, sometimes undesirable, color shifts. To achieve a clean black-and-white inversion, further adjustments are necessary.
Desaturating the "Difference" Effect: The "Difference" blend mode can result in colored inversions, especially when applied over colored backgrounds. To ensure a monochrome inversion, you need to desaturate the effect. This is achieved by adjusting layer styles.
- Open Layer Style: Double-click in any open area of the Text layer (not on the layer name or thumbnail) to open the Layer Style dialog box.
- Uncheck "Blend Clipped Layers to Group": Locate and un-check the "Blend Clipped Layers to Group" checkbox, which is typically enabled by default. "With this setting off, Photoshop will Desaturate after applying the Difference blend mode, meaning it will desaturate the 'blue' effect of the text, which is what we want." This step is crucial for converting the color inversions into a grayscale-appropriate result.
Converting Grays to White with Levels: Even after desaturation, the text might appear in shades of gray rather than pure black and white, depending on the background. To force a clean black-and-white output, a Levels adjustment layer is employed.
- Create a Levels Adjustment Layer: Alt-click (Option-click on Mac) the black/white icon (Create new fill or adjustment layer) at the bottom of the Layers panel and choose "Levels" from the popup menu.
- Clip the Adjustment Layer: To ensure this adjustment only affects the text layer below it, clip it. You can do this by holding down Alt (Option) and clicking on the horizontal line between the Levels adjustment layer and the text layer in the Layers panel, or by right-clicking the Levels layer and selecting "Create Clipping Mask."
- Adjust Levels for Inversion: In the Properties panel for the Levels adjustment, you'll see sliders for shadows, midtones, and highlights. The goal is to make the text pure black and pure white. The user's description suggests a specific adjustment: "In the Properties panel, set the value on the far left (the highlights, basically) to 120 as shown below. This tells Photoshop that for any value above 120, you want the text to render as white." This adjustment effectively pushes all values above 120 to pure white and, by implication, values below 120 will become pure black after the "Difference" blend mode has done its work.
The Advantage of Dynamic Inversion
The beauty of setting up the text this way, rather than using a manual mask, is its dynamic nature. "Wherever you move the text, it will invert dynamically depending on what’s behind it." This means that if you move the text to a different part of the image with varying tones, the inversion effect will update automatically, maintaining optimal contrast without manual intervention. "Your patience isn’t further tried by having to readjust the text." This dynamic behavior is a significant advantage for workflows where elements are frequently repositioned.
Explore Dynamic Text in Photoshop - Day 14
Method 2: Rasterizing and Inverting (Less Dynamic)
While the blend mode method offers dynamic results, a simpler, though less flexible, approach involves rasterizing the text and then using Photoshop's built-in inversion features. This method is less dynamic because once rasterized, the text loses its editable properties, and the inversion is a static effect applied to the pixels.
- Create and Format Text: As before, create your text layer and format it.
- Rasterize the Text Layer: Right-click on the text layer in the Layers panel and select "Rasterize Type."
- Apply Inverse: With the rasterized text layer selected, go to
Image > Adjustments > Invert(or use the keyboard shortcut Ctrl+I / Cmd+I).
This method will invert the colors of the text based on the current background at the time of inversion. If you then move this rasterized layer over a different background, the inversion will not update. To achieve a dynamic effect with this method, you would essentially have to repeat the inversion process for each new background, which is far from ideal.
Method 3: Using Color Balance and Threshold (Alternative Refinement)
Another way to refine the output after applying the "Difference" blend mode is by using a combination of Color Balance and Threshold adjustments, or even just Threshold alone.
- Apply "Difference" Blend Mode: As described in Method 1.
- Add a Threshold Adjustment Layer: After clipping a Levels adjustment, or as an alternative to it, you can use a Threshold adjustment layer. This layer converts the grayscale image to a pure black-and-white image based on a threshold value.
- Create a Threshold adjustment layer and clip it to your text layer.
- In the Properties panel, adjust the "Threshold Level" slider. Values closer to 0 will result in more white, while values closer to 255 will result in more black. You'll need to find a balance that makes your text appear as desired against its background.
This method also aims to create a stark black-and-white output, forcing the pixels to become either black or white, thus achieving a strong contrast.
Integrating Text Rotation and Warping
Beyond inversion, Photoshop offers extensive capabilities for manipulating text in terms of orientation and form, which can be combined with inversion effects for more elaborate designs.
Rotating Text
Rotating text is a fundamental technique for adding dynamism and visual interest.
- New Document: Start by creating a new document (
File > NeworCtrl+N/Cmd+N). - Text Tool: Select the Text tool (T) and create a text layer. Type your text and format it using the Character and Paragraph panels.
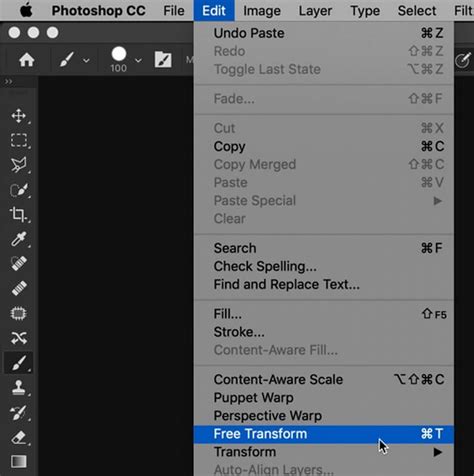
- Free Rotation: With the text layer selected, you can use the Free Transform tool (
Edit > Free TransformorCtrl+T/Cmd+T). A bounding box will appear around your text. Move your cursor slightly outside one of the corner handles until it turns into a curved double-arrow. Click and drag to rotate the text freely. - Specific Angle Rotation: Alternatively, in the options bar at the top of the screen, there's a field for "Set rotation angle." You can directly input a numerical value to rotate the text by a precise degree.
Warping Text
Warping text allows for more artistic distortions, bending and shaping the text into various forms.
- Create and Select Text: As with rotation, begin by creating and selecting your text layer.
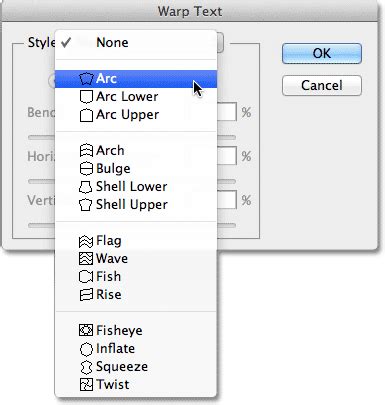
- Access Warp Text: Go to the top menu bar and navigate to
Type > Warp Text. - Choose a Warp Style: The "Warp Text" dialog box presents a variety of "Warp Styles" like "Arc," "Flag," "Wave," "Fishtail," etc. Each style offers a unique distortion. Select a style that suits your design.
- Adjust Warp Options: Once a style is chosen, you can further customize the warp effect using the "Bend," "Distortion," and other related options. For instance, the "Arc" style can be bent upwards or downwards, and the horizontal and vertical distortions can be fine-tuned.
- Apply and Refine: Click "OK" to apply the warp. You can then apply layer styles or the inversion techniques discussed previously to further enhance the warped text. "By using the Warp Text function in Photoshop, you can create stunning text effects that will make your designs stand out."
Layer Styles and Advanced Refinements
Layer styles can add depth, dimension, and stylistic flair to text, even after it has been inverted. Effects such as Bevel & Emboss, Drop Shadow, or Stroke can be applied to the text layer. When working with the dynamic inversion method, remember that these layer styles will interact with the inverted text. For instance, a drop shadow will be cast by the black or white text, depending on its inversion.
It's also worth noting that the order of operations can sometimes influence the final outcome. For example, applying layer styles before rasterizing (if you choose that path) or before applying certain blend modes might yield different results than applying them afterward. Experimentation is often key to achieving the desired aesthetic.
Considerations for Different Audiences and Applications
The dynamic text inversion technique is a powerful tool that can be adapted for various levels of complexity and application.
For Beginners
For those new to Photoshop, understanding the basic text tool, layer panel, and simple adjustments like color changes is a good starting point. Introducing them to the concept of "Difference" blend mode can be a gateway to more advanced effects. The key is to start with simpler backgrounds and perhaps black and white images to grasp the core inversion principle before tackling full-color, complex imagery.
For Intermediate Users
Intermediate users can readily implement the blend mode and adjustment layer method. They will be comfortable with clipping masks and understanding how different blend modes interact. They can also begin to explore how text inversion pairs with other text manipulation techniques like rotation and warping.
For Professionals
Professionals can leverage this technique for high-impact designs, such as posters, book covers, or motion graphics. The dynamic nature of the effect is particularly valuable in video editing or animation where text might move across scenes with varying lighting and colors. Understanding the underlying principles allows for creative problem-solving and the development of unique visual styles. The ability to "move it anywhere in your image and get the same effect" is a testament to the robustness of a well-executed dynamic inversion.
Avoiding Clichés and Misconceptions
A common misconception might be that text inversion is a single, straightforward command. As demonstrated, it often requires a combination of techniques. Another cliché to avoid is relying solely on basic inversion methods that lack dynamism. For instance, simply setting text to white and hoping it works on all backgrounds is insufficient. The true power lies in creating a system that adapts.
Furthermore, while the goal is inversion, it's important to remember that the "Difference" blend mode, when applied to color, produces color inversions. The subsequent steps-desaturation and threshold/levels adjustments-are crucial for achieving the desired black-and-white or clean contrast effect. Misunderstanding these intermediate steps can lead to unexpected colored text or insufficient contrast.
Conclusion of Techniques
"As you've seen in this tutorial, there are countless ways to manipulate text in Photoshop and create stunning text effects." The dynamic inversion of text is a sophisticated technique that, when mastered, can elevate designs by ensuring unparalleled legibility and a professional, polished look. Whether employed through the intricate dance of blend modes and adjustments, or combined with creative rotations and warps, the ability to make text dynamically invert its background is a testament to Photoshop's power and flexibility. The beauty of setting up the text this way is that it allows for flexibility and adaptability, ensuring that the text remains a prominent and readable element within any design, no matter how complex the surrounding visuals become. This technique transforms text from a static element into a reactive component of the overall composition.