Designing a compelling banner for printing requires a systematic approach to ensure a flawless final product. This article guides you through the step-by-step process of creating a print-ready banner using Adobe Photoshop, a graphic design software. Whether you're a beginner with little or no design experience or looking to refine your workflow, these easy steps will help you create a professional-looking banner in no time.
Setting Up Your Document for Success
Before diving into design, correctly setting up your Photoshop document is paramount. Launch Adobe Photoshop and navigate to File > New. This action opens the New File window, where you can meticulously define all the properties of your banner.
Choosing Dimensions and Resolution
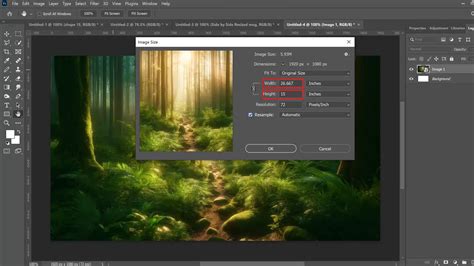
Select the desired size for your banner. For instance, an 8ft x 2ft banner is a common choice. The resolution is also a critical factor. For a banner that will be viewed from a distance of approximately 10 feet, a resolution of 120 pixels per inch (PPI) is usually sufficient. The general rule of thumb is: the further away the viewer will stand, the lower the resolution can be. This approach prevents the creation of excessively large files. If you are uncertain about the appropriate resolution, it is always best to consult with your printer.
Color Mode and Background
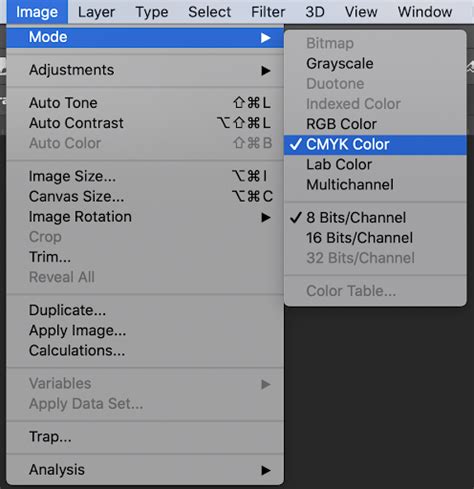
Ensure your color mode is set to CMYK. This is the standard color mode for printing, guaranteeing accurate color reproduction. For a clean and versatile starting point, set the background contents to white. Once you have configured these settings, click the "OK" button. A new layer, representing your blank canvas, will open, ready for your creative input.
Incorporating Visual Elements: Images and Logos
Visuals are the cornerstone of an effective banner. Photoshop offers intuitive tools to integrate images and logos seamlessly into your design.
Placing Images
To insert an image, go to File > Place. A "Place" window will appear, allowing you to select an image from your computer. Choose your desired image and click "Place." The selected picture will then appear on your banner canvas.
Manipulating Images
Once an image is placed, you can easily move it by clicking and dragging. To re-size the image proportionally, hover over one of its corners until your cursor transforms into a double-sided arrow. Then, hold down the Shift key and drag. Holding Shift ensures that the image's aspect ratio remains consistent, preventing distortion.
You can add multiple images to your banner by repeating the "Place" process. This is how a logo, for example, can be incorporated. If you need to re-size an image after it has been placed, select Edit > Free Transform. This will bring back the bounding box around the image, allowing for further adjustments to its size and position.
Adding Text for Impact and Information
Text is crucial for conveying your message. Photoshop's type tool provides flexibility in adding and styling text elements.
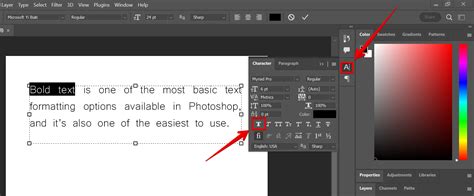
Typing and Positioning Text
Select the "Type tool" from the side menu (it usually looks like a 'T'). Click anywhere on your banner where you wish to start typing. Once you have finished entering your text, confirm the action, much like you did when placing images.
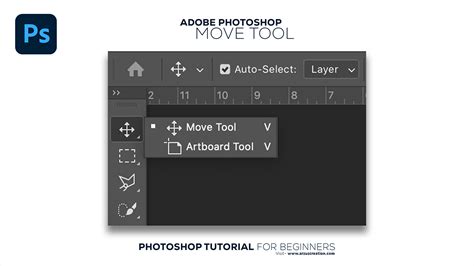
To reposition text, first select the layer it resides on in the Layers panel (typically located on the right side of your screen). Then, choose the "Move tool" from the left-hand menu and click and drag the text to its desired location.
Styling and Resizing Text
You can add more text by repeating this process. Resizing text is done in the same manner as resizing images: select the text layer, go to Edit > Free Transform, and adjust the bounding box. The Move tool is also used to adjust the placement of text after resizing.
Enhancing Your Design: Background Colors
A well-chosen background color can significantly impact your banner's overall aesthetic and message.
Changing Background Color
To alter the background color, select the "Paint Bucket tool" from the left-hand menu. Ensure that the background layer is selected in your Layers panel. You can pick your desired color from the swatches or use the color mixer for more precise selection. Simply click anywhere on the banner to apply the chosen color to the background.
Finalizing Your Design: Saving for Print
The final steps involve saving your banner in appropriate formats to ensure it is ready for professional printing.
Saving the Working File
It is essential to save your file in Photoshop's native format first. Go to File > Save As.... In the "Save As" window, choose "Photoshop (.PSD)" from the dropdown menu. This format preserves all your layers, allowing you to make future edits or modifications to your design. This PSD file serves as your master template.
Preparing for the Printer
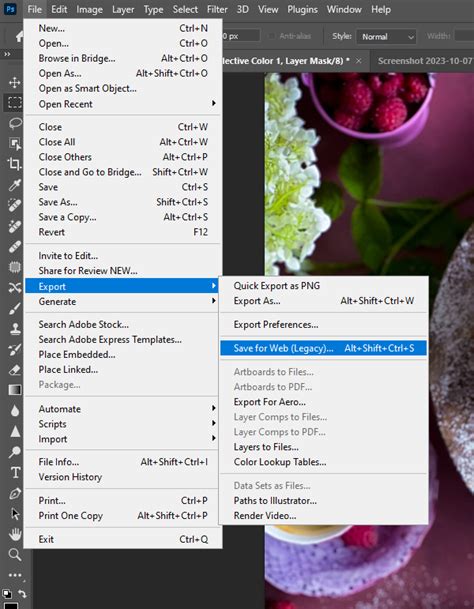
Once you have saved the PSD file, you need to create a print-ready version. Go to Layer > Flatten Image. This merges all the layers into a single background layer. Then, repeat the saving process: File > Save As.... This time, select "Photoshop PDF" from the dropdown menu. This PDF format is what you will typically deliver to your printer. Click "Save."
A "Save Adobe PDF" window will then open, presenting various PDF preset options. For most professional printing services, a preset like "High Quality Print" or a custom setting that ensures minimal compression and maximum detail is recommended. Always consult your printer for their specific file requirements.
Understanding Print Specifications: Resolution and Bleed
Achieving a professional print-ready banner involves understanding key printing concepts like resolution and bleed.
Resolution for Print
While 120 PPI might suffice for banners viewed from a distance, many professional printing services prefer a higher resolution for optimal clarity, especially for graphics and text that are closer to the viewer. A common standard for print resolution is 300 DPI (dots per inch). If your banner design includes intricate details or elements that will be viewed up close, consider increasing the document's resolution to 300 DPI during the initial setup.
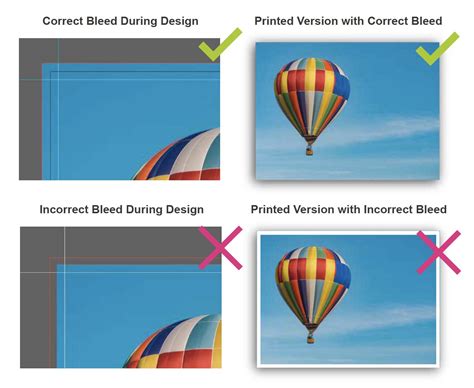
The Importance of Bleed
For print projects that extend to the edge of the paper or material (known as full-bleed designs), it's crucial to extend your design beyond the intended trim area. This extension is called a "bleed." A standard bleed for most print projects is about 1/8 inch (approximately 3mm) on each side. This accounts for slight variations during the cutting or trimming process, ensuring that no white edges appear on your finished banner. To set up a bleed in Photoshop, you can use the Image > Canvas Size option and add the bleed amount to the width and height of your document. For example, if your banner is 850mm x 2000mm and you need a 3mm bleed, you would set the canvas size to 856mm x 2006mm.
Alternative Tools and Considerations
While Photoshop offers unparalleled flexibility, it's worth noting that simpler tools exist for banner creation, and specific banner types have unique requirements.
Simpler Banner Creation Tools
If you find Photoshop's extensive features overwhelming, or if you need to create basic banners quickly, consider using dedicated online banner creator tools. Websites like merchantfloor.com/banner-creator offer user-friendly interfaces where you can add text, buttons, and images to create banners in a matter of minutes. These tools are excellent for rapid prototyping or for users who do not require the advanced customization that Photoshop provides.
Banner Types and Bespoke Services
Different banner types come with their own specific size options and material considerations. For instance, vinyl banners are durable for outdoor use, while fabric banners offer a more refined aesthetic for indoor displays. Mesh banners are ideal for windy outdoor environments due to their perforated texture, allowing wind to pass through. If you cannot find a standard size or style that meets your needs, many printing services offer bespoke options. Reaching out to their bespoke services department can help you create something as unique as your brand or event.
Sign Material - (www.TheSignChef.com) Choosing the Right Banner Material for Your Project
Common Banner Sizes for Web Advertising
When designing banners for online advertising, adhering to standard sizes ensures compatibility across various platforms and ad networks. Here are some common banner ad sizes for desktops and mobile devices:
- Desktop:
- 300 x 250 pixels (Medium Rectangle - a very common size for blog sidebars and many websites)
- 468 x 60 pixels (Full Banner - a classic horizontal banner)
- 728 x 90 pixels (Leaderboard - a large horizontal banner often placed at the top of pages)
- 250 x 250 pixels (Square - versatile for various placements)
- 120 x 600 pixels (Skyscraper - a tall vertical banner)
- 160 x 600 pixels (Wide Skyscraper - a slightly wider tall vertical banner)
- Mobile:
- 320 x 50 pixels (Mobile Leaderboard - the standard horizontal banner for mobile devices)
- 300 x 250 pixels (Mobile Medium Rectangle - also used on mobile)
To create a banner in Photoshop for web advertising, go to File > New, select the 'Web' preset, and enter your desired dimensions in pixels. For example, to create a 300 x 250 pixel banner, enter these dimensions.
Optimizing Images for Banners
When incorporating product images into your banner, their quality and background are important considerations.
Transparent Backgrounds
For greater flexibility in changing the banner's background color, it is beneficial to use product images with transparent backgrounds. These are typically saved in PNG format. If you use a JPG image, its background will be included in the banner. A checkered background in Photoshop is an indicator of transparency.
Arranging and Tiling Images
To view your product image and banner template side-by-side for easier transfer, go to Window > Arrange > Tile All Vertically. Then, use the Move tool to click and drag your product image into the banner. Once the image is on the banner template, you can close the original image tab.
Final Touches and File Formats
With your design elements in place, the final steps involve refining the layout and saving the file in the appropriate formats.
Resizing and Positioning Images
After placing an image, you can resize and position it using Edit > Free Transform. The markers around the image allow for resizing, and you can move the image anywhere on the banner. The top bar also offers options for resizing. For instance, an image might be resized to 38% of its original height and width to fit a desired position.
Adding Buttons and Calls to Action
To create a button, select the "Rectangle tool" (which might be nested within other shape tools) and click-and-drag on the image to draw a rectangle. You can then resize this rectangle by dragging its corners. Choose a color for the button from the 'Fill' menu on the top bar. To add text to the button, select the "Text tool" again, click on the rectangle, and type your call to action, such as "Shop Now." Use the Move tool to position the text precisely on the button.
Adding Logos
If you need to add your logo, open the logo file separately, then use the Move tool to click and drag it into your banner. You can then resize and position it as needed.
Saving Your Banner for Different Uses
Finally, save your banner in formats suitable for both online advertising and as a design template.
Saving as JPG for Online Use
Go to File > Save As and select "JPG" from the dropdown menu. This format is ideal for online advertising platforms like Google AdWords and other digital advertising needs.
Saving as PSD for Future Edits
To retain the ability to make future changes, repeat the File > Save As process, but this time save the file as a "Photoshop (.PSD)". This layered file is your banner design template, allowing you to easily swap images, text, or buttons to create new versions of your banners as needed, for example, when launching new collections.
Leveraging Your Template for Multiple Banners
Once you have established a well-designed banner template, creating variations in other standard sizes becomes a streamlined process. You can adapt your existing design elements to fit different dimensions such as 728x90, 160x600, 120x600, and various mobile sizes. While the initial template creation requires time and attention to detail, having these basic templates in place significantly speeds up the process of generating new banners for future campaigns or product launches.
While various banner template tools are available, designing in Photoshop offers the most comprehensive flexibility in terms of sizing, precise positioning, and fine-tuning every aspect of your banner's appearance. This control ensures your banners are not only visually appealing but also perfectly aligned with your branding and marketing objectives.