Learning how to use layer masks in Photoshop will elevate your post-processing skills to previously unreachable heights. The function of a layer mask is very simple, yet can be used in complex ways. A layer mask allows you to hide part of a layer. This allows for you to constrain any layer, so only a particular part of that layer will affect the image. Layer masks in Photoshop are an essential tool for enhancing your creativity and flexibility when working with images. They allow us to hide or reveal parts of an image or layer without permanently erasing any content. Layer masks provide flexibility in design, as they allow the designer to make adjustments without permanently altering the image.
Understanding the Core Functionality of Layer Masks
At its core, a layer mask is a grayscale channel that controls the visibility of specific areas of a layer. The concept is straightforward: white reveals the content of the layer, black hides it, and shades of gray provide varying levels of visibility. This grayscale approach is fundamental to how layer masks operate, offering a nuanced control over image elements.
Layer masks in Photoshop are powerful tools used for non-destructive editing. They allow us to add or hide specific parts of a layer without permanently altering the original image. This non-destructive nature is a significant benefit of using layer masks, as it gives you the flexibility to alter or fine-tune changes later. This means you can experiment with different effects without permanently affecting your original image. Layer masking is a reversible way to hide part of a layer, giving you more editing flexibility than permanently erasing or deleting part of a layer.
When applying a layer mask, it is important to remember that the color white reveals, while black conceals. By painting with white or black on the layer mask, we can either show or hide parts of the image. Working with layer masks is quite straightforward. First, select the layer you want to mask, then click the "Add Layer Mask" button in the Layers panel. This will create a white mask, allowing the entire layer to be visible.
Creating and Manipulating Layer Masks
To create a layer mask, you’ll need to create a layer first. For the purpose of this example, we'll demonstrate how to add a layer mask to an Orton effect layer. The Orton effect adds glow to a scene, but usually only works well in the sky of an image. We'll need to use a layer mask to make sure that the Orton effect layer only affects the sky.
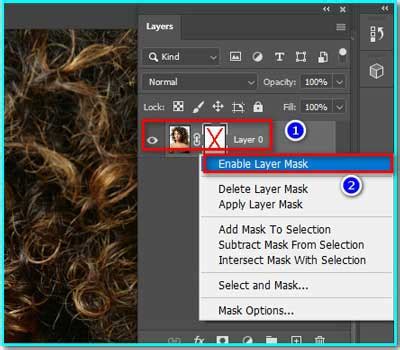
Next, make sure you select the layer you’d like to mask. Then, hit the "Add layer mask" button at the bottom of the Layers panel. The layer mask button looks like a rectangle with a circle cut out of the middle. In the Layers panel, make sure there is a white border around the layer mask thumbnail, indicating it is selected for editing.
Once the layer mask is created, you can paint on it. Painting black will hide that part of the layer, so you can see what is underneath that layer. Painting white will show through that part of the layer. You can easily adjust the opacity of the brush in the toolbar on the top of your screen when the brush tool is selected. Using a lower opacity allows you to paint out a layer slower and more naturally. Oftentimes, using a 10% brush opacity and painting over an area many times is an effective technique. With a 10% opacity, you'd have to paint over an area 10 times before it was fully concealed.
Press D to set the default colors of white and black in the Toolbar. Paint over the image, which adds black to the layer mask. Adding white to a layer mask shows the layer that contains the mask. Paint over hidden areas of the image. Switching between black and white as you paint on a layer mask is a flexible way to fine-tune the mask edge. To switch between black and white colors seamlessly while painting, use the X keyboard shortcut. Remember, white reveals, and black conceals elements of the layer.
Starting with a black layer mask will hide the whole layer, and then you can paint white to reveal small areas of the layer. This can be very helpful when you just want to reveal a very small area.
Advanced Techniques and Practical Applications
Adjustment layers, such as curves, levels, and more, already come with a white layer mask attached to them when they are created. Don’t create a second layer mask on top by mistake.
When working with layer masks, we have various options to customize and control our masks. One important aspect is adjusting the size of the mask. We can easily do this by selecting the mask and using the Transform tool (Ctrl + T on PC, Cmd + T on Mac) to resize it without affecting the content of the layer.
Layer masks make use of grayscale values. Painting with different shades of gray allows us to have varying levels of opacity in our masks. The lighter the gray, the more visible the layer; the darker the gray, the more hidden it becomes. This is essential for blending images or creating smooth transitions. Gray on a layer mask partially hides the layer that contains the mask.
Beyond basic brushwork, Photoshop offers a wide range of advanced techniques when it comes to layer masks. One advanced technique is feathering. Feathering creates soft transitions between visible and hidden areas of a layer, making the final result appear more natural. Adjustments work hand-in-hand with layer masks, as they give us the power to control the tonal and color appearance of a masked region.
If you want to make multiple layers worth of adjustments to an area in your image, put all of the layers together in a group. Then, you can create a layer mask to go on top of the group.
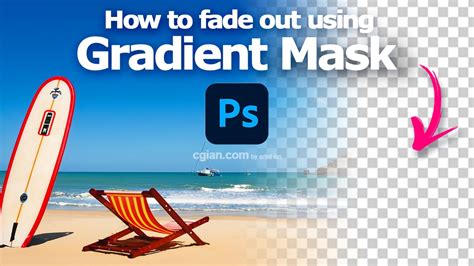
Layer masks are incredibly useful tools in Photoshop for photographers and designers alike. For example, portrait photographers may use a layer mask on a brightness and contrast layer to brighten just the face of their model. Landscape photographers might use a layer mask to darken just the clouds in their image. One practical use of layer masks is in creating image composites. Imagine working with two images, one with a beautiful sky and another with an interesting foreground. Layer masks allow you to seamlessly blend these elements.
Photoshop Layer Masks Explained in 7 Minutes!
In the world of advanced CGI and AI courses, layer masks also play a vital role. They enable artists and designers to refine selections, mask complex objects, and make intricate selections for visual effects or 3D artwork. Even when using software like Lightroom, understanding the concept of layer masks is beneficial. Many adjustments in Lightroom are essentially using the same masking principles, applied in a slightly different way.
Exploring Further: Selections, Quick Mask, and Other Programs
Once you’ve got a grasp on creating layer masks with the brush tool, try exploring more advanced techniques like making layer masks with a color range selection, luminosity masks, or even a selection tool.
You can create a layer mask from a selection by selecting the layer you want to mask, then going to 'Layer' > 'Layer Mask' > 'Reveal Selection' or 'Hide Selection' in the Photoshop menu.
To invert a mask in Photoshop, first, ensure the layer mask is selected in the Layers panel. Next, press 'Ctrl' + 'I' on a PC or 'Cmd' + 'I' on a Mac to invert the mask.
Quick Mask mode in Photoshop allows you to work within a layer mask using editing tools such as the Brush and Gradient tools. To use Quick Mask mode, first, create a layer mask. Then, click on the layer mask in the Layers panel to activate mask mode. Color differentiates the protected and unprotected areas. The area outside the selection is masked. Painting with white increases the masked area; painting with black increases the selected area. In Quick Mask mode, painting with white adds to the selection, while painting with black deselects areas. Painting with gray or another color creates a semitransparent area, useful for feathering or anti-aliased effects.
If you want to reuse a layer mask, you can do so by using "Command-Click" (Mac) or "Control-Click" (PC) on a mask thumbnail in the Layers panel. This allows you to make a selection of the mask.
The layer mask approach is similar in other image editing programs like GIMP and Procreate. While the specific implementation might vary, the fundamental concept of using a grayscale channel to control visibility remains consistent across these platforms.
Layer masking might seem like a complicated subject, but with a little practice, and starting with the most simple kinds of layer masks, you’ll become a pro in no time!