Eyeglass glare can be a persistent and frustrating issue for photographers, often detracting from an otherwise excellent shot. Whether it's a subtle sheen or a blinding reflection, these unwanted highlights can obscure the eyes and mar the overall aesthetic of a portrait. Fortunately, Adobe Lightroom offers a robust set of tools that, when applied strategically, can effectively mitigate or even completely remove this photographic nuisance. This tutorial will guide you through the process, from initial assessment to final refinement, ensuring your subjects' eyes shine through without the distraction of glare.
Understanding the Challenge of Eyeglass Glare
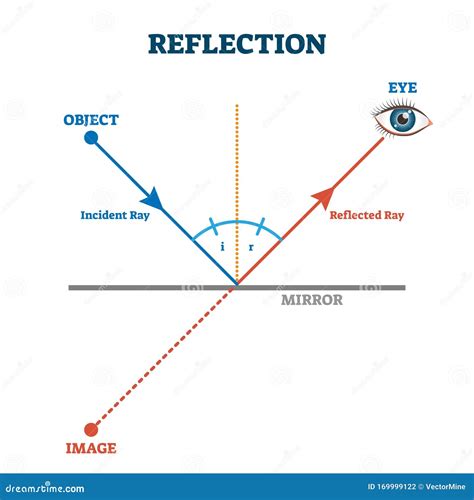
Before diving into the technical aspects of removal, it's crucial to understand why eyeglass glare occurs and the inherent difficulties in correcting it. Glare is essentially the reflection of light sources off the curved surface of eyeglass lenses. These light sources can range from studio strobes and ambient room lighting to the sun itself. The angle of the light, the curvature of the lens, and the position of the camera all play a role in the intensity and placement of the glare.
The primary challenge in removing glare lies in preserving the natural appearance of the eye beneath. Simply cloning out a bright spot can leave an unnatural, flat area, or worse, an incomplete removal that still draws attention. The goal is to seamlessly blend the corrected area with the surrounding skin tones and textures, making the edit virtually undetectable.
Pre-emptive Measures: Prevention is Better Than Cure
While this guide focuses on post-processing solutions, it's vital to acknowledge that the most effective way to deal with eyeglass glare is to prevent it during the shooting process. If possible, taking measurements to prevent glasses glare during the initial photoshoot is the ideal scenario. This often involves subtle adjustments to lighting angles, subject positioning, or even tilting the subject's head slightly. Understanding the light source and how it will reflect off the lenses is key. For instance, positioning lights slightly off-axis can often redirect reflections away from the camera. Similarly, diffusing harsh light sources can soften reflections, making them less obtrusive.
However, in situations where re-shooting is not an option, and you have taken a picture and forgot to take measurements to prevent glasses glare, we have the solution for your problem.
The Lightroom Workflow: Step-by-Step Glare Removal
Adobe Lightroom provides a suite of powerful tools that can be employed for eyeglass glare removal. The process typically involves a combination of the Spot Removal tool and the Adjustment Brush.
1. Initial Assessment and Preparation
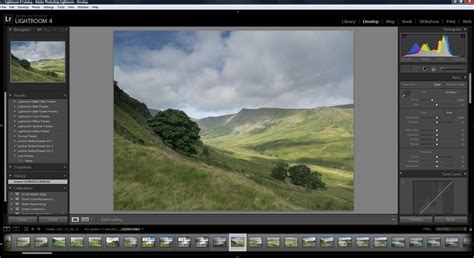
Begin by opening your image in Lightroom's Develop module. The "Develop" module is where all the image adjustments and corrections are made. Before you start making any edits, take a moment to carefully examine the glare. Note its size, shape, intensity, and how it interacts with the eye and surrounding skin. Understanding these characteristics will inform your approach to removal.
2. Utilizing the Spot Removal Tool (Clone Mode)
The Spot Removal tool is your first line of defense against distracting blemishes, including eyeglass glare. To access it, navigate to the toolbar in the Develop module and select the Spot Removal tool (shortcut 'Q').
Once selected, you'll have two primary modes: Heal and Clone. For eyeglass glare, the Clone mode is often more effective because it directly copies pixels from one area to another, allowing for precise control over what replaces the glare.
- Select "Clone": In the Spot Removal tool options, choose the "Clone" setting.
- Set Feather and Opacity: Set both Feather and Opacity to 100%. A 100% feather ensures a smooth transition between the cloned area and the original image, minimizing visible edges. A 100% opacity means the cloned pixels will be fully opaque, completely covering the glare.
- Paint Over the Glare: Carefully paint over the entire glare spot with the Spot Removal brush. Lightroom will automatically select a source area to clone from.
- Modify the Patch Source: After you paint, a source area (a circle) will appear, and the cloned area (another circle) will replace the glare. It is crucial to modify the patch source if necessary. You can do this by clicking and dragging the source circle to a more appropriate area of skin or background that closely matches the texture and tone of the area you want to cover. The goal is to select a source that blends seamlessly. If the initial automatic selection isn't ideal, manually repositioning the source is key to achieving a natural look.
How to Remove Reflections from Glasses in Lightroom Classic [2026 Full Guide]
Important Consideration: If you’re working with large or several glares, and the Spot Removal tool is proving difficult to use effectively, it’s sometimes recommendable to discard the image and work with a different one, if possible. This is because attempting to remove extensive glare can sometimes lead to unnatural-looking artifacts. If this just isn’t possible, it’s probably better to remove the glares in Photoshop instead of Lightroom, as Photoshop offers more advanced and granular control over pixel manipulation.
3. Refining with the Adjustment Brush
While the Spot Removal tool is excellent for outright replacement, the Adjustment Brush offers more nuanced control for subtle corrections and blending. This tool allows you to apply specific adjustments to targeted areas of your image.
- Select the Adjustment Brush Tool: In the toolbar, select the Adjustment Brush tool (shortcut 'K').
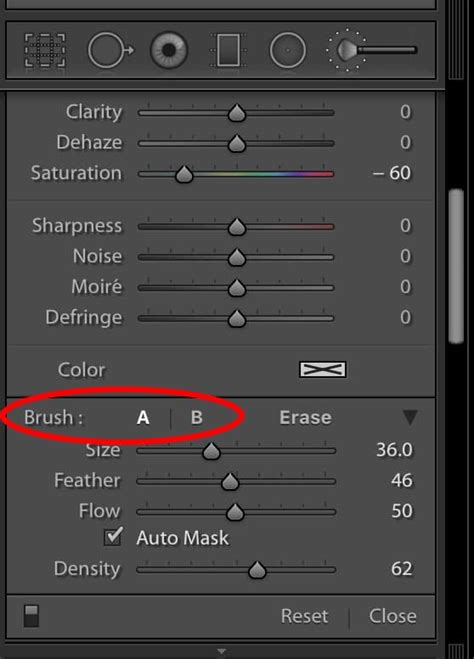
- Set Brush Properties:
- Clarity and Sharpness: Set both Clarity and Sharpness to -50. Reducing these values softens the texture and edges within the brushed area, which can help to de-emphasize the glare and blend it more naturally.
- Exposure and Contrast: You may also want to slightly reduce the Exposure and Contrast in the area to match the surrounding skin tone.
- Cover the Glare Completely: The key here is to cover the whole glare spot at once. Try to make a single, smooth stroke that encompasses the entire area of glare. This ensures that the softening effect is applied uniformly.
- Desaturation and Tinting: For further refinement, you can use the Adjustment Brush to address color discrepancies. Select the brush again and adjust the settings for Saturation and Temperature.
- Desaturate: Reduce the Saturation slider. Glare often appears brighter and more saturated than the surrounding skin.
- Yellowish Tint: Add a slight yellowish tint by moving the Temperature slider slightly towards yellow. This helps the corrected area to overlay better with skin color, as skin tones naturally have warm undertones.
- Utilize "Heal" Mode: Within the Adjustment Brush settings, ensure you are using the "Heal" mode. The "Heal" mode is designed to blend the sampled details and colors with the brightness of the hidden area. This means it not only applies your brush settings but also intelligently samples from the surrounding pixels to create a harmonious blend, further enhancing the natural appearance of the corrected skin.
4. Advanced Considerations and AI-Powered Tools
Lightroom, particularly in its more recent versions, has incorporated AI-powered features that can simplify complex editing tasks. While the manual methods described above are highly effective, these AI tools can offer a quicker alternative for certain types of reflections.
- AI-Powered Reflections Tool: The AI-powered Reflections tool is designed to easily remove reflections in photos taken through glass windows. This tool eliminates large and prominent window reflections in just a few steps, allowing your image's subject to stand out clearly. When you activate this tool, Lightroom is analysing and removing reflections in the photo.
- Quality and Resolution: When using AI-powered tools, you may encounter options for Quality. Quality determines the resolution of the result. Select a quality option from the menu. It will determine the time taken to render the results. Higher quality settings will produce a more refined output but will take longer to process.
- Sync and Auto-sync Workflows: For photographers working with multiple images that have similar glare issues, the Reflection Removal also supports Sync and Auto-sync workflows. This means you can apply the same reflection removal settings across a batch of photos, saving significant time and ensuring consistency.
It's important to note that while AI tools are powerful, they may not always be perfect. Sometimes, the +100 setting might show the reflection, indicating that the AI is pushing its capabilities to the limit. In such cases, manual refinement might still be necessary, or a combination of AI and manual techniques could yield the best results.
When to Consider Other Software
As mentioned earlier, for extensive or particularly challenging glare, Lightroom might reach its limits. If you find yourself spending an inordinate amount of time trying to perfect the glare removal in Lightroom, or if the results are consistently appearing artificial, it might be time to consider more advanced software.
Photoshop, for instance, offers a wider array of tools for pixel-level manipulation. Tools like the Content-Aware Fill, advanced cloning and healing brushes, and layer-based editing provide greater flexibility and precision. This can be particularly useful when dealing with complex reflections that involve intricate details or patterns that need to be reconstructed rather than simply replaced.
The Importance of Subtle Editing
Regardless of the tools you employ, the ultimate goal is to make the edit as seamless as possible. Over-editing can lead to an unnatural appearance, drawing more attention to the correction than the original glare. Always step back from your image and view it at different zoom levels. Ask yourself:
- Does the corrected area blend naturally with the surrounding skin?
- Are there any visible edges or artifacts?
- Does the eye look natural and expressive?
Subtlety is key. A successful glare removal is one that goes unnoticed, allowing the viewer to focus on the subject's eyes and the emotion of the portrait.
Conclusion: Mastering the Art of Glare Removal
Eyeglass glare is a common photographic challenge, but with the right techniques and tools within Adobe Lightroom, it can be effectively managed. By understanding the nature of glare, employing the Spot Removal and Adjustment Brush tools strategically, and leveraging advanced AI features when appropriate, you can significantly enhance the quality of your portraits. Remember that practice is essential, and the ability to achieve a natural-looking result often comes with experience. Always strive for subtlety, and if necessary, don't hesitate to turn to more advanced software for the most demanding edits.