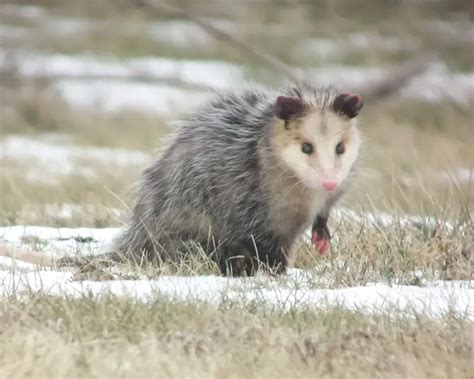
The Virginia opossum, North America's only marsupial, is a creature of fascinating adaptations and a unique place in the ecosystem. Known for its distinctive "playing possum" defense mechanism, this animal offers an engaging subject for digital artists. This tutorial will guide you through the process of drawing a Virginia opossum using Photopea, a powerful and accessible browser-based image editor. We will break down the drawing into manageable steps, focusing on capturing the opossum's characteristic features, from its pointed muzzle and beady eyes to its prehensile tail and distinctive gait.
Understanding the Opossum's Anatomy and Behavior
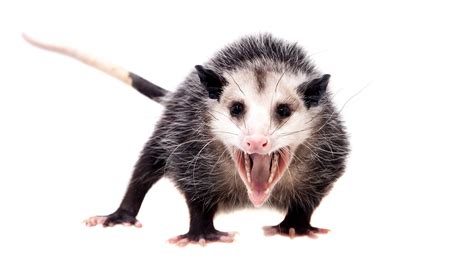
Before we begin sketching, it's beneficial to understand a few key characteristics of the Virginia opossum. Native to North and Central America, these marsupials are often misunderstood. A newborn opossum is remarkably small, no larger than a dime, highlighting the significant development that occurs after birth. Their most famous behavior, "playing dead," is a sophisticated survival tactic. When threatened, they enter a catatonic state, appearing dead to deter predators. This involves remaining very still, holding their breath, and sometimes emitting a foul odor until the perceived danger has passed. This behavior is the origin of the common phrase "playing possum."
Preparing Your Workspace in Photopea
Photopea offers a familiar interface for those accustomed to other digital art software. To start, open Photopea in your web browser. You'll want to create a new canvas. A good starting size for this tutorial would be around 1920 pixels wide by 1080 pixels tall, with a resolution of 300 DPI for better detail. Select a soft round brush for sketching, and set your foreground color to a light gray or a neutral brown, which will be easy to see and later to refine.
Sketching the Opossum's Form: From Head to Tail
Our drawing process will move from general shapes to specific details, building the opossum's form layer by layer. We'll begin by sketching the head, then the body, and finally the limbs and tail, paying attention to the proportions and natural curves of the animal.
Step 1: Laying the Foundation - The Head and Neck
Begin by drawing the head of the opossum. Think of it as a slightly elongated oval, with a more pointed snout. Leave a gap open for the neck, connecting it to where the body will eventually be. This initial sketch should be loose, focusing on establishing the overall shape and placement of the head.
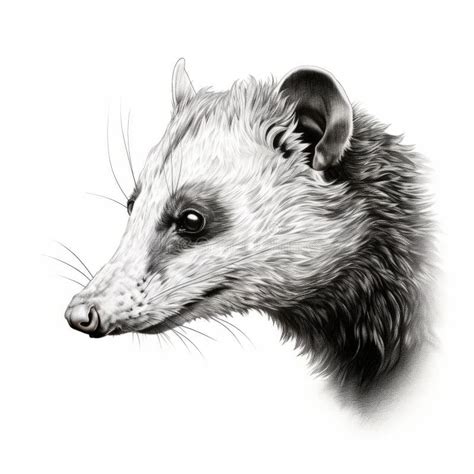
Step 2: Defining the Muzzle and Facial Features
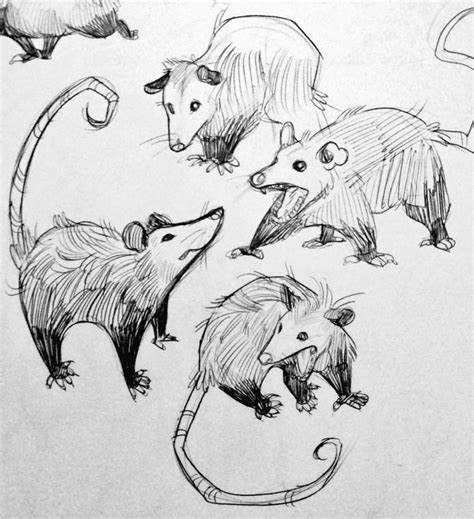
Now, let's refine the head. Sketch out the muzzle, paying attention to its tapering shape. Add guides for the eyes, nose, and mouth. The eyes of an opossum are typically dark and beady, set relatively far apart. The nose is a prominent, dark, pointed structure at the end of the snout. For the mouth, sketch a line that will later be detailed to show the characteristic opossum smile, often revealing its numerous teeth.
Step 3: Adding the Ears and Initial Body Volume
The ears of an opossum are distinctive - they are generally bare, rounded, and somewhat large in proportion to the head. Draw two rounded shapes, slightly pointed at the top, emerging from the sides of the head. Next, begin to add volume to the body. Sketch a general, somewhat bulky shape that extends from the neck. This should be a fluid line, suggesting the opossum's posture. If you envision the opossum sitting or perching, adjust this curve accordingly.
Step 4: Constructing the Front Legs and Paws
Let's focus on the forelimbs. Starting from the body, draw the front leg extending downwards and slightly to the left. The leg should have a natural bend. Then, draw the foot. For the front paw, sketch some long and uneven toes. These digits are quite distinct, and it's important to capture their somewhat spindly appearance. Remember to use quick, short strokes when detailing the toes to suggest fur.
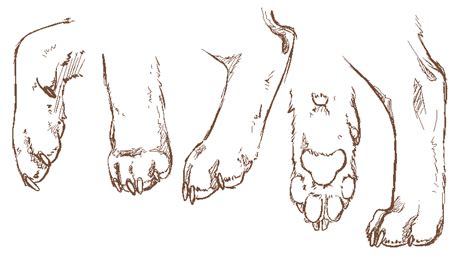
Step 5: Detailing the Hind Leg and Foot
The hind leg is typically drawn by continuing the curve from the body. Draw it extending downwards towards the ground or the surface the opossum is on. For the hind foot, use a few short lines clumped together to represent its shape. Unlike the more delicate front paws, the hind feet can appear a bit more robust in their structure.
Step 6: Sculpting the Tail
The tail of a Virginia opossum is a significant feature - it's long, prehensile, and sparsely furred, often appearing scaly. From the right side of the body, draw two lines that meet at a point to form the tail. It should be a substantial length, tapering towards the end. Ensure the tail has a natural curve, suggesting its flexibility.
Refining the Opossum's Features in Photopea
With the basic structure in place, we can now add finer details to bring our opossum to life. This stage involves refining lines, adding texture, and ensuring the proportions are accurate.
Step 7: Working on the Muzzle Details
Let's return to the muzzle. Use an arc as a guide to draw the top part of the opossum's muzzle. Follow the basic path of the arc but draw the top part a bit lower as you darken the line. Use quick, short strokes to draw the mouth to represent fur texture. The line should stretch to the left inside of the head. Add the canine tooth at the bottom of the muzzle - opossums have a significant number of teeth.
Step 8: Completing the Lower Jaw and Mouth
Now, use the initial arc as a guide to draw the bottom part of the opossum's muzzle. Follow the path of the arc as you darken the line for the lower jaw, but make it shorter than the upper line. Add the lower canine as a small arc and a couple of lines for the gums. You can add a few more teeth using arcs that line the bottom part of the mouth along the gumline. For a simpler drawing, you can draw the mouth closed by simply adding a line under the mouth for the lower jaw.
Step 9: Enhancing the Ears and Head Structure
Use the small arc on the top of the head as a guide to draw the opossum's ear more precisely. The shape of the ear should be pointier at the top, and the base should be inside the head. Add a few strokes at the bottom for the fur and curved lines inside the shape for the ear's structure. Draw the ear on the other side of the head using a couple of curved lines, ensuring symmetry.
Step 10: Bringing the Head to Life with Fur Texture
Use the remaining lines on the head as guides to draw the rest of the opossum's head. Follow the path of the guides as you darken the lines and use quick, short strokes for a furry texture. This is where you'll build up the sense of fur. Add some lines inside the head for extra detail, such as around the eyes and nose. Draw a few dots in the muzzle and a few long, slightly curved strokes coming out of them for the whiskers. These whiskers are an important characteristic.
Step 11: Defining the Forelimbs and Paws with Texture
Use the lines on the right side of the opossum's body as a guide to draw the front legs more accurately. Use quick, short strokes as you go around the guide line and create the leg's form, adding to the furry texture. Draw the foot and toes at the tip using a series of curved lines, ensuring they look natural and distinct. Draw the front leg on the other side the same way, maintaining consistency.
Step 12: Finalizing the Hind Limbs and Tail Details
Refine the hind leg and foot, using similar techniques to add fur texture with short strokes. Ensure the connection to the body is natural. For the tail, darken the lines and add subtle texture to suggest its slightly rougher, less furred surface. You might add a few short lines to indicate the segmentation or scaly appearance of the tail.
Adding Shading and Final Touches
The final stage of our drawing tutorial involves adding shading to give the opossum depth and dimension. This step will make the drawing pop and enhance its realism.
Step 13: Applying Shading for Depth
Consider where the light source is coming from. Apply darker shades in the areas that would be in shadow - under the chin, beneath the body, and on the underside of the tail. Use a softer brush or a lower opacity setting for your brush to create smooth transitions. You can also use the smudge tool sparingly to blend the shading. Pay attention to the areas where the legs meet the body, and where the tail attaches.

Step 14: Highlighting and Final Details
Add highlights to the areas where the light would hit most directly - the top of the head, the back, and the upper surfaces of the legs and tail. Use a lighter shade or even white for these highlights. You can also add a few subtle darker lines to define the fur direction in certain areas. Ensure the eyes are dark and reflective, and the nose has a slight sheen.
Photopea - Tutorial for Beginners in 13 MINUTES! [ COMPLETE ]
The Virginia Opossum: A Unique American Marsupial
The Virginia opossum (Didelphis virginiana) is a remarkable creature that stands out in the North American fauna. As the only marsupial native to the continent, it holds a unique evolutionary position. Its range extends from southern Canada down to Costa Rica, making it a widespread and adaptable species. Their ability to thrive in diverse environments, from forests to urban areas, is a testament to their resilience.
The Mountain Pygmy-Possum: A Critically Endangered Relative
While the Virginia opossum is relatively common, other opossum species face significant threats. The Mountain pygmy-possum (Burramys parvus), a mouse-sized marsupial found only in a few alpine and subalpine regions of southeastern Australia, is critically endangered. Originally thought to be extinct, a living individual was rediscovered in 1966. These small marsupials are particularly vulnerable to habitat loss and climate change, with global warming forcing them to higher elevations where their food sources, such as Bogong moths, may become scarce.

Lesson plan note: The plight of the Mountain Pygmy-Possum highlights the impact of global warming on wildlife. Students can be encouraged to brainstorm class projects to educate others about climate change and its effects on animals, using the Mountain Pygmy-Possum as a prime example.
Conclusion of the Drawing Tutorial
We have now completed our step-by-step drawing of the opossum in Photopea. This tutorial aimed to provide a clear and accessible method for creating a detailed illustration of this fascinating animal. By breaking down the process into manageable steps, focusing on anatomical accuracy, and utilizing Photopea's tools for sketching, refining, and shading, you can achieve a satisfying result. Remember that practice is key to improving your digital art skills, and revisiting this tutorial or exploring other drawing lessons can further enhance your abilities.
We hope you found this drawing tutorial interesting and informative. Feel free to share your creations and thoughts in the comments below or on our social networks. Visit the "Animals" category on our site to find more drawing lessons about various creatures, such as a muskrat or a bulldog.
The author is a professional artist, photographer, and sculptor, co-founder and co-owner of Drawing For All. They have been drawing and studying art since childhood and are an expert in the field of fine arts.