The desire to create a personalized photo calendar, perhaps as a thoughtful gift for hosts in China or simply to adorn your own space with cherished memories, is a common one. Many tutorials readily available online often point towards Adobe Photoshop Elements. However, if you're a user of the more comprehensive Adobe Photoshop Creative Cloud (PSCC), you might wonder if Elements is included or requires a separate purchase. Rest assured, PSCC is a powerful tool perfectly capable of calendar creation, even if Elements offers some automated features for hobbyists. You don't need to purchase Elements separately to design a stunning custom calendar. Photoshop CC provides all the necessary functionalities, and you can even leverage pre-made templates or scripts to streamline the process.
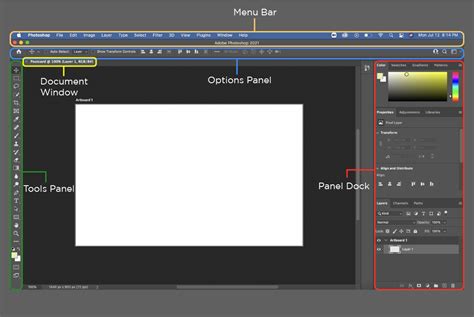
Understanding Photoshop Elements vs. Photoshop CC for Calendar Design
It's important to clarify the distinction between Photoshop Elements and Photoshop CC. Photoshop Elements is a distinct product tier, primarily aimed at hobbyists and users who may find the full Photoshop suite overwhelming. It often includes simplified workflows and automated features designed for specific tasks, such as calendar creation. These automated layout tools in Elements might come at an additional cost or be part of a specific bundle.
However, this does not mean that Photoshop CC is incapable of producing a calendar. On the contrary, PSCC offers a much greater degree of control and customization. While it might require a more hands-on approach compared to Elements' automated features, the results can be far more sophisticated and tailored to your exact vision. You are more than capable of making a personalized calendar using Photoshop CC. The software is perfectly capable of such mundane tasks as calendar making, and can be used for office decor or to showcase personal imagery.
Leveraging Templates and Scripts for Efficiency
If you're looking for a shortcut or a starting point, you don't necessarily need to build your calendar from scratch within Photoshop CC. Many resources offer pre-designed calendar templates that you can download and customize. These templates often provide the basic grid structure, and you can then easily incorporate your own photographs and branding.
Furthermore, the Photoshop community has developed numerous scripts that can dynamically generate calendar elements, such as the numbers for each day of the month. These scripts can significantly speed up the process of populating your calendar grid, especially if you're creating multiple calendars or need to generate dates for an entire year.
Creating a Custom Calendar Grid in Photoshop CC: A Step-by-Step Guide
Let's delve into the process of designing a calendar with a background image directly within Photoshop CC. This method offers maximum creative freedom.
Step 1: Setting Up Your Document and Background
First, you need to create a new file. It's advisable to set your color mode to CMYK since you'll be printing your project later. This ensures accurate color reproduction.
Next, select your desired background image. This could be a personal photograph, a scenic landscape, or any graphic that complements your calendar theme. Copy this image and paste it into your new Photoshop document. You can then resize and position the image as needed to serve as the visual foundation for your calendar.

Step 2: Constructing the Calendar Grid - Days of the Week
Now, let's create the structure for your calendar grid. Begin by selecting the Rectangle tool. Choose a fill color (white is a common and versatile choice) and draw a square. This will represent a single day cell.
Duplicate this square shape to the right. You'll make a copy of it, ensuring the original square remains intact for further manipulation. Continue copying and pasting this shape more times until you have seven squares in a row, representing the days of the week.
Step 3: Merging the Day Cells
To treat the row of day cells as a single unit, select the Selection tool (often referred to as the Move tool in this context, but the marquee selection tools are also relevant here). Select the entire row of squares you just created.
Within Photoshop, there are options to merge shape components or layer groups. Grouping these shape layers together will allow you to manipulate them collectively. Now, the cell row is a single, cohesive shape or group.
Step 4: Building the Full Calendar Grid
With the row of seven day cells ready, you can now duplicate this entire row. You'll need to create five more rows to accommodate all the days of a typical month. Position these rows directly below the first one, creating a grid. You'll have a grid that is seven squares wide and six squares high, ready to be filled with numbers. Again, merging or grouping these components together will streamline future adjustments.

Step 5: Adding the Days of the Week and Numbers
With your grid structure in place, it's time to add the textual elements. Select the Type tool. Choose a clear and legible font for the names of the days. Type out "Sunday," "Monday," "Tuesday," and so on, selecting a suitable color. Place the first day's name (e.g., "Sunday") over the top-left square of your grid. Repeat this action for all the weekdays, aligning them appropriately within their respective cells.
Once the days of the week are in place, you'll add the numbers for the days of the month. Again, using the Type tool, pick your desired font style and color for the numbers. Type in the numbers 1 through 31 (or however many days your month has), then place them all in the corresponding cells of your grid. Pay attention to the starting day of the month and ensure the numbers align correctly within the grid structure.
Step 6: Designing the Month Header
Now, let's create a distinct area for the month's name. Once again, pick the Rectangle tool and draw a shape above your calendar grid. This shape will serve as the background for the month's title. You can customize its color, size, and style to match your overall design aesthetic.
Step 7: Grouping and Positioning Elements
To keep your workspace organized, it's highly recommended to group related layers. Select all the layers that constitute your calendar grid, including the day names, numbers, and the month header shape. Press Ctrl+G (or Cmd+G on a Mac). This action will group all these layers together for your convenience, making it easier to move, resize, or duplicate the entire month's calendar block.
Once grouped, you can position this calendar block on your background image in your desired spot.
Step 8: Replicating for All Months
With one month's calendar complete and grouped, you can now duplicate this group 11 more times to create layouts for the remaining months of the year. For each duplicated group, you will need to:
- Change the Month Name: Edit the text layer for the month header to reflect the correct month (e.g., "January," "February," etc.).
- Adjust Numbers and Dates: This is a crucial step. You'll need to delete the numbers from the previous month and re-enter the correct dates for the new month. Pay close attention to which day of the week the 1st of the month falls on.
- Modify Size and Position: You may need to slightly adjust the size and position of each month's grid to ensure visual harmony and optimal placement on your background.
This systematic approach ensures consistency across all months while allowing for individual adjustments.
Step 9: Adding the Year
Finally, to complete your calendar, add the year. Use the Type tool to add the year prominently on your design. Choose a font and size that complements the rest of your calendar. Place it where it would look best, perhaps above the month header or in a corner of the design.
Step 10: Finalizing and Saving Your Calendar
Before finalizing, take a moment to review your entire calendar design. Ensure all elements are aligned, text is legible, and your photographs are well-placed. Make any necessary adjustments.
Once you are satisfied, it's time to save your work. Click "Merge visible" to consolidate all your layers into a single image layer. This is a good practice to secure all the elements in place and prepare the file for export.
To save your calendar, you have a couple of options depending on your intended use:
- For Digital Use: Save your calendar as a JPEG or PNG file if you plan to use its digital copy for sharing online or as a desktop background.
- For Printing: If you plan to print your calendar right away, it's best to save it as a TIFF file. TIFF files are lossless and preserve the highest image quality, which is essential for professional printing.
And this is how you create a custom calendar in Photoshop CC. While it took some time and effort, the result is a unique and personalized creation.
How to Design a 2025 Calendar in Photoshop - How to Use Adobe Photoshop (Part 19)
Exploring Alternative Solutions: Photo Calendar Creator
If the process described above for Photoshop CC took some time and effort, and you're looking for an easier way, there are dedicated software solutions available. While Photoshop CC is a powerful and versatile tool, it is still a complex and expensive piece of software, and mastering its intricacies for a task like calendar creation might be more than some users require.
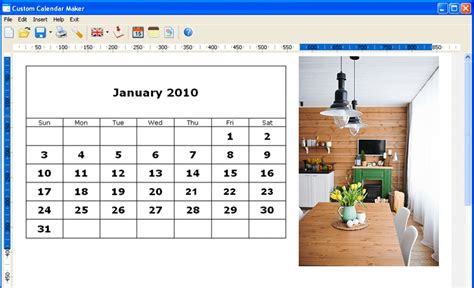
If you're seeking a more streamlined and user-friendly approach to making a personalized photo calendar, then direct your attention to specialized software like Photo Calendar Creator. This type of software is designed specifically for calendar creation, offering a more intuitive interface and automated features that can significantly reduce the time and effort involved. It is often a lot more affordable than professional design software and is also exceptionally easy to use.
Photo Calendar Creator typically provides a wide array of pre-designed templates and design elements that you can personalize to your heart's content. Many of these programs offer a free trial period, so you can download the software right now and try it for yourself to see if it meets your needs.
Using Photo Calendar Creator: A Simplified Workflow
If Photo Calendar Creator (or similar software) has caught your eye with its many nifty features, here's a general idea of how you might use it:
Step 1: Project Setup and Image Import
Run the software and choose what type of calendar you want to create - wall calendar, desk calendar, etc. The program will likely present you with a variety of templates. Select one that appeals to you, or choose a blank canvas to start from scratch. You can then add your pictures to your project. Most software allows you to import photos from your computer or even directly from cloud storage. You can often arrange and resize your photos within designated slots or drag and drop them freely onto the calendar pages.
Step 2: Customizing the Calendar Grid and Layout
Now, decide on the look of your calendar grid. This includes the style, color, and font for the numbers, days of the week, and month names. You can often choose from a range of pre-designed grid styles or come up with a grid of your own. Select a new color, size, and font for every aspect of the month grid. Some programs even allow you to add special dates, holidays, or personal appointments and highlight them in the cells.
Step 3: Saving and Printing
Once your design is finished, you can save it. Many calendar creation programs allow you to save your design as a template for later use, which is incredibly convenient if you plan to create calendars annually. Alternatively, you can print your calendar right away directly from the software.
And voila - it often only takes a few simple steps to create a one-of-a-kind calendar using dedicated software like Photo Calendar Creator.
Conclusion: Choosing the Right Tool for Your Photo Calendar Project
Ultimately, the choice between using Photoshop CC and a dedicated calendar creation tool like Photo Calendar Creator depends on your specific needs, skill level, and desired outcome.
If you already have Photoshop CC, have a good grasp of its functionalities, and desire complete creative control over every aspect of your calendar design, then sticking with Photoshop CC is a perfectly viable and rewarding option. You have the power to create intricate designs, incorporate advanced photo editing techniques, and produce a truly unique piece of work. You know what tool to use if you want to avoid spending money on overly complex software for a relatively straightforward task.
However, if you're new to design software, are on a tighter deadline, or simply prefer a more guided and user-friendly experience, a specialized program like Photo Calendar Creator offers a compelling alternative. These tools are designed to make calendar creation accessible and efficient, providing a perfect balance of being feature-rich and intuitive. They are often a lot more affordable and can produce excellent results with minimal effort.
Regardless of the tool you choose, the ability to create a personalized photo calendar is well within your reach, allowing you to share your memories in a tangible and meaningful way.