There are numerous compelling reasons why one might wish to remove the white background from an image. Perhaps you are in possession of a logo that lacks a transparent version, or you require a clean cutout of a product to facilitate its integration into a composite image. Fortunately, Adobe Photoshop offers a comprehensive suite of tools and techniques designed to address the removal of white backgrounds. This guide will primarily focus on rendering white or solid-colored backgrounds transparent, detailing various approaches that cater to different image qualities and color compositions.
Unlocking and Preparing Your Image Layer
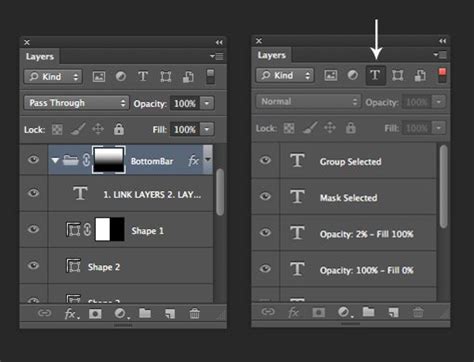
Before embarking on any editing, it's crucial to prepare your image layer. Upon opening your chosen image in Photoshop, you will typically find it locked in the Layers panel, appearing as "Layer 0." To enable editing, click the lock icon to release it, transforming it into an editable layer. For organizational clarity, it is highly recommended to rename this layer to something descriptive. An alternative, and often safer, approach is to duplicate the original layer by right-clicking on it and selecting "Duplicate Layer," then hiding the original by clicking the eye icon next to it. This duplicated layer serves as a safety net, allowing you to revert to the original image should any mistakes occur during the background removal process.
The Magic Eraser Tool: A Swift Solution for Simple Backgrounds
For images featuring a clean, solid white background and distinct subject matter, the Magic Eraser tool presents a remarkably efficient solution. This tool is particularly effective when the subject of your image has dark colors and lacks any light, white areas that could be inadvertently erased.
Utilizing the Magic Eraser
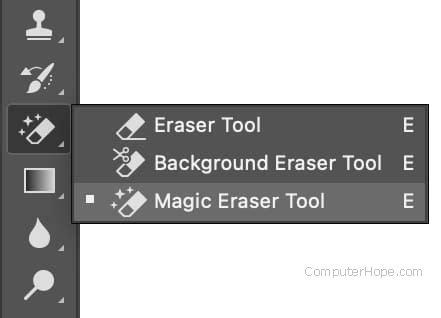
- Locate the Tool: Within the Photoshop toolbar, the Magic Eraser tool is typically found within the Eraser tool group, often as the third icon.
- Adjust Tolerance: A key setting for the Magic Eraser is its "Tolerance." This value determines how similar in color pixels must be to the pixel you click on to be erased. For a pure white background, a lower tolerance (e.g., 20%) is advisable. This ensures that only pixels very close to white are affected, preventing the accidental erasure of lighter shades within your main subject. If your white background has subtle variations or gradients, you may need to experiment with different tolerance levels to achieve the desired result.
- Click and Erase: With the Magic Eraser tool selected, simply click on the white background area. The tool will then delete all contiguous pixels of similar color within the tolerance range. For larger backgrounds, you may need to click and drag the cursor over the entire area.
- Refining with Trim: After erasing the background, you might notice excess transparent areas surrounding your subject. To remove these, navigate to the "Image" tab in the menu bar and select the "Trim" option. This command will automatically crop the image to its visible content, eliminating any transparent pixels around the edges.
The Background Eraser Tool: More Control for Slightly Complex Backgrounds
When your white background isn't perfectly uniform - perhaps it's cloudy, has subtle shadows, or darker edges - the Magic Eraser might be too aggressive or insufficient. In such cases, the Background Eraser tool offers a more controlled approach.
Mastering the Background Eraser
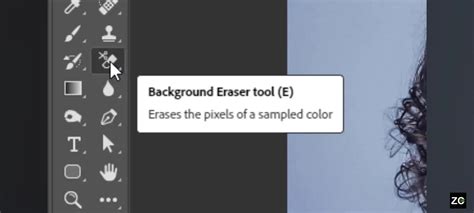
The Background Eraser tool's cursor is distinctive: a circle with crosshairs in the center. The crosshairs are the crucial element, determining which color is sampled and erased.
- Tool Placement: Select the Background Eraser tool from the Eraser tab in the toolbar.
- Targeting the Background: Position the crosshairs directly over the white background area you wish to remove.
- Erasing with Precision: Press and hold the mouse button. As you drag the cursor over the white areas, the tool will sample the color under the crosshairs and erase pixels of that color, while attempting to preserve the colors under the outer brush circle.
- Tolerance and Sampling: Similar to the Magic Eraser, the Background Eraser has a tolerance setting. A lower tolerance will limit the erasure to colors very similar to the sampled color. You can also adjust the "Sampling" setting (Continuous, Once, Background Swatch) to control how the tool samples colors. For a white background, "Once" is often effective, sampling the color only when you first click. Experiment with different tolerance levels based on the specific nuances of your background.
- Edge Refinement: Dragging the cursor carefully along the edges of your subject is key to a clean result. The outer circle of the cursor defines the area that will be erased, while the inner crosshairs define the color to be sampled.
The Quick Selection Tool: Intelligent Selection for Greater Control
For images where the white background is not perfectly uniform, or when you need a more precise selection of your subject, the Quick Selection tool is an invaluable asset. This tool intelligently identifies areas of similar color and texture, allowing you to "paint" a selection.
Employing the Quick Selection Tool
- Open and Prepare: Open your image in Photoshop, unlock the background layer, and duplicate it, hiding the original as a backup.
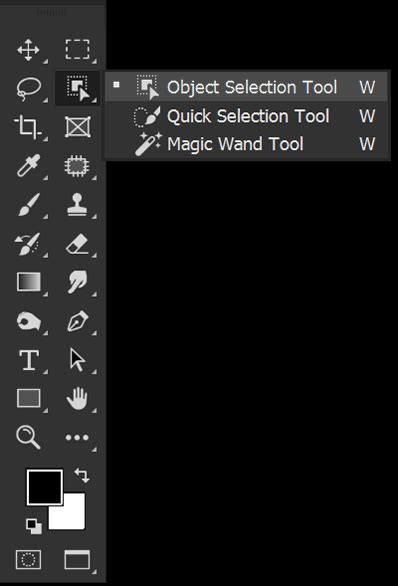
- Select the Tool: Choose the Quick Selection tool from the toolbar. It is often grouped with the Magic Wand tool.
- Paint Your Selection: Click and drag the cursor over the object you want to isolate. Photoshop will analyze the pixels and automatically expand the selection to include similar areas. It's generally best to keep the cursor on the object itself and near the edges to avoid over-selecting into the background.
- Refining the Selection: Once an initial selection is made, it's rarely perfect. The Quick Selection tool offers options in the preference bar to add to or subtract from the selection.
- Adding to Selection: Use the default brush to paint over areas that were missed.
- Subtracting from Selection: Hold down the
Alt(Windows) orOption(Mac) key while painting to remove areas that were incorrectly included in the selection.
- The Refine Edge/Select and Mask Workspace: For even finer control, especially with complex edges like hair or fur, Photoshop offers the "Select and Mask" workspace (previously "Refine Edge"). Access this by clicking the "Select and Mask…" button in the options bar after making a selection, or by going to
Select > Select and Mask. Here, you can use various brushes to refine the selection, adjust edge smoothness, feathering, and contrast. A common technique is to use the "Refine Edge Brush Tool" to paint over areas like hair, allowing Photoshop to intelligently distinguish between the subject and the background. - Inverting and Masking: Once your subject is accurately selected, you have two primary options:
- Delete the Background: Invert your selection (
Select > InverseorCtrl+Shift+I) and press theDeletekey to remove the background. - Create a Layer Mask (Recommended): With your subject selected, click the "Add Layer Mask" icon at the bottom of the Layers panel. This is a non-destructive method, meaning you can always go back and edit the mask to refine the transparency.
- Delete the Background: Invert your selection (
Layer Masks: The Non-Destructive Powerhouse
Layer masks are a cornerstone of efficient and flexible image editing in Photoshop. They allow you to selectively hide or reveal parts of a layer without permanently deleting pixels. This is particularly advantageous when removing backgrounds, as it provides the ability to easily revisit and adjust your masking at any time.
Implementing Layer Masks for Transparency
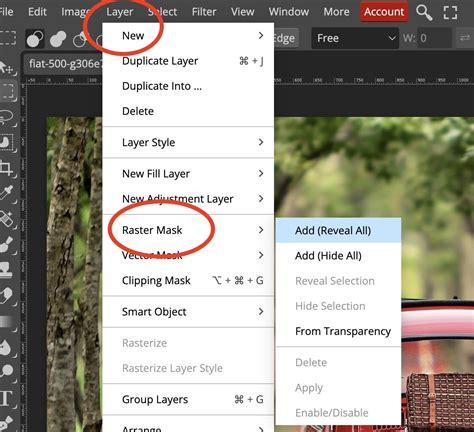
- Create a Mask: After making a precise selection of your subject using any of the selection tools (Quick Selection, Lasso, Pen Tool, etc.), ensure the selection is active. Then, with the desired layer selected in the Layers panel, click the "Add Layer Mask" icon (a rectangle with a circle inside) at the bottom of the panel.
- Understanding Mask Colors: A layer mask is a grayscale image. White areas on the mask represent visible parts of the layer, black areas represent hidden (transparent) parts, and shades of gray represent semi-transparency.
- Editing the Mask: To refine the mask, select it in the Layers panel (it will have a white border around it). You can then use the Brush tool (
B) with black or white paint:- Painting with Black: Hides parts of the layer, effectively creating transparency.
- Painting with White: Reveals parts of the layer, bringing back previously hidden areas.
- Painting with Gray: Creates semi-transparent areas, useful for subtle effects.
- Softening Edges: To soften harsh edges on a layer mask, select the mask and use a soft-edged black brush. You can also use the "Feather" option in the Layer Mask properties or the "Refine Edge" settings to apply a subtle blur to the mask's edges.
Advanced Techniques: Color Range and Blending Sliders
For specific scenarios, Photoshop offers more advanced tools that can be highly effective in creating transparency.
Using Select Color Range
The "Select > Color Range" command is a powerful way to isolate pixels based on their color values.
- Access Color Range: Go to
Select > Color Range. - Sample the Color: Use the eyedropper tool to click on the white background of your image.
- Adjust Fuzziness: The "Fuzziness" slider controls the tolerance, similar to the Magic Eraser. Adjust this slider until the selection in the preview window accurately represents the white background you want to remove.
- Invert and Mask: Once you have a good selection of the background, click "OK." Then, invert the selection (
Select > InverseorCtrl+Shift+I) to select your subject, and create a layer mask.
Blending Sliders for Solid Color Removal
Blending sliders, found within the Layer Style dialog box (Layer > Layer Style > Blending Options), offer a unique way to create transparency, particularly effective for solid white or black backgrounds.
- Access Layer Style: Right-click on your layer in the Layers panel and select "Blending Options," or go to
Layer > Layer Style > Blending Options. - Blend If Sliders: In the Layer Style dialog box, locate the "Blend If" section. You will see two sliders: "This Layer" and "Underlying Layer."
- Removing White: To remove a white background from "This Layer," drag the right slider of the "This Layer" bar (representing highlights) to the left. As you drag, the white areas of the layer will become transparent, revealing the checkerboard pattern or any underlying layers.
- Softening Transitions: For a smoother transition and to avoid harsh edges, you can split the sliders. Hold down the
Alt(Windows) orOption(Mac) key while dragging either half of a slider. This creates a softer gradient effect. - Limitations: While powerful for solid colors, blending sliders may not produce clean results for gradients or textured backgrounds and often require additional cleanup with other tools.
Saving for Transparency: File Formats Matter
Once you have successfully removed the white background and achieved the desired transparency, the way you save your image is crucial for preserving it.
PNG and SVG: The Standards for Transparency
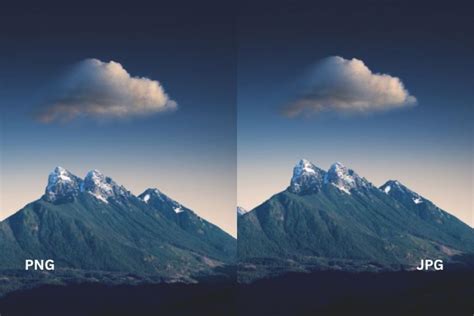
- PNG (Portable Network Graphics): This raster image format is the most common choice for web graphics and applications requiring transparency. PNG files support full alpha channel transparency, meaning they can have smooth, semi-transparent edges.
- Save for Web: To save with transparency, use
File > Export > Save for Web (Legacy). In the Save for Web dialog box, ensure the file format is set to "PNG-24" and that the "Transparency" option is checked. You can also adjust quality settings and preview the image.
- Save for Web: To save with transparency, use
- SVG (Scalable Vector Graphics): This vector image format is ideal for logos, icons, and illustrations that need to scale without losing quality. SVGs inherently support transparency.
Why Not JPEG?
The JPEG format does not support transparency. If you save an image with a transparent background as a JPEG, Photoshop will automatically fill the transparent areas with a solid color, typically white.
Advanced Considerations and Best Practices
Batch Processing with Actions
If you frequently need to remove white backgrounds from multiple images, Photoshop's "Actions" feature can automate the process. You can record a series of steps (e.g., opening an image, using the Magic Eraser, trimming, saving as PNG) and then play back this action on a batch of images.
Adobe Express for Quick Edits
For simpler background removal tasks, Adobe Express (formerly Adobe Spark) offers a free plan that includes a background removal tool, often powered by Adobe Sensei AI, which can provide quick and effective results without needing the full Photoshop software.
Understanding Transparency in GIFs
While GIFs can display transparency, they have limitations. GIFs do not support alpha transparency; each pixel is either fully transparent or not. This means gradients and semi-transparent edges will not render correctly in GIF format.
Artificial Intelligence Assistance
Modern versions of Photoshop leverage Adobe Sensei, an AI technology, to assist with background removal. Tools like "Remove Background" within the Properties panel can automatically detect and isolate subjects, significantly speeding up the process for many images.
By understanding the various tools and techniques available in Adobe Photoshop, from the straightforward Magic Eraser to the advanced Layer Masks and Blending Sliders, you can effectively remove white backgrounds from your images. The key lies in selecting the appropriate method based on the complexity of your image and consistently saving in formats that preserve transparency, such as PNG, to ensure your subjects stand out on any background.