Interlacing, a technique historically rooted in the limitations of early television broadcasting, has found new life and creative applications within digital image manipulation software like Adobe Photoshop. Originally conceived to transmit television signals efficiently over limited bandwidth, interlacing in video involved transmitting only half of the horizontal lines for each frame at a time. This method allowed for a smoother perceived motion on screens of the era, albeit with a trade-off in image clarity. Today, understanding and replicating interlacing effects in Photoshop offers a distinct aesthetic, reminiscent of vintage displays and digital artifacts, adding a unique visual character to photographs.
Understanding the Core Concept of Interlacing
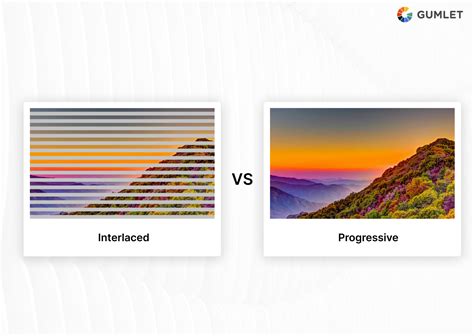
At its heart, interlacing is a method of reducing the amount of data that needs to be transmitted or processed. In the context of video, this meant splitting a single frame into two "fields." One field would contain all the odd-numbered horizontal lines, and the other would contain all the even-numbered horizontal lines. These fields were then transmitted sequentially. When displayed, the odd and even lines would be drawn on the screen in rapid succession, creating the illusion of a full frame and smoother motion than would have been possible with a progressive scan transmitting all lines at once. This was a clever solution to the problem of limited bandwidth, a challenge that is largely a relic of the past in modern digital video but continues to inform visual effects.
When a progressive image, such as a standard JPG or PNG, is loaded (for example, in a web browser), the top part typically gets downloaded first, and the bottom part loads last, so the image progressively appears from top to bottom. In contrast, when an interlaced image is loaded, you first see a blurry or less detailed version of it, and then the finer details emerge as the image gets fully downloaded. This characteristic, while a byproduct of its transmission method, can be leveraged for stylistic effect.
Interlacing in Photoshop: Mimicking Broadcast Artifacts
While Photoshop is primarily a tool for still image editing, it allows users to simulate the visual characteristics of interlaced media. This can be achieved through various methods, often involving the creation of patterns that mimic the alternating lines of scanned video. The goal is to replicate the aesthetic of an image pulled from a video stream or a frame captured from a vintage television.
One common approach involves creating a custom pattern of alternating black and white lines. This pattern is then applied to a layer within Photoshop. By adjusting layer settings and potentially using masks, this pattern can be integrated into an image to simulate the interlaced effect. This process can imbue a photograph with a "hi-tech" or retro-digital feel, adding visual interest and a unique artistic touch.
Creating the Interlace Pattern
The journey to creating an interlaced effect in Photoshop often begins with the preparation of the lines themselves. This involves creating a new document with very specific dimensions, typically 1x2 pixels, for creating very tiny, tight lines for a low-resolution appearance. The height of this document can be varied to achieve fatter lines, while the width is usually set to 1 pixel. This small canvas is then used to define a pattern.
When you define a pattern in Photoshop, it is saved in the library for future use. It is often beneficial to create a number of different patterns at this point, allowing for variations in line thickness. This is particularly important when working with high-resolution images, as a pattern that appears fine on a low-resolution image might be too small to be noticeable on a high-resolution one. For instance, a 2-pixel wide line might be too small for a large, detailed image.
The process of defining the pattern typically involves:
- Creating a new document (e.g., 1x2 pixels).
- Using a selection tool, such as the horizontal pixel selection tool, to select a single line of pixels.
- Filling this selection with a color, often white, using "Foreground Color" as the fill option.
- Selecting another horizontal line of pixels, typically directly below the first, and filling it with a different color, usually black.
- Ensuring that only these two lines are selected, and then using the "Edit" -> "Define Pattern" command. This action saves the created pattern for later use.

Applying the Interlace Effect to an Image
Once the pattern is defined, it can be applied to an image. The typical workflow involves:
- Opening the image you wish to interlace.
- Creating a new layer above the image layer.
- Ensuring this new layer is active.
- Using the "Edit" -> "Fill" command, and selecting "Use: Pattern." The pattern that was just defined will be available for selection.
- Applying this fill will cover the new layer with alternating lines of black and white, effectively creating a striped overlay.
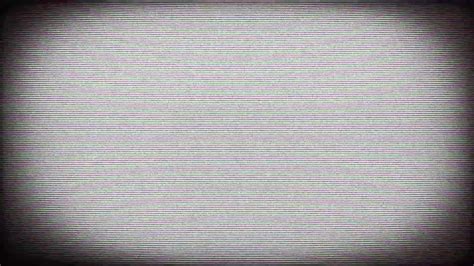
The next crucial step is to adjust how this pattern layer interacts with the image below. This is typically achieved by changing the Layer Mode of the pattern layer. A common and effective mode for this effect is "Multiply." When the "Multiply" mode is applied, the white areas of the pattern become transparent, allowing the image layer below to show through, while the black lines of the pattern darken the corresponding areas of the image. This results in the appearance of dark lines superimposed over the image, simulating the look of interlaced scan lines.
Scan Lines: 2 min Photoshop Tutorial
Refining the Interlaced Look
After applying the "Multiply" layer mode, the interlaced image might still require some adjustments to achieve the desired aesthetic. A simple yet effective refinement involves using the Move tool on the pattern layer. By nudging the pattern layer up or down by a single pixel, you can subtly shift the alignment of the lines relative to the image content. This slight adjustment can significantly impact the final look, allowing you to find the perfect balance that best suits the specific photograph. Experimenting with these small movements can reveal nuances in how the lines interact with the image's details and colors.
For those seeking to go the extra mile and achieve more sophisticated results, advanced blending options can be explored. For instance, the interlacing effect can be made to appear only in darker areas of the image, thereby protecting faces or other important highlights from being obscured by the scan lines. This is achieved by accessing the "Advanced Blending Options" and manipulating the "White slider" to the left, which effectively hides the effect from the highlights. Holding down the Alt/Option key while adjusting the slider can split the triangle, creating a smoother transition and a more integrated blend between the effect and the original image.
Alternative Approaches and Related Effects
Photoshop offers other built-in filters that can produce results reminiscent of interlacing or related visual phenomena. The "Filter -> Sketch -> Halftone Pattern" filter, when set to the "Line" pattern, can create a similar striped effect. While not identical to the custom pattern method, it offers a quicker way to achieve a stylized line-based visual.
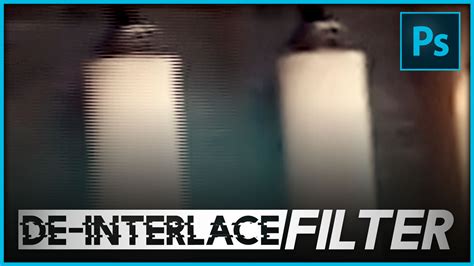
Conversely, Photoshop also includes filters designed to reverse interlacing. The "Filters -> Video -> De-interlace" filter is an example. This filter attempts to reconstruct a full, progressive frame from an interlaced source. Applying this filter to an image that has already been interlaced can produce interesting, often fragmented or distorted results, demonstrating the nature of deinterlacing processes.
Interlacing in Web and Data Transmission: The PNG Context
Beyond its aesthetic applications in image editing, the concept of interlacing is also relevant in file formats like PNG. PNG interlacing, specifically using the Adam7 algorithm, is a method for optimizing how images are displayed over the web, particularly on slower connections.
When a progressive PNG image loads, it does so line by line from top to bottom. This means a user sees nothing, then a few lines, then more lines, gradually building the image. With an interlaced PNG, the Adam7 algorithm works by transmitting a sparse version of the image first, followed by progressively denser versions, until the full image is rendered. This means that a user sees a very blurry, low-resolution preview of the entire image almost immediately. This allows the viewer to quickly determine if the image is relevant to them, and if it is, they can choose to wait for the full details to load. This can be a better user experience on slow connections, as it provides immediate feedback and allows for quick judgment calls.
The "Smallest/Slow" compression mode in PNG is often recommended for web use. This mode utilizes lossless compression, meaning the file size is reduced without any loss of image quality. The trade-off for this efficiency is that the compression process itself requires more computational power, leading to a longer export time. However, for web delivery, the benefit of a smaller file size with no quality degradation generally outweighs the increased processing time.
Deinterlacing Options in Video Editing
In the realm of video editing, particularly within software like Adobe Premiere Pro, specific deinterlacing options are available to handle interlaced footage. These options are crucial for converting interlaced video fields into progressive frames, which are often preferred for modern displays and for effects like slow motion or freeze frames.
- None: This option does not apply any deinterlacing processing. It's important to note that selecting "None" does not automatically disable "Reverse Field Dominance" if that setting is active.
- Always Deinterlace: This option converts interlaced fields into non-interlaced, progressive-scan frames. It achieves this by discarding one of the two fields for each frame, retaining only the "dominant" field. The dominant field is typically specified in the project settings. If the sequence is set to "No Fields (Progressive Scan)," "Always Deinterlace" will retain the upper field. This method is beneficial for clips intended for slow-motion playback or freeze-framing, as it produces a clean, full frame for each moment.
- Flicker Removal: This option addresses a common issue with interlaced video where thin horizontal details (like a single scan line) can appear to flicker. This happens because such fine details might only be present in every other field. Flicker Removal combats this by slightly blurring consecutive lines together (typically by 50%). This process does not deinterlace the clip but rather smooths out the temporal artifacts caused by the field structure. For further improvement of video appearance when the clip speed is not 100%, frame blending can be enabled in conjunction with flicker removal.
In essence, while interlacing originated as a technical necessity for broadcasting, its visual signature has evolved into a creative tool. Whether used to evoke a sense of nostalgia, achieve a digital-art aesthetic, or optimize web delivery, understanding the principles of interlacing and its implementation in software like Photoshop and in file formats like PNG provides a valuable set of techniques for digital creators. The ability to simulate or manipulate interlaced effects allows for a unique artistic control, transforming ordinary images into visually compelling pieces with a distinct character.