For many users, the seamless transition of photos from their iPhone to their Windows PC has been a point of convenience. Typically, images imported from an iPhone via File Explorer would automatically convert from HEIC to JPG, a format universally recognized and easily managed by Windows. However, a sudden shift where these files appear as HEIC in Windows 11 File Explorer can be perplexing, especially when the conversion process seems to have abruptly ceased. This article aims to demystify the HEIC format, explain why this change might occur, and provide a comprehensive set of solutions for opening and converting HEIC files on your Windows 11 machine, ensuring you can access and utilize your cherished memories without interruption.
Understanding the HEIC Format: More Than Just an iPhone Internal
It's a common misconception that HEIC is merely an "internal format in iPhone." In reality, HEIC, or High Efficiency Image Coding, is a standardized image file format developed by the same consortium that created the widely used JPEG standard. Introduced by Apple in 2017 with iOS 11, the High Efficiency Image Format (HEIF) that HEIC is based upon offers significant advantages. HEIC images are designed to be nearly twice as small as JPEGs of equivalent quality, allowing iPhones to capture exceptionally high-quality pictures while optimizing storage space. This efficiency is a key reason behind its adoption by Apple and its increasing presence across various devices and platforms.
While native Windows applications have historically lagged in direct support for HEIC, this is rapidly changing. The format itself is not proprietary to Apple; it's a global standard. The challenge often lies in the operating system's built-in capabilities or the installed software's ability to interpret these modern image codecs.
Why Your HEIC Files Might Not Be Converting Automatically
The automatic conversion of HEIC files to JPG when transferring from an iPhone to a Windows PC is a feature designed to ensure compatibility. When this process suddenly stops working, several factors could be at play:
- Changes in iPhone Settings: While less common, an accidental change in iPhone settings could alter the export format. However, the provided information suggests the iPhone is indeed capturing in HEIC, and the issue lies with the Windows side of the transfer.
- Windows Updates or Corrupted Codecs: Windows updates can sometimes introduce or resolve compatibility issues. It's possible that a previous update caused a glitch, or a necessary codec for HEIC support became corrupted.
- Third-Party Software Interference: The unexpected appearance of HEIC support on your laptop, even if it wasn't explicitly installed by you, could indicate that a third-party application has installed HEIC-related extensions or codecs in the background. This is not necessarily a negative, but it can sometimes lead to unexpected behavior if not managed correctly.
- File Transfer Method: A critical point raised is that importing photos directly via File Explorer is not a supported method and can potentially lead to issues like corrupting the photo database on the phone, missing photos, or even lost edits. This method bypasses Apple's intended transfer protocols, which are designed to handle format conversions more robustly.
It is important to note that the behavior observed on one Windows 10 laptop, where photos appeared as JPG as usual, highlights the variability in how different Windows versions and configurations handle HEIC files.
The Correct Approach to Importing iPhone Photos to Windows
To avoid potential data corruption and ensure a smooth transfer, it is strongly recommended to use Apple's official method for exporting photos and videos. The guide titled "Copying personal photos and videos from iPhone, iPad, or iPod touch to your computer" provides the most reliable pathway. This process is designed to leverage the operating system's capabilities and Apple's own software to manage the transfer and any necessary format conversions.
How to Transfer Photos from iPhone to Laptop
Solutions for Opening HEIC Files in Windows 11
Even if automatic conversion fails, Windows 11 offers several ways to open and interact with HEIC files.
1. Installing the HEIF Image Extensions from the Microsoft Store
This is the most straightforward and officially supported method for enabling native HEIC viewing within Windows 11.
- Locate an HEIC File: Open File Explorer (you can press
Windows key + E) and navigate to a folder containing an HEIC file. - Attempt to Open: Double-click the HEIC file. If you do not have the necessary extensions installed, Windows will likely display a message stating, "The HEIF Image Extension is required to display this file."
- Download and Install: Next to this message, you should see a link that reads "Download and install it now." Click this link.
- Proceed to Microsoft Store: A prompt asking, "Did you mean to switch applications?" may appear. Select "Yes" to continue to the Microsoft Store.
- Install the Extension: The link should direct you to the HEIF Image Extensions app page in the Microsoft Store. Click the "Get" button to download and install the extension.
- Verify: Once installed, return to your HEIC file in File Explorer and double-click it. It should now open directly in the Photos app, similar to how other image formats are handled.
This extension allows Windows to natively decode and display HEIC and HEIF images, making them accessible without needing third-party software for viewing.
2. Utilizing Microsoft Paint for Conversion
Once the HEIF Image Extensions are installed, you can leverage Microsoft Paint for a quick and easy conversion of HEIC files to JPG and other common formats.
- Open the HEIC File in Paint: In File Explorer, right-click on the HEIC file you wish to convert. From the context menu, select "Open with," and then choose "Paint."
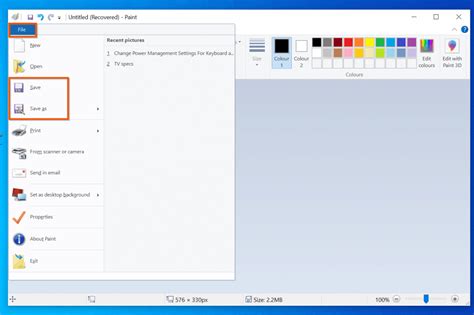
- Save As JPEG: Within the Paint application, click on "File" in the top-right corner. From the dropdown menu, select "Save as."
- Choose JPEG Format: A submenu will appear. Click on "JPEG picture." You will also see options to save as PNG, BMP, or GIF, offering flexibility in your conversion needs.
- Save the Converted File: The "Save As" dialogue box will appear. Choose your desired save location, give the new file a name, and click "Save." Your HEIC file is now converted to a JPG.
This method is particularly useful for converting individual files or a small batch of images when you need them in a universally compatible format.
3. Exploring Third-Party Software Solutions
While Microsoft's built-in tools are often sufficient, several third-party applications offer more advanced features for managing and converting HEIC files.
CopyTrans HEIC for Windows
CopyTrans HEIC for Windows is a popular free utility that enables HEIC support directly within Windows Explorer. It allows you to preview and browse HEIC images without requiring additional software to be running in the background.
- Viewing HEIC Files: After installation, you can view HEIC and HEIF images directly in Windows Explorer.
- Conversion Capabilities: CopyTrans HEIC also provides the functionality to convert HEIC files to JPEG. This conversion can preserve important metadata such as the date the photo was taken and geolocation. It supports batch conversion, allowing you to convert up to 100 images at once.
- Integration: The software integrates with Windows, enabling you to right-click on an HEIC file and select "Convert to JPEG with CopyTrans" from the context menu.
- Uninstallation: If you wish to remove CopyTrans HEIC, you can do so through the Control Panel's "Programs and Features" section.
It's important to note that CopyTrans HEIC does not typically open HEIC photos directly within the Windows Photos app if it's not already associated. You may need to ensure the Photos app or Windows Photo Viewer is installed and then associate HEIC files with one of them through the "Open with" settings.
Adobe Photoshop Elements
For users who already have Adobe Photoshop Elements installed, particularly recent versions like 2025, there's a powerful built-in batch processing tool.
- Open Photoshop Elements: Launch Adobe Photoshop Elements.
- Select "Advanced" Mode: Near the top center of the window, choose "Advanced" operating mode. If you are not in this mode, the "Process Multiple Files" option will be unavailable (greyed out).
- Access "Process Multiple Files": Navigate to "Files" and select "Process Multiple Files."
- Configure Batch Conversion:
- In the "Source" box, enter the path to the folder containing your HEIC files.
- In the "Destination" box, specify the folder where you want the converted JPG files to be saved.
- Check the "Convert Files To" checkbox.
- To the right of this checkbox, select your desired JPG quality.
- Start Conversion: Click the "OK" button. Photoshop Elements will then process all HEIC files in the source folder, convert them to JPG, and save them in the designated destination folder. This process is typically quite fast, with conversions happening at a rate of about one photo per second.
This method is highly efficient for converting large collections of HEIC files and ensures that metadata is handled appropriately. It's a good practice to place HEIC files in a dedicated folder before initiating the batch process. While the example specifically mentions Photoshop Elements 2025, it's highly probable that similar batch processing capabilities exist in other versions of Photoshop Elements and the full Adobe Photoshop Creative Cloud suite.
4. Checking for Codec Updates
In some instances, the ability to open HEIC files relies on specific codecs being installed and up-to-date.
- Access Program Features: Go to
Control Panel > Programs > Programs and Features. - Review Installed Codecs: Look for any installed HEIC or HEVC related codecs.
- Verify Latest Version: You can often find information on the latest codec versions from the software provider (e.g., Microsoft for HEIF Image Extensions) and compare it with what you have installed. If an update is available, installing it might resolve the issue.
It's important to distinguish between HEIC (image format) and HEVC (video format), though they share similar underlying encoding technology. HEVC uses video codecs, while HEIC utilizes image plugins within Windows.
Addressing Potential Misconceptions
Several points warrant clarification to ensure a comprehensive understanding:
- HEIC is a Standard, Not Apple's Proprietary Format: As mentioned, HEIC is a globally recognized standard, not an internal Apple format. The challenge is in Windows' native support, not the format's origin.
- File Explorer Transfer Issues: Reiteration is necessary: using File Explorer for direct iPhone photo import is discouraged due to potential data integrity issues. Always use Apple's recommended methods or reliable third-party sync tools.
- HEIC vs. JPG: While HEIC offers superior compression and quality for its file size, JPG remains the most universally compatible format. The need for conversion often stems from the desire for broader compatibility with older software, devices, or sharing platforms.
By understanding the nature of the HEIC format and employing the right tools and methods, you can effectively manage your iPhone photos on your Windows 11 PC, ensuring that your memories are accessible and usable whenever you need them.