The digital landscape is awash with dynamic visuals, and at the forefront of this animated revolution is the Graphics Interchange Format, or GIF. Far from being a fleeting trend, GIFs have cemented themselves as a vital component of online communication, enabling quick, expressive, and often humorous visual narratives. Whether you're a digital artist looking to bring your illustrations to life or a social media enthusiast aiming to create engaging content, understanding how to create animated GIFs in Adobe Photoshop is an invaluable skill. This guide will navigate you through the process, from the fundamental nature of the GIF format to the intricate steps of animation and export within Photoshop.
Understanding the GIF: A Foundation for Animation
Before diving into the creative process, it's essential to grasp what a GIF is and its inherent characteristics. GIF, standing for Graphics Interchange Format, is a type of image file format that was initially developed by CompuServe in 1987. Its enduring popularity, especially for animation, stems from a few key features.
One of the defining aspects of the GIF format is its color palette, which is limited to a maximum of 256 colors. While this might seem restrictive compared to modern image formats that support millions of colors, it's perfectly suited for simple graphics such as logos, icons, and line art. This limitation can sometimes lead to visual artifacts like dithering, where colors are simulated using patterns of dots, which can contribute to a distinctive aesthetic in animated GIFs.
Another crucial characteristic is its compression. GIFs employ a lossless compression method, meaning that the file size can be reduced without a significant loss of image quality for the colors it supports. This makes them highly portable and well-suited for web use, where loading times are a critical factor. However, it's important to note that while the compression is "lossless" within its color limitations, the 8-bit color depth itself is a form of limitation that affects the fidelity of photographic images.
The true magic of the GIF, however, lies in its ability to display multiple frames in sequence, creating the illusion of movement. This animation capability has propelled GIFs into ubiquity, making them a go-to format for everything from viral memes and expressive reactions on social media to short, looping visual stories. Unlike video formats, GIFs do not support audio, which keeps them focused on pure visual motion.
GIF vs. Other Image Formats: A Comparative Look
To truly appreciate the GIF's role, it's helpful to understand how it differs from other common image file types:
- JPEG (JPG): This format is best suited for photographic images and artwork that require a wide range of colors. JPEGs use lossy compression, which means some data is discarded to achieve smaller file sizes, though the quality loss is often imperceptible for photos. They support millions of colors and are a dominant format for digital photography and many online images.
- PNG: Pronounced "ping," PNG was designed as a successor to GIF. It is a lossless format that supports transparency (alpha channel), allowing for smooth blending with backgrounds, and can display up to 16 million colors. PNGs are excellent for web graphics that require transparency or high color fidelity, but they do not support animation in the same way as GIFs.
- TIFF: This format is a workhorse for professional printing and high-resolution imagery. TIFFs are lossless, preserving extremely high photographic quality, making them ideal for scanning, fine art, and print production. They are generally much larger in file size compared to GIFs or JPEGs.
While GIFs were originally conceived for displaying basic graphics, their animation capabilities have outshone their limitations, transforming them into a cultural phenomenon. They are a quick visual language, often used to convey jokes, ideas, or emotions, much like memes, which are typically static images with captions but serve a similar communicative purpose.
Bringing Illustrations to Life: Animated GIF Creation in Photoshop
Adobe Photoshop CC offers a powerful yet accessible suite of tools for creating animated GIFs, allowing you to transform static illustrations or sequences of images into dynamic, looping visuals. The process can be approached in a couple of primary ways: by creating frames directly within Photoshop or by importing a series of pre-made layers or video frames.
Method 1: Drawing Frames within Photoshop
This method is ideal if you're starting from scratch or want to create a hand-drawn animation directly in Photoshop.
- Create a New Document: Begin by navigating to
File > New. Set your desired dimensions (width and height) and resolution for your animation. A common resolution for web GIFs is 72 pixels/inch. ClickCreate. - Open the Timeline Panel: To access Photoshop's animation tools, go to the top menu bar and click
Window, then selectTimeline. This will open a panel at the bottom of your screen, which is crucial for managing your animation frames. - Prepare for Frame-by-Frame Animation: Within the Timeline panel, you'll see an option to create a
Frame Animationor aVideo Timeline. For drawing individual frames, select theFrame Animationoption. If you see a "Create Video Timeline" button, click the small arrow next to it and choose "Create Frame Animation." - Create a Video Group (Optional but Recommended): For better organization, especially with complex animations, you can create a "Video Group." In the Timeline panel, click on the
film roll iconnext to Layer 0 (or your base layer) and selectNew Video Group. This helps keep your animation layers contained. - Add Layers for Each Frame: For each frame of your animation, you will need a corresponding layer in the Layers panel. With your Video Group selected (if you created one), click the
+button at the bottom of the Layers panel to add a new layer. Each new layer will represent a single frame in your animation. - Draw Your Frames: Now, you'll draw your animation frame by frame. Select a layer in the Layers panel and use Photoshop's drawing tools (brushes, pencils, etc.) to create the content for that specific frame. Ensure your
timeline scrubber(the red line with the blue arrow) is positioned over the frame you are currently working on. - Set Frame Durations: In the Timeline panel, each frame will have a duration associated with it. Click on the duration displayed below each frame (e.g., "0 sec.") to set how long that frame will be visible. For a smoother animation, you'll want to adjust these durations. You can select multiple frames and set a uniform duration for them.
- Duplicate Frames for Consistency: A common workflow for creating frame-by-frame animation is to duplicate your first frame and then make small modifications on subsequent duplicated frames. This ensures that the duration and other settings are consistent across your animation. To duplicate a frame in the Timeline panel, select the frame and click the
duplicate selected framesicon (often looks like two overlapping squares). - Onion Skinning (Optional): To help visualize the transition between frames while drawing, you can enable "Onion Skinning." This will show a semi-transparent overlay of previous or next frames. In the Timeline panel, click the
☰menu and selectOnion Skin Optionsto configure this. - Convert to Frames from Layers (Alternative if Layers are Pre-made): If you have prepared your animation as separate layers in the Layers panel (where each layer is a distinct frame), you can automatically convert these into frames. In the Timeline panel, click the
☰menu in the top-right corner and selectMake Frames From Layers.
Method 2: Importing Existing Layers or Video Frames
If you have already created your animation elements as separate layers in Photoshop, or if you have a short video clip you wish to convert into a GIF, this method is more efficient.
- Prepare Your Layers: Ensure that each distinct part of your animation or each frame is on its own separate layer within your Photoshop document. If you have a video, you can import it into Photoshop by going to
File > Import > Video Frames to Layers. Photoshop will then convert each frame of the video into a separate layer. - Open the Timeline Panel: As before, go to
Window > Timeline. - Create Frame Animation: Ensure the Timeline panel is set to
Frame Animationmode. - Make Frames from Layers: Click the
☰menu in the top-right corner of the Timeline panel and selectMake Frames From Layers. Photoshop will automatically create a frame for each layer in your document, with each frame displaying the content of its corresponding layer. - Adjust Frame Order and Duration: You can now reorder your frames by simply dragging them in the Timeline panel. Select one or more frames and adjust their duration by clicking on the time displayed beneath each frame.
- Preview Your Animation: Use the
Playbutton in the Timeline panel or press thespacebarto preview your animation. This is crucial for checking the timing and flow.
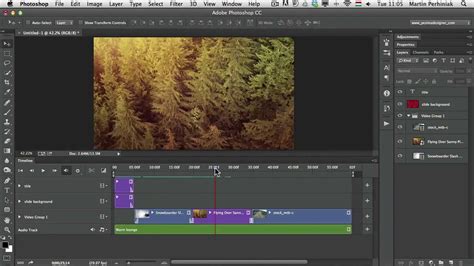
How to Create Frame Animation in Photoshop
Refining and Exporting Your Animated GIF
Once your animation is assembled and you're satisfied with the sequence and timing, the next critical step is to export it correctly.
Looping and Previewing
- Set Looping Options: At the bottom of the Timeline panel, you'll find a dropdown menu next to "Forever." This controls how many times your GIF will loop. You can choose
Once,3 Times,5 Times, orForever(which will loop continuously). - Previewing Your GIF: Before exporting, it's essential to preview your animation. You can do this directly within Photoshop using the Timeline's play controls. However, be aware that some image viewers or browsers might not play GIFs automatically or might display them at a different speed than intended. This is why the "Save for Web (Legacy)" export option is so important, as it provides a preview within its dialog box.
Exporting for the Web
The most effective way to export an animated GIF from Photoshop is by using the "Save for Web (Legacy)" function, which offers more control over optimization settings crucial for web performance.
- Navigate to Export: Go to
File > Export > Save for Web (Legacy). This will open a dedicated dialog box. - Select GIF Format: In the preset dropdown menu (usually at the top right of the Save for Web dialog), select a GIF preset.
GIF 128 Ditheredis a common starting point, offering a good balance of color and file size. - Optimize Color Settings: Under the
Color Reduction Algorithmsection, you can choose the number of colors. Reducing the number of colors (e.g., from 256 down to 128 or 64) can significantly decrease file size, but it might also impact image quality, leading to more noticeable dithering or banding. Experiment with different color counts to find the best balance for your specific animation. Dithering options (e.g., Diffusion, Pattern, Noise) can also be adjusted to manage how colors are simulated. - Check Looping Options: Ensure that the looping option selected in the Save for Web dialog matches your desired setting (e.g.,
Forever). - Preview and Compare: The Save for Web dialog box allows you to preview your GIF and compare different optimization settings side-by-side. Pay attention to the estimated file size and visual quality.
- Export: Once you are happy with the preview and settings, click
Save...to choose a location and filename for your animated GIF.
- Keyboard Shortcuts: For quicker access on Windows, you can use
Ctrl + Alt + Shift + S. On a Mac, the shortcut isCommand + Alt + Shift + S.
Achieving Smooth Animation
To make your animated GIF look professional and engaging, consider these tips:
- Smooth Transitions: Ensure that each frame transitions logically and smoothly to the next. Avoid abrupt jumps unless intentional for stylistic effect.
- Consistent Timing: While not all frames need the same duration, a consistent and deliberate timing will make the animation feel more fluid. Experiment with different frame durations to achieve the desired pace.
- Frame Rate Consideration: Although Photoshop doesn't directly expose a "frame rate" setting for GIFs in the same way as video, the duration set for each frame effectively dictates the playback speed. Shorter durations mean more frames per second, resulting in faster and potentially smoother motion. Conversely, longer durations will slow down the animation.
- File Size Management: Animated GIFs can quickly become large in file size, impacting loading times. Regularly check the estimated file size in the "Save for Web (Legacy)" dialog. Reducing the dimensions of your GIF, decreasing the color palette, and optimizing dithering settings are key strategies for managing file size.
By diligently following these steps and considering the nuances of the GIF format and Photoshop's tools, you can effectively create compelling animated GIFs that enhance your digital communication and creative projects. The blend of simplicity and versatility inherent in the GIF format, coupled with the power of Photoshop, opens a world of possibilities for bringing your visual ideas to motion.