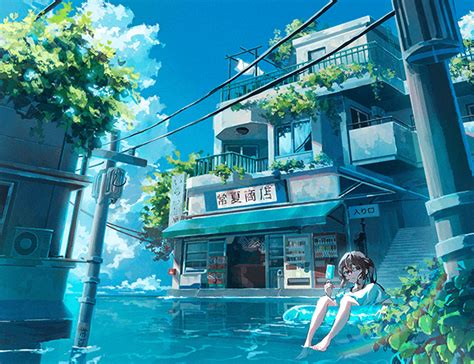
Anime backgrounds possess a unique charm, effortlessly blending realism with fantastical elements to transport viewers into immersive worlds. This tutorial delves into the art of transforming ordinary photographs into breathtaking anime-style backgrounds, drawing inspiration from the celebrated works of artists like Makoto Shinkai, known for his stunning skies and meticulously painted environments. Whether you're a seasoned digital artist or a beginner looking to explore a new creative avenue, this guide will equip you with the knowledge and techniques to craft captivating anime scenes.
The Foundation: Selecting and Preparing Your Photograph
The journey begins with selecting the right photograph. Ideally, choose an image that is free of people or has minimal human figures. This simplifies the editing process, allowing you to focus on transforming the environment. The quality of the source image is also paramount. If your photograph has a low resolution, it's recommended to edit at 300 dpi (dots per inch). DPI is a measurement of dots per inch of a printed or monitor-viewed image, indicating its original intended size and its resolution/quality. Working at a higher DPI will ensure clearer details and a better final output.
Before diving into the artistic process, it's crucial to understand the fundamental steps involved in preparing your image. This often includes removing unwanted elements and separating distinct objects into different layers.
Mastering the Art of Layer Separation and Masking
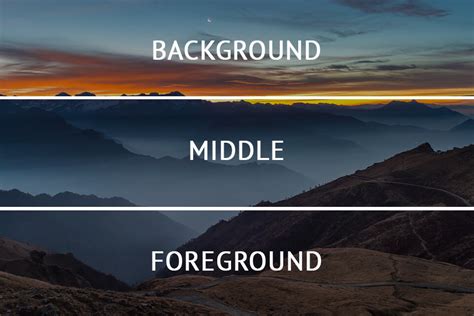
A cornerstone of digital art, especially in achieving a polished anime aesthetic, is the effective use of layers. The first critical step in transforming your photograph is to meticulously separate the foreground objects from the background. Depending on the complexity of your artwork, you may need to mask different objects into their own individual layers. It is always better to use a mask to crop out an object rather than erasing the image directly. This non-destructive approach allows for easier adjustments and revisions later in the process.
For instance, if you have a photograph of a hallway, you'll want to isolate the hallway itself onto its own layer. This separation is key to manipulating each element independently. After separating the hallway into its own layer, you might find that certain areas, like the sky, are no longer relevant to your desired composition. These can be removed.
Refining Foreground Elements: Adding Depth and Texture
Once your foreground object, such as the hallway, is isolated, you can begin to refine it. If there are missing areas or if you wish to extend the object, you can add in the missing areas with a hard round brush. To ensure you don't accidentally paint on transparent areas, it's highly recommended to lock the layer's transparency. With transparency locked, you can then start painting over the layer to give it a more painterly feel, adding texture and depth that moves away from the photographic source.
A useful trick to enhance the visual quality of your photo is to apply the "remove noise" filter. This filter effectively removes noise and image compression artifacts that can detract from the final anime aesthetic.
Crafting the Perfect Sky: A Makoto Shinkai Inspired Approach
The sky is often the most captivating element in an anime background, setting the mood and tone for the entire scene. Makoto Shinkai is renowned for his breathtaking sky compositions, and learning to replicate this artistry is a key skill.
Painting Clouds: The Illusion of Effortless Beauty
Painting clouds can be a notoriously challenging aspect of digital art. While masters like Makoto Shinkai can render a beautiful cloud in mere seconds, beginners often spend hours achieving less satisfactory results. The key to painting natural-looking clouds lies in "randomness." This means being random in both the cloud's shape and its placement, ensuring a natural, asymmetrical appearance that avoids looking too organized or symmetrical.

To achieve this, you can utilize default brushes in software like Photoshop. A round brush with "other dynamics" enabled and a slightly lowered "brush tip hardness" can be effective. Another useful brush is the chalk brush. By locking layer transparency and using these two brushes, you can create surprisingly good-looking clouds. Remember, the goal is to mimic the organic, unpredictable nature of real clouds.
Utilizing Reference and Custom Brushes
While painting clouds from scratch is rewarding, there are times when efficiency is paramount. For those seeking to save time, using pre-made cloud brushes or even pasting photographic elements can be a viable option. Many artists create their own custom brushes by either using photographs or manually drawing leaf shapes, which can be adapted for cloud textures.
For the sky itself, add a new layer behind your foreground object layer. Begin painting the sky with a soft round edge brush. The color you choose for the sky will significantly influence the time of day and the overall mood of your scene. For instance, a warm sunset might involve hues of orange, pink, and purple, while a midday sky would be a vibrant blue.
Populating the Scene: Buildings, Trees, and Beyond
Once the sky and foreground are established, it's time to fill the scene with supporting elements that bring your anime background to life.
Painting Trees and Bushes: Mimicking Nature's Form
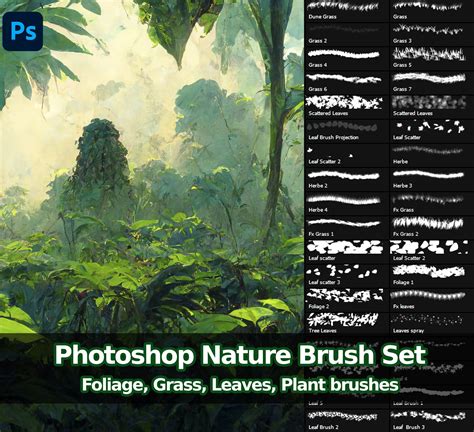
Painting trees and bushes shares similarities with painting clouds, with the primary difference being the type of brush used. Custom brushes designed to mimic the texture of leaves and foliage can be incredibly effective. By locking layer transparency and using a custom "leaf/bush" brush, you can paint these elements quite rapidly. When drawing trees and bushes, remember to add shadow and highlight details and adjust the color palette to ensure they harmonize with the overall environment. For example, if your photo was taken at noon, you'd use darker greens and perhaps lighter yellows for highlights.
Constructing Distant Buildings: Simplicity and Detail
Distant buildings can be relatively straightforward to paint. Add a new layer and draw the building details, such as windows, in a front view. Utilizing the "SHIFT" key can help you draw or erase in perfectly straight lines, which is crucial for architectural elements.
Incorporating 3D Models for Enhanced Realism
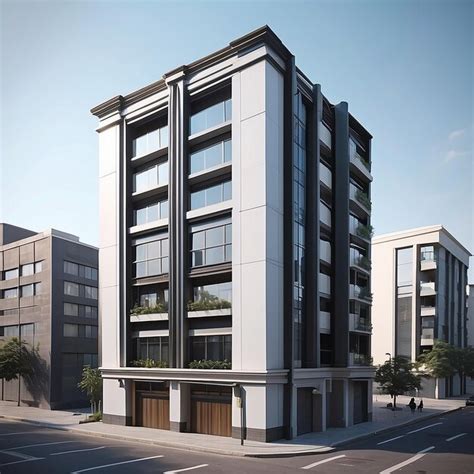
To further populate your scene and add a sense of depth and realism, you can integrate 3D models. Software like Blender3D is invaluable for rendering various 3D models, such as buildings and trees, which can then be incorporated into your anime background. This approach allows for precise control over lighting, perspective, and form, seamlessly blending 3D elements with your 2D artwork.
The Magic of Atmospheric Effects and Lighting
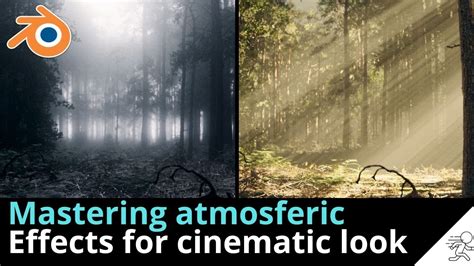
Atmospheric effects are essential for making your anime painting more believable and visually engaging. These subtle details can transform a flat image into a dynamic and immersive scene.
Adding Mist and Haze: Creating Depth and Atmosphere
To add mist or haze, use a soft round edge brush to paint the effect. This can create a sense of depth, especially in distant elements, and can also soften harsh lines, contributing to a more painterly feel.
Specular Highlights and Glow Effects: Bringing Light to Life
To add specular highlights or light reflections, draw thin lines along the bevels or edges of objects where light would naturally catch. For a glow effect, create a new layer and use a soft round edge brush to paint the glowing area, such as around light sources. Setting this layer's blend mode to "additive" or "screen" can enhance the luminous quality.
The Power of Sunlight and Bokeh
The airbrush tool, particularly a soft variant, can be used to draw sunlight or add further glow to objects within the picture. Bokeh, the aesthetic quality of the blur produced in the out-of-focus parts of an image, can also be drawn to add a magical, dreamy quality to the background.
Color Theory and Harmonization: The Anime Palette
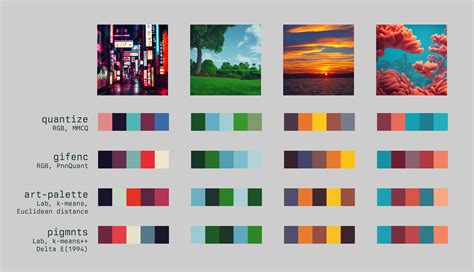
Anime often employs vibrant and saturated colors. Shadows are frequently depicted with cooler tones, such as blues, while sunlight might be rendered with warmer reds and yellows, often with greenish undertones. It's important to adjust the photo's colors to harmonize with the sky color you've chosen. Functions that help change hue, saturation, and brightness are invaluable for this purpose.
For instance, if your initial photo has elements that appear too blueish for a warm sunset, you can adjust their hue to better match the overall color scheme. This color picking process, where you press "I" to select colors directly from the photo and paint over them, helps achieve that characteristic painterly feel.
Advanced Techniques and Final Touches
As you progress, you'll discover various techniques to elevate your anime backgrounds.
Utilizing Artistic Filters and Tone Curves
Artistic filters can be powerful tools for transforming an image. Experimenting with these filters, often using a "Color Only" setting, allows you to add a unique stylistic touch and prepare the image for further line art work. The Tone Curve is another potent tool that affects the overall brightness and contrast of an image, allowing for precise adjustments.
The Importance of Negative Space
Negative space, the area surrounding and between the subjects of an image, is as crucial as positive space in overall composition. Thoughtfully incorporating negative space, perhaps by drawing a solitary, stark element like a dead tree, can create a powerful sense of emptiness and atmosphere.
Creating Outer Glow Effects
To achieve an outer glow effect for elements like clouds, you can create a new layer, draw the clouds, adjust their strength until satisfied, and then merge this layer with the original cloud layer. This technique can add a subtle luminous halo.
Leveraging Online Resources and Assets
For those looking to save time, readily available non-copyrighted anime sky materials can be found on platforms like Clip Studio Assets and across the internet. These resources can be a valuable addition to your toolkit.
Overcoming Challenges: A Self-Taught Artist's Perspective
The journey of creating art is not without its challenges. Many artists, including the author of this tutorial, have faced unique hurdles. Despite suffering from partial color blindness, a keen eye for color and composition has been developed through persistent practice and determination. This highlights that formal training is not the only path to artistic excellence; self-taught artists can achieve remarkable results through dedication.
The process of turning a photograph into an anime background is a testament to the power of digital tools and artistic vision. By mastering layer separation, brush techniques, color theory, and atmospheric effects, you can transform any photograph into a captivating anime scene. The key is to embrace experimentation, learn from masters like Makoto Shinkai, and most importantly, enjoy the creative process.