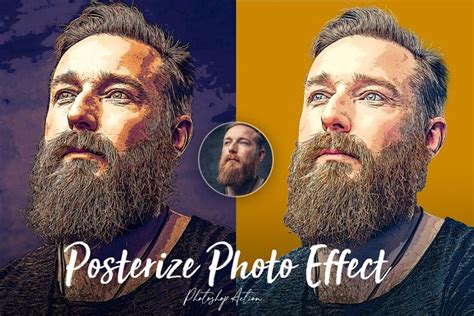
Posterization in Photoshop is a powerful technique that transforms continuous-tone images into graphics with distinct, hard-edged areas of color or grayscale. This effect mimics the aesthetic of traditional posters printed with a limited palette of inks, where smooth gradations are replaced by abrupt transitions. The process of posterization significantly reduces the detail in an image, imparting a more stylized, painterly, or airbrushed quality. This article delves into various methods for achieving this effect in Adobe Photoshop, from basic adjustments to more nuanced layering techniques, suitable for both novice and experienced users.
Understanding the Concept of Posterization
At its core, posterization is about reducing the number of tonal values within an image. In a typical photograph, there are countless shades of color and brightness, creating smooth transitions. Posterization simplifies this by quantizing these tones into a smaller, predefined set. This means that instead of a continuous spectrum of colors, the image is broken down into distinct bands or levels. This technique was historically employed in printing to reduce the complexity and cost of reproduction, as fewer colors meant less ink and simpler printing plates. Artists often favor posterization for its ability to create bold, graphic visuals with a strong artistic statement, reminiscent of woodcuts and linoleum cuts, where gradual tones are transformed into hard-edged images.
Basic Posterization Techniques in Photoshop
Photoshop offers several straightforward ways to apply a posterization effect. These methods are quick and effective for achieving a generalized posterized look across an entire image.
Using the Posterize Adjustment
The most direct method involves using Photoshop's built-in Posterize adjustment. This feature allows users to control the number of brightness levels in each of the image's color channels (Red, Green, and Blue).
- Open Your File: Begin by opening your desired image in Photoshop via
File > Open. - Duplicate the Background Layer: It's always a good practice to work non-destructively. Duplicate your background layer by pressing
Command/Ctrl + J. - Apply Posterize Adjustment: Navigate to
Image > Adjustments > Posterize.... A dialog box will appear, allowing you to set the "Levels." The number of levels you choose directly dictates how many distinct tonal values will remain in the image. Lower values produce a stronger posterization effect, resulting in fewer colors and more pronounced hard edges. Experiment with different values to find the best result for your specific image. For a black and white image, setting the levels to "2" can yield a stark black and white result without grays.
The Posterize Filter Gallery Approach
Another method involves using the Filter Gallery, which offers more control over edge fidelity and simplicity.
- Open and Duplicate: As with the previous method, open your file and duplicate the background layer.
- Access Filter Gallery: Go to
Filter > Filter Gallery...and select the "Cutout" filter. - Adjust Filter Settings: Within the Cutout filter settings, you can manipulate three key parameters:
- Number of Levels: Similar to the Posterize adjustment, this controls the overall tonal reduction.
- Edge Simplicity: This parameter affects the complexity of the edges. Lower values create simpler, blockier shapes.
- Edge Fidelity: This setting determines how closely the filter adheres to the original image's edges. Higher values will retain more detail, while lower values will simplify them further.
- Experiment with these settings, often aiming for values like Number of Levels set to 4, Edge Simplicity to 4, and Edge Fidelity to 2, to achieve a stylized posterized look.
How to Posterize in Photoshop
Adjusting Saturation and Levels
For a more stylized and color-reduced effect, particularly when working with color images that you want to appear as if printed with limited inks, a combination of saturation and levels adjustments can be highly effective.
- Open and Duplicate: Open your image and duplicate the background layer.
- Desaturate (Optional): For a grayscale posterization, you can add a Hue/Saturation adjustment layer (
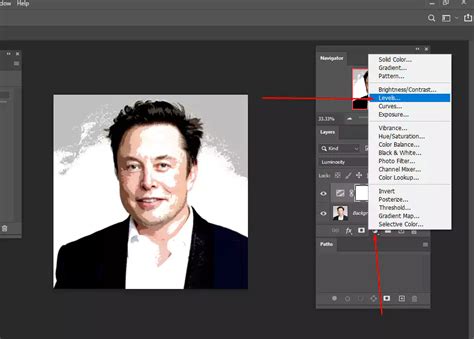
Layer > New Adjustment Layer > Hue/Saturation). Drag the "Saturation" slider all the way to the left (-100). If you started with a color image and want a monotone result, adding a Black & White adjustment layer after this step can be beneficial. - Adjust Levels: Add a Levels adjustment layer (
Layer > New Adjustment Layer > Levels). The optimal settings for the Levels adjustment will vary significantly depending on the specific image. This layer allows you to control the overall brightness and contrast, further refining the hard-edged transitions. - Posterize: Finally, add a Posterize adjustment layer (
Layer > New Adjustment Layer > Posterize). This will apply the posterization effect, and you can adjust the number of levels to achieve the desired reduction in tones.
Advanced Posterization with Layer Masks
For more precise control, especially when you want to posterize a specific subject within an image while leaving the background untouched, or to build up a posterized effect layer by layer, using layer masks is essential. This method allows for non-destructive editing and fine-tuning.
Building a Posterized Image with Solid Color Layers and Masks
One advanced technique involves creating an image built up from solid color layers, each with a specific layer mask. This approach allows for a unique interpretation of posterization, where the image is constructed from the bottom up.
- Original Image as Base: Start with your original image. This will often serve as the basis for generating layer masks.
- Grayscale Version: Create a grayscale version of your original image. This can be done using a Black & White adjustment layer or by converting the image to grayscale. This grayscale layer often sits at the bottom of the layer stack.
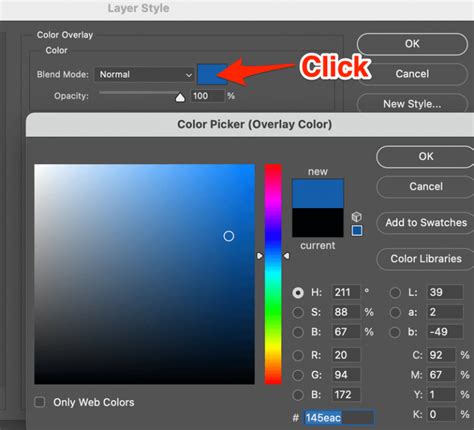
- Solid Color Layers: Above the grayscale layer, create multiple solid color layers. Each layer will represent a distinct color or tone in your final posterized image. The colors can be chosen to mimic a limited print palette or to create an artistic effect.
- Layer Masks for Control: The crucial element here is the use of layer masks. Each solid color layer is given a mask that controls which parts of that color are visible. The idea is to build the image progressively. For instance, the bottom-most color layer might have a mask that reveals large areas, while subsequent layers have masks that reveal progressively smaller or more specific areas.
- Mask Logic: The principle is that a layer only "prints" or becomes visible if it is darker than the layers below it, or if its mask allows it. This creates a build-up effect, starting with a white or light base and adding progressively darker colors on top. Each layer's mask is carefully crafted to block out more and more of its color, until perhaps a top-most black layer with a restrictive mask is reached.
- Overall Color Tweak: A Hue/Saturation adjustment layer placed at the top of the stack can be used to globally tweak the colors of the entire posterized composition.
Using Select Subject for Targeted Posterization
For contemporary versions of Photoshop (2020 and later), the "Select Subject" tool offers an incredibly efficient way to isolate a main subject for posterization.
- Apply Initial Posterize Effect: First, apply a basic posterize effect to the entire image using the Posterize adjustment. This gives you a starting point.
- Group Adjustment Layers: Place the adjustment layers responsible for the posterization (e.g., Posterize, Levels, Hue/Saturation) into a layer group. This organizes your adjustments.
- Select the Subject: Utilize the
Select > Subjectcommand. Photoshop's AI will analyze the image and automatically create a selection around the main subject. While this selection might not always be perfect, especially around intricate areas like hair, it's often "good enough" for the posterize effect. - Apply Layer Mask: With the subject selected, click on the layer group containing your posterization adjustments in the Layers panel. Then, click the "Add layer mask" icon at the bottom of the Layers panel. A layer mask will be automatically created for the group, with the selected subject appearing in white (where the effect is visible) and the background in black (where the effect is hidden).
- Refine the Mask: If there are areas where the selection wasn't perfect (e.g., parts of the subject missed, or parts of the background showing the effect), you can refine the mask using the Brush Tool. Paint with white on the mask to reveal the posterization effect in missed areas, or paint with black to hide it from unwanted background areas.
How to Posterize in Photoshop
Creative Applications and Considerations
The posterization effect is not merely a technical trick; it's a creative tool that can be applied to a wide range of projects.
Artistic Inspiration
The appeal of posterization often stems from its resemblance to traditional printmaking techniques like woodcuts and linoleum cuts. Artists like Cynthia Back have created striking imagery using these methods, transforming gradual tones into bold, hard-edged graphics. Photoshop's posterization filter allows users to quickly achieve a similar hard-edged aesthetic, whether in black and white or with a limited color palette.
Practical Uses
Beyond fine art, posterization can be used to:
- Create striking graphic designs: Ideal for posters, flyers, and social media graphics.
- Develop a unique style for holiday cards or personal projects: Give your photos a distinct artistic flair.
- Simplify complex images: Reduce visual noise and focus on essential forms.
- Achieve a retro or vintage aesthetic: Mimic the look of early printed materials.
Working with Color vs. Grayscale
While Photoshop's posterization filter can be applied to color images, it often produces the most compelling results with grayscale images, yielding stark black and white graphics. For color images, the goal is typically to reduce the color palette to a few distinct hues, creating a graphic, almost illustrative look. The advanced layering techniques discussed earlier are particularly useful for achieving controlled and aesthetically pleasing color posterization.
Nondestructive Editing with Smart Filters
To ensure that your posterization edits are flexible and can be modified later, it's highly recommended to use Smart Filters.
- Convert to Smart Object: Before applying a filter, right-click on your layer in the Layers panel and select "Convert to Smart Object."
- Apply Filter: Now, go to
Filterand select your desired posterization filter (e.g., Posterize, or filters within the Filter Gallery). The filter will be applied as a "Smart Filter." - Edit and Adjust: The advantage of Smart Filters is that they are nondestructive. You can double-click on the Smart Filter in the Layers panel at any time to readjust its settings, add, remove, or hide the filter without degrading the original image data.
Image Trace / Live Trace in Other Software
While this article focuses on Photoshop, it's worth noting that similar effects can be achieved in other software. For instance, Adobe Illustrator's "Image Trace" (formerly Live Trace) feature can convert raster images into vector graphics with a limited number of colors and simplified shapes, producing a posterized aesthetic.
Conclusion
Posterization in Photoshop offers a versatile pathway to artistic expression and graphic design. Whether employing the straightforward Posterize adjustment, exploring the Filter Gallery, or constructing intricate layered compositions with masks, the ability to reduce tonal values and create hard-edged imagery opens up a world of creative possibilities. By understanding the underlying principles and mastering the various tools available, users can transform ordinary photographs into dynamic, stylized artworks with a distinct and impactful visual language. The key lies in experimentation, understanding how each adjustment affects the image, and leveraging Photoshop's powerful features for both global and selective posterization.